SimonD’s workbench

simond

Western Thunderer
Some progress over the weekend. There are still some spots to tidy on the paint, the “concertina” doors are a PITA to mask, and I had some bleed and some spray going round corners, hopefully will get there in the next day or two. I’ll let it all harden off for a while.
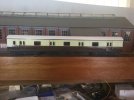
image.jpg

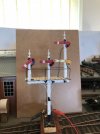
The signal is getting there too. It’s difficult to know when to stop when doing a “refurbishment”, if you do too much,it would probably have been easier to simply start again, but I think this is sufficient & will be fit for purpose. The tall doll leans backwards at a jaunty angle. It did before I started, so I cut it free from one trimmer, jigged it all so it was nicely vertical, and reattached it with epoxy, and a pin epoxied into a hole. Once it had all set, I took off the jig, and it promptly resumed its rather casual attitude. It’s not awful and it won’t affect function, but it is irritating.

The distant lamp didn’t work, managed to extract the blutak that held the bulb, cleaned and reconnected the bulb. Re-stuffed the bottom of the lamp housing with blutak, and painted it black

The home arms were stripped, resprayed with Halfords white primer, and hand painted with Vallejo acrylics. The distant arm simply needed the spectacle frame repainting. There will be a dab or two of touchup required when it’s all finished.

Added some handrails, 0.7mm N/S, representational, no pretence at scale. Replaced the plastic planks on the platform with coffee stirrers (I bought a box of 1000, for about a fiver, about five years ago, and as Seasick Steve says, “I still got most of it left”)

Need to make the levers & balance arms to go at the foot of the post, & link it all up. One crank is missing, need to sort that first.
C0E2D29E-1D11-4700-B0C1-486E9BA77C2F.jpeg

if nothing else, convalescence is good for modelling progress…
 

simond

Western Thunderer
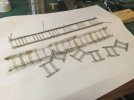
Window bars…

image.jpg

they’re going in the ultrasonic bath in a minute or two. I’m going to make another set for the outside framed van, for which I never made any.

I used nicked silver wire. Do we think they should stay metallic, or be painted? If painted, what colour? Black would seem logical, but it won’t be very visible. The photos appear to show a fairly pale colour. Cream perhaps?

trouble is, this photo suggests the bars should be dark, though it’s an earlier vehicle.


And I’m right out of salmon pink…
 
Last edited:

Phil O

Western Thunderer
Simon, I like the fact that your signal lights are not very bright, unlike the spotlights fitted to most signals you see these days.
 

simond

Western Thunderer
Thanks Phil,

I can claim no credit, the signal was built by John Matthews, erstwhile proprietor of Scale Signal Supply.

The lamps are Grain-of-Rice incandescent bulbs, and in my photo, the power source was a PP3!

I do agree that model lamps can end up being far too bright, and unfortunately, whilst SMD LEDs are perfect in many respects, they are tiny, run on very low voltages, and use negligible current, they don’t look like incandescent lamps, and still less like an oil lamp.
 

simond

Western Thunderer
Thanks Giles,

I did the other thing, and sprayed them white yesterday evening. I’ll make a couple of windows, fit the bars, and review.

after further reflection, I’m not going to buy a tester pot of “Eton mess”, or “Salmon delight” or “Boudoir de rive gauche” or whatever ludicrously-named shade of pink from the diy shed on my way home from work. It’s too dark to see inside anyway.

photos to follow…
Simon
 
Last edited:

LarryG

Western Thunderer
Window bars looked to be black in TPO vans, or at least a very dark colour. Seeing as yours are wire and therefore three-dimensional, they will reflect light like the read thing.

In 4mm scale, I scribe mine with a new blade and they reflect light as if 3-D, although I have also ruled them on the back of glazing with black cellulose at times.
 

simond

Western Thunderer
Thanks Larry, certainly the photo I linked (courtsey of @Dog Star ) shows a dark colour, but the photos in Russell suggest something pale, which may indeed be the light catching as you suggest.

It’s rather pleasant sitting outside at the moment, but I may go in later, and fit them to some glazing.
 
Last edited:

simond

Western Thunderer
Further consideration of the photo in Russell suggests that Larry’s right.

Halfords’ rattle can gloss black currently drying…
 

simond

Western Thunderer
Window bars now look ok, but I have not made a great job of the droplight and bolection painting :(

much retouching will be required. I may be some time.
 

simond

Western Thunderer
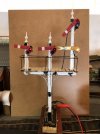
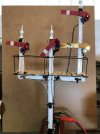
The M14 van is on the naughty step, so I have made a bit of progress on the bracket signal. I had hoped to complete it by now but have not quite achieved that, it works, but some fettling is needed as is some touching up of paint
1A50DD06-35E4-4C6D-92DE-333DAB94EC7F.jpeg336ADD1D-6AC1-4DEF-8BBE-8B368FE99378.jpegE482B03E-33A1-43A0-85B5-E5C4AB4D4205.jpeg

Not sure why the middle doll lamp is dimmer. Tant pis.
Also not sure why the arms go up above horizontal. Not me guv, someone else put the stops on!

All being well, it’ll be earning its keep next Thursday
 

Tony Overton

Western Thunderer
Window bars…
View attachment 163335

I used nicked silver wire. Do we think they should stay metallic, or be painted? If painted, what colour? Black would seem logical, but it won’t be very visible. The photos appear to show a fairly pale colour. Cream perhaps?
Back in May you posted progress on window bars. Can I ask, what diameter N/S wire did you use please? I've tried 0.5 and 0.4, but both still seem over size, and am now thinking of trying 0.3, or may be 0.2 mm rod, if I can get hold of it.
Tony
 

simond

Western Thunderer
More signal repairs for Leigh


image.jpg

a rather sweet L&Y (shunt arm, I think) from the SSS stable. This one, like the previous repair, has seen the thick end of 20 summers in John’s garden, and it needed a little TLC. Indeed, a pull on the wire, rather than moving the arm, caused the whole pole to rotate!

Physically, all sorted and mostly repainted, but it has lost its lamp, @Jon Fitness hasn’t got any to fit, but has supplied a drawing, so I’ll have to get the lathe wound up, and see if I can get a grain of rice in.

On another subject, I’ve pretty much cleaned up the paintwork on the M14 van, I’ve done the window glazing and bars, so will fit them, but I’ll do the corridor connectors, buffers and couplers first, so I don’t poke them in by accident.

image.jpg

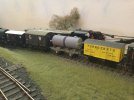
I’ve also got my twin tank wagon to finish, @John Baker kindly printed new tanks for me, and I really ought to get a coat of paint & the transfers on them, and finally fit it all together. That might also provide a bit of impetus to fire up the airbrush for a light weathering session, as the Minerva minks look rather, well, RTR.

image.jpg

But rather than getting on with these, I spent several hours on Sunday in company with a few mates completely relaying the North Whitton station on John’s garden line. Twenty summers had done a bit of damage to the signal, but twenty winters had pretty much dissolved what passed for copperclad on the sleepers of most of the P&C and running had ceased to be reliable as the rails were retained mostly by faith, hope and a smidgen of solder in places. Five Peco points in place, hopefully the remaining two will go in on Thursday evening and I can get most of the feed wires in and connected back to the choccy block behind the panel. A new track diagram with section switches will follow in short order. Very satisfying, but no photos, sorry.
 
Last edited:

simond

Western Thunderer
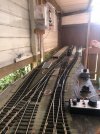
All track feeds put in at North Whitton today. Given the relatively simple layout, I was surprised that it took a good four and a half hours. Tested and works well, with all the sections “permanently” live.

The trackplan is an improvement - we can now get a large loco, eg a Black 5, and 5 coaches into the reception road - platform 1 - and using my R/C 48xx I could block-back and shunt them out, and back into platform 2, without blocking the station throat. The Peco points seem to flow reasonably well, and I’m quite impressed with the settrack left hander into the loco shed (tunnel to left of down line) - first one I’ve seen. I’m quite favourable towards Peco track for garden lines. Robust, well made, and likely to have a good life expectancy, and if & when it fails, easily replaceable.

Next step is section feeds - this will provide isolation for the ends of all four roads, switching for the roads themselves and allow the use of a non-R/C station pilot! Hopefully Thursday evening.

Then lever frame and signals. North Whitton is one of the termini on John’s garden line, which is run under block, with proper signalling…. That said, I suspect the gap in the platform needs addressing!

11013316-C3EF-4A0A-AEAB-A9E52C9B1457.jpegBECADAC6-8D94-40BC-A221-05C52F6A44D1.jpeg
 
Top