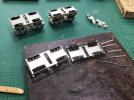
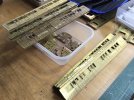
4mm On Heather's workbench - on a Holden to…Yarmouth?

Mark Tatlow

Member
Although you can compress the bolster spring by tightening the bogie pivot nut, I don't think this is sensible as it means that the bolster clasps the bearing surface to tight and makes it difficult to rotate.

I have not had any problems with bouncing/rocking and actually I find that that they are quite smooth. This might be because the bearing points of the bolsters are fairly widely spaced or it might be because the spring wires are quite thin so are compressed even when going into a dip.

The ride height of the wheels is adjustable by bending the springs slightly and David A's little jig is excellent (and David if I may I will nick this for a revision of the instructions?).

The bogie distance from the solebars/underframe is by adjusting the location of the bearing surface. Sadly, because the sprung bolster is deeper than say the Bill Bedford sprung bogies so you can't just pop then RTR coaches.
 

Daddyman

Western Thunderer
David A's little jig is excellent (and David if I may I will nick this for a revision of the instructions?).
Nick away! I wouldn't call it "mine" - I probably nicked the idea in turn from Dave Bradwell's NER tender etch. He was also the person who told me to bend the springs on these bogies in the first place. And to use 9-gauge on the bolsters and 10 on the axleboxes.
 
Will it run?

Heather Kay

Western Thunderer
I’m afraid the mojo wandered off. Nothing of consequence has been achieved all week.

Then, today, Mrs Mojo made a tentative appearance and I decided to try and work out how to fit the bogies to the underframe.

16E9596D-A8C5-4B4D-B0E4-F6866CC24602.jpeg

There are always compromises involved mixing and matching parts from different places. The coach kits come with their own bogie kits, which are designed - I think - to be built in the "traditional" wobbly at one end and fixed at the other manner. The R/M bogies have their own mounting plates and parts which don’t match the D&S setup in any meaningful way. I ended up deciding to drill a single hole centrally in the coach floor to take a suitable bolt. The R/M upper bolster part was folded up and mounting tabs files away so it would sit flat against the coach floor, and this was temporarily held in place with a nut, to be soldered in place once I was happy the setup worked. The bogies dropped over the bolt, and everything seemed to be working as planned.

A quick whizz up and down the test track showed bogie swing was adequate, but there did need to be more weight. That’s the wooden blocks. I’ll find a better setup eventually, but the wooden blocks seem to provide the required deflection of the axlebox springs, and I can weigh them and replace with suitable ballast later. I’ve now fitted a bolt underneath the bogies, which allows me to "wind up" the bolster springing to better match the ride height I see in photos. Another whizz up and down shows things still work well. I shall call that progress.

In other news, a large scale drawing of a brake third has appeared. This is proving entertaining and illuminating. More on that in due course,
 

Dave Holt

Western Thunderer
Progress indeed, Heather. Setting up fully sprung stock is generally a process of trial and error, especially where there sprung bolsters in addition to the axleboxes. I wouldn't fix anything too firmly till you have the bodies fitted.
Dave.
 

Heather Kay

Western Thunderer
Apologies for the radio silence. I’m making lots of bogies, and once you’ve seen one you’ve pretty much seen 'em all! While the outcome of cosmetic detailing is awaited, there’s no reason I can’t just pile in and build the etched parts up.

E20F45CB-403C-4584-ACFD-380CB2E8E488.jpeg

I will attempt to condense my findings on construction into a brief tutorial before I'm done.
 
Firming up fitting bogies

Heather Kay

Western Thunderer
After what seemed like an age, and having six pairs of bogies essentially constructed, I thought it might be an idea to figure out the best method of attaching them to the chassis.

7338E9BC-C758-405F-8339-062899792348.jpeg

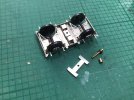
Half the raw materials. The H-shaped plate is from the Miscellany/Rumney fret. Initially, I’ve opened the central hole to accept a 10BA bolt. The D&S kit provided some rather nice brass bearings which have been tapped 10BA down the centre. If I could find a way to use those it would save fitting nuts and having to file them down for clearance.

AC0C140F-CA7C-488E-B6B7-5347F430ED9F.jpeg

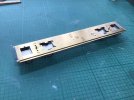
I had already worked out the location of the bogie pivot in my earlier experiments, so it was a case of drilling out to take the 10BA bolt. This would act as a clamp to hold the H-plate securely while I tacked it in place on the underside of the floor. With that done, the central holes were drilled through again to clear the bearing. This was fitted from underneath and also tacked in place.

802CFDBD-D41E-496B-B60E-7226146C826D.jpeg

My stock of bolts proved either too short or too long, but unlike Goldilocks I couldn’t find anything "just right". The longer bolts were used, passing up through the bogie central pivot hole with a washer. Gauging the ride height settled on screwing the bolt down to the fullest extent, compressing the bolster springs, then loosening it a half-turn. Enough slack for free rotation on the pivot, and leaving some movement on the bolster. I’ll have to trim the bolts short later, if required. A drop of superglue or even some Copydex should be enough to prevent the bolt working loose over time.

4A88E838-5E06-458B-8C95-9B2431B935A1.jpeg

Being intended for P4, the total swing required isn’t all that large. Here you can make out the maximum available with the wheels touching the insides of the solebars. I will, of course, need to work out if this is likely to cause electrical shorting and take suitable remedial action. Each chassis was plonked on the test plank, ballast weight balanced amidships, and the ensemble given a poke down the track. Nice and smooth they are.

Now, shall I carry on building more bogies, or shall I have a play and detail up the five chassis to see how that all works. Decisions, decisions.
 

Richard Gawler

Western Thunderer
Some years ago I tackled two bogie wagons where the wagon underframe and body was a resin casting and the designer of the kit had made no meaningful provision to attach the bogies.
DSC_0128.jpg

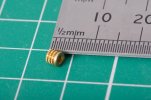
I used some M2 bushes like this. Although designed to be staked into a soft thick material like a plastic or resin, I expect they could be pressed through sheet metal and soldered from behind. The advantage over a nut being they will centre themselves into the hole.

The bushes came in a pack of five. Four went into the wagons and the fifth has been sitting on a shelf above my bench ever since.
 
Assessing the rest of the task ahead

Heather Kay

Western Thunderer
88CE632F-2599-4E75-8868-A5C078CD39F1.jpeg

Today, I have mostly been working my way through the previously built coaches, ensuring I have enough sides and ends to fit all the underframes, and the required quantities of the three diagrams match. I’m also cleaning up the now rather ancient soldering, noting things that are missing or damaged, and generally being rather daunted by the whole process.

As ever, I may be some time.
 

Mark Tatlow

Member
Hi Heather

How long are the nuts that you are using, do they stop side play of the bolt in their thread?

Because the point where the bogies take restraint from the bolt is much lower than you normally get with either cast or brass bogies (necessary due to the springing of the bolster), the possibility for any movement is magnified so they are prone to side movement and rocking. I solve this by fixing the bolt rigidly to the floor and then securing the bogie with a nut from below.

Another caution, applicable to any metal bogie on a metal coach in 4mm is that if the brake blocks get knocked short circuits can get set up. I now always separate the bogie from the coach body electrically by way of double sided copper clad. It is a bit more effort but it saves bother down the line.

For this reason, I would get a couple of coaches fully done and "played with" before going on to the remainder of the batch.


Mark
 

Heather Kay

Western Thunderer
Hi Mark

Initial tests indicate the D&S bearing is sufficiently rigid to avoid sideplay. It is held by both the H-plate and the coach floor. Any tendency to wobbling I hope will be checked by couplings and/or semi-functional gangways between coaches.

That being said, building a pair up with couplings and so on is a good idea. I’ll work on that once I’ve been through the back catalogue from the previous builder.
 

Heather Kay

Western Thunderer
I know a lot of modellers really dislike building coaches. I can understand why. There’s so much fiddly and repetitive work, often on a single vehicle. Multiply that by however many coaches I’m working on, and you have to wonder about my sanity at taking on such tasks!

Having satisfied myself the bogies could be fitted to the floors without too much pain, I thought it might make sense to review all the partly-built coaches. So far, I’ve been assembling new kits, but there was a whole box full of floors, sides and ends that had been mostly stuck together some time ago.

I hauled everything out, identified which diagrams were which, and made sure I had enough parts to make whole coaches. Being charitable, the previous builder hadn't done a completely marvellous job. My guess is a low wattage iron was deployed, and flux residues hadn’t been cleaned off or neutralised. Slowly, I worked through everything, repairing and replacing missing hinges, drop lights, and end details as required. Tedious stuff.

With all that done, I started looking at other details that would need attention. The commode handles are relatively simple affairs, but will probably need a jig to form to shape reliably. Likewise for the end handrails. Then I realised the brake thirds had loads of handrails. Each double luggage door pair had a pair of straight grab handles - another jig might be sensible. There were also long grab rails along the sides, although the kit hadn’t been designed with etched holes for such fripperies.

I checked photos, and sure enough the long rails survived through to scrapping. From a drawing it was simple to transpose the locations to the sides.

A70FBFC6-F8D9-411D-AA42-21B512C9F62A.jpeg

The question was, though, how to drill holes centred reliably on the beading. The answer was it couldn’t be done. Pragmatically, I decided to drill against the beading and into the central panels instead. I doubt the subterfuge will be noticeable at this scale.

5C026B74-8349-4C45-940D-4D129425FF6D.jpeg

With however many holes marked out and drilled 0.45mm diameter, plus those double-door grab rails, I set to with pliers and made the long rails. I’ve decided commode rails and other sundries will be left until the models are painted, but the long rails really needed to be soldered in place for strength. First attempts at bending were rubbish, so I laid down tools and walked away from the bench. Next morning, the bending-fu was working, as this photo shows.

33082C46-61B9-4E25-8FE5-B7CA96437128.jpeg

This was about halfway through. The plastic tub contains the last ends that needed detailing. I’m pleased to say all the handrails are now made. My sanity is still teetering on the brink, but I’m not entirely sure it’s down to building these coaches.

Next week, I’ll get back to more bogies, I think. I keep jumping round between tasks to try and alleviate the tedium a little. Favourite music played loud also helps.
 

simond

Western Thunderer
I don’t know why but I’m not listening to music as I used to. I tend to model in silence at the moment, though I have been binge listening to the Infinite Monkey Cage whilst motorbike fettling. I’m very doubtful that there’s much logic there.

I made a G-commode-handle jig a few years back, its 7mm, so not much use in this case, but the principle might be helpful. There were photos in my Porth Dinllaen thread on RMW, but they may have evaporated. If it would be helpful, shout and I’ll post photos and a description. Assuming I can find it…
 

Heather Kay

Western Thunderer
Music is an aid to help me by letting that part of my brain that likes to worry about the smallest things concentrate on something else, while the rest of me gets on with the task at hand. The ebb and flow of Test Match Special has the same effect. I do find, though, that most often I am working in whatever silence my growing tinnitus allows

Thanks Simon. I will log into RMW later and see if the posts are still illustrated. If you can find the images and would like to share the technique here - or probably better in a separate thread here on WT - that would be fantastic.

I let the brain cell worry about such things. Usually, a solution presents itself, but sometimes I fail to come up with a working solution. A few bits of scrap brass sheet and some carefully drilled holes ought to deal with the door grab handles. I may be overthinking the commode handles, which are mostly straight. The end handles, though, do need a reliable method of reproducing the shapes.
 

daifly

Western Thunderer
I don’t know why but I’m not listening to music as I used to. I tend to model in silence at the moment, though I have been binge listening to the Infinite Monkey Cage whilst motorbike fettling. I’m very doubtful that there’s much logic there.

I made a G-commode-handle jig a few years back, its 7mm, so not much use in this case, but the principle might be helpful. There were photos in my Porth Dinllaen thread on RMW, but they may have evaporated. If it would be helpful, shout and I’ll post photos and a description. Assuming I can find it…
Simon
Sadly, no photos!
Dave
 

Richard Gawler

Western Thunderer
I know a lot of modellers really dislike building coaches. I can understand why. There’s so much fiddly and repetitive work, often on a single vehicle. Multiply that by however many coaches I’m working on, and you have to wonder about my sanity at taking on such tasks!

. . .

I have had five goes at making coaches during the last few years (all modified RTR) and only one made it as far as getting painted. I encountered structural matters as well as details, like getting the floor flat and the sides in a straight line, and for me at any rate making the parts above the windows on a BR Mk1 strong enough to not cave in under thumb pressure. This thread should be sobering reading for any hobbyist fancying turning professional. Still - I am enjoying this account all the same. I am glad I am trying 7mm now, the larger scale seems a huge lot easier to me.
 

simond

Western Thunderer
Dave,

your ability to find such things never fails to amaze me, thanks!

I shall post a couple of pictures of the jig in a wee while
 
Top