4mm On Heather's workbench - on a Holden to…Yarmouth?

Back to bogies - adding detail

Heather Kay

Western Thunderer
Sorry for the gap in comms. You can guess why. :confused::oops:

Anyway, thanks for all the input on the grab rails. I think I’ll go with fixing the wire rails in place before painting gets started, then just paint them a sort of darkish brownish sort of colour and be done.

Meanwhile…
IMG_3461.jpeg

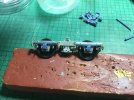
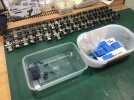
I have begun to face down the daunting task of detailing these beggars. So far, it’s soldering in the whitemetal castings for the bolster springs. Next, I think it’s opening all the spring damper bracket holes a gnat's crotchet. After that, carefully separating the printed parts and just getting down to gluing them together.

No doubt, I shall be some time. :))
 

Richard Gawler

Western Thunderer
There are gold plated sprung contact wires in organ keyboards. These might pass for metal or wooden handrails in a 4mm model. Years ago they were stocked by Maplin, I have looked and found nothing so far but someone must stock them nowadays.
 

Heather Kay

Western Thunderer
This weekend, Best Beloved and I should have been in Telford, enjoying a weekend chatting about plastic planes. Sadly, himself's health has not been clever, and we had to make the decision to cancel the trip. It left me a bit bummed out, and not feeling in any mood for work.

Over the past week or so I’ve been doing repetitive tasks around the bogies. I’ve already done the whitemetal soldering, as you read earlier. I decided to use a fine taper broach to open the spring hanger bracket holes, the idea being to give a bit of leeway for adjustment. While doing that, I discovered some of the wheel spring units were sticky. A bit of remedial work fixed those.

IMG_3464.jpeg

With nothing left to act as distractions, I decided to have at it with the 3D bits. I had a bit of a brainwave in that I thought I might use PVA to attach the plastic to the metal. I’ve used PVA for attaching various parts to various models in the past. It isn’t a permanent fix, but does provide enough "bite" to hold a part with the advantage that if knocked the join breaks, not the part. This photo is the test, and it seems to work. What didn’t work, though, is aligning the springs with the damper rods. I am not blaming anyone there but myself: I think a problem with my measuring is the root cause. If things prove prone to dropping off, I can run some superglue in to reinforce the joints.

While the bogie kits included many minuscule washers designed to make up representations of the rubber doughnut dampers, the D&S kits included tiny turned brass units. If I’m lucky, I’ve got enough to do the job. I’ve used four in my test pictured. Because the spring ends haven’t aligned - all my fault, I reiterate - I’ve taken the pragmatic route of chopping off the ends of the springs. Once the step boards are fitted, and everything is painted in grot, I sincerely doubt the problem will show.

I’ve been avoiding this stage for many months, and now I find it’s not actually as hard as I feared. I just need to gather myself for a full-on onslaught and get the details attached, and then I can move on with the build. Wish me luck.
 
Last edited:

Heather Kay

Western Thunderer
Thanks gents!

Best Beloved has good days and bad days. Sadly, I think the latter are becoming the norm. That’s life.

In other news, the PVA seems to be doing the trick. The resin parts are pretty firmly fixed in place. Guess what I shall be doing today, and tomorrow, and probably for the rest of the week! (Apart from rocking quietly in a corner, of course.)
 

James Spooner

Western Thunderer
Thanks gents!

Best Beloved has good days and bad days. Sadly, I think the latter are becoming the norm. That’s life.

In other news, the PVA seems to be doing the trick. The resin parts are pretty firmly fixed in place. Guess what I shall be doing today, and tomorrow, and probably for the rest of the week! (Apart from rocking quietly in a corner, of course.)
Heather,

I would echo Richard’s remarks and add that, on the modelling front, making up two GER etched brass carriage kits end on end is stretching my love for modelling so I’m not surprised that creating sixteen is sending you into a corner gently rocking. I may well be heading for the nearest bar in similar circumstances!

Nigel
 

Heather Kay

Western Thunderer
I’m not surprised that creating sixteen is sending you into a corner gently rocking

It does help that someone occasionally throws some money at me. ;)

I made fair progress today. Some days, I find a decent play list belted out of the hifi helps keep me focused. When I decided I’d had enough for the day, I found I was a quarter of the way through detailing the bogies. Interruptions notwithstanding I might complete them this week.
 

Heather Kay

Western Thunderer
IMG_3471.jpeg

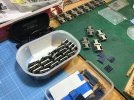
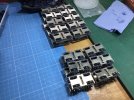
The stack at the back have their step boards. The stack at the front are pending.

Well, they were until just now. As I type, all the bogies are detail complete, and have been snagged for sticky springing. One more milestone passed. I’m having the rest of the day off, and have my therapist standing by.
 

Heather Kay

Western Thunderer
Jeepers! Doesn’t time fly? :oops:

Just when I thought the bodies were ready to think about getting them painted, more bloomin' soldering!

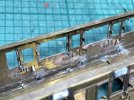
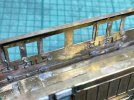
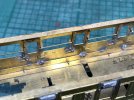
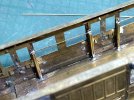
I decided the corridor side handrails should be soldered in. That way, they get painted with the bodies, and can be retouched later if I choose. The glazing can be slipped in later. But, of course, this wouldn’t be simple straightforward job. It never is.

IMG_0188.jpeg

The kit window inserts were designed with these little tags that fold out to take the rod for the handrails. The other tags are designed to hold the glazing, but I’m not a fan. Far too fiddly, but I digress. Most of that soldering, by the way, isn’t mine. You see what I’m up against?

IMG_0189.jpeg

For whatever reasons, either me or the previous builder had chopped some of the tags off. The most egregious excision (did you like that?) was one of the composite coaches where all the tags were removed. I will deal with that one after the painting is done. Two of the brake thirds were afflicted, but only at the brake ends.

IMG_0191.jpeg

This is how things should have worked for all the bodies.

IMG_0192.jpeg

Nice.

IMG_0193.jpeg

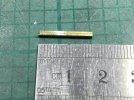
After some cogitation I elected to make little brackets from some square tube stock. They would sit on the angle at floor level, with a little fillet of solder to hold them since they weren’t actually structural. I needed ten all told, so that occupied an hour or so. Thank gawd for podcasts, I say.

IMG_0197.jpeg

And this is how they turned out. It’ll have to do.

Back to the sink for some further cleaning, I suppose. Oh, my poor back! It goes out more often than I do. :))
 

Heather Kay

Western Thunderer
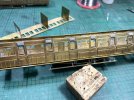
Working out how to fit interiors is vexing. Various decisions made much earlier in the construction process - and not all of them by me - mean it’s not possible to just make a regular one-size-fits-all plastic floor as D&S intended. Yet, a floor must be made since there are various apertures in the chassis left from removing parts during construction. Even with partitions and seats in, daylight would come up through the floor here and there.

IMG_3594.jpeg

The compartment assemblies were "adjusted" in order to fit over the bogie mountings. Dropping a styrene sheet in would make the floor higher than ideal and involve a lot of extra trimming of parts for fit. I’ve ended up trimming the styrene sheet to drop in between the angle at the base of the coach sides and the cross beams. A dab of adhesive of one kind or another should be sufficient to hold it. I’ve still needed to make slight adjustments to the compartment metalwork to get it to snuggle in place.

In this composite, I have to figure out what the heck happens at the far end. As built there was a luggage compartment, which was later converted to a slightly truncated passenger one. Something needs to fill that break at the end, and I think it needs to go at an angle to allow access to the gangway.

Ever so slowly, I’m getting there.
 

James Spooner

Western Thunderer
By the way, if Future Me comes across Past Me, I hope I give myself a good slap for taking such stupid jobs on! :)) :oops:
I must admit I am seriously impressed by your perseverance! I do love Dan Pinnock’s carriage kits and have just made up two more for my project but I also need to build other things in between as the volume of soldering components for each door is pretty heavy. Building the quantity you have taken on, with the added complexities of coping with the half finished work of others as well, puts you into the superhero category!

Nigel
 
Top