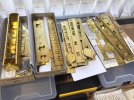
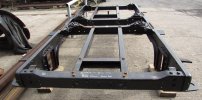
4mm On Heather's workbench - on a Holden to…Yarmouth?

oldravendale

Western Thunderer
I fear I'll not add anything to help the build, Heather, except to say that I built a couple of the D & S 4mm coaches to go with the model of GNR No1 which Steph had largely built based on the Rosebud Kitmaster kit, wheeled and motorised for me (a Christmas/Birthday present eons ago). They were an absolute delight. They also taught me how to produce a varnished teak finish - at this distance in time I can't remember the precise process and, of course, as I was not a member of WT at the time I took no photos.....

Anyway, as I said, this'll not help the build or the paint job in any way whatsoever except to say that I reckon the D & S kits are up there in the top quartile. I have one of the cranes to build in 7mm......

Brian
 

Heather Kay

Western Thunderer
Thanks Brian. I think I’ve still got the 4mm crane kit stashed away somewhere. I’m almost tempted to dig it out and have a go at it! As it happens, I have some 7mm D&S kits in the pipeline. If they’re anything like the 4mm ones, they’ll be a pleasure to build.
 

Heather Kay

Western Thunderer
The aim is to produce two full rakes of eight gangwayed coaches.

Having consulted with the client, I find he’s attempting to make up three rakes of five coaches. He would like six per rake, but isn’t currently sure he has the room on the layout for such excess.

The rather odd selection of coaches, then, makes a bit more sense in this light.

This morning I have some admin to sort out, so I expect to be back at the bench this afternoon.
 

Heather Kay

Western Thunderer
Just this second I have completed the final pair of underframes. There are no more kits to start from scratch, and it’s pretty much just assembling things from now on. I suppose this means I should get on with those bogie kits…

Perhaps Monday. :D
 
Tentative steps in bogie building

Heather Kay

Western Thunderer
Well, I took a bit of time out. Sorting stuff, collecting stuff, arranging stuff. There was a whole lot of stuff going on.

Today, I took the metaphorical bull by the horns and started a pair of bogies. I know, shocking.

498E82C6-E1E5-4E00-A253-A1247A3E0358.jpeg

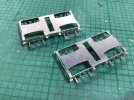
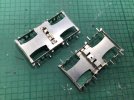
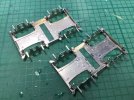
To be fair, in fairly short order, here is a pair of bogie frames. Next up is the bolster arrangements. Although I’ve read the instructions, I’m still a bit hazy about the next stages. I’m sure they’ll make more sense once I just get stuck into them.

BD0323C1-247D-43B4-8FC8-0CF6FF4A5064.jpeg

While a lot smaller than my usual fare, I’m very impressed with the design so far. Things fold nicely, things fit as they should, minimal tidying needed. I particularly liked the way the step board brackets are formed. This set of coaches will have the full complement of steps.

I need to spend some time sorting and clearing more stuff, pending a visitor on Wednesday, and the installation of a new front door being imminent. I will try and get some more work done on the bogies during the next day or so. I’m not doing a blow-by-blow account on this pair. I shall probably do a better job on the next pair. I just want to work through the first pair in my own time before I bog myself down trying to document things.
 
Last edited:

Mark Tatlow

Member
Hi Heather

Before you permanently install the bolster (which is actually fairly easy once you plunge in) you need to fit the brakes as otherwise the spring fouls their positioning. But doing a dry run before will be a lot easier.

As the real bogies were pressed steel - meaning that they were stamped into a mould that rolled the edges over (see the prototype pictures in the instructions). Thus, you ought to be rounding the perimeter of the side frames and ends with a file. It simply wasn't possible to reflect this in an etch. Optional mind!

The first pair will take a lot longer than the latter pairs!


Mark
 

Heather Kay

Western Thunderer
As the real bogies were pressed steel - meaning that they were stamped into a mould that rolled the edges over (see the prototype pictures in the instructions). Thus, you ought to be rounding the perimeter of the side frames and ends with a file. It simply wasn't possible to reflect this in an etch. Optional mind!

Hi Mark. Thanks for the heads up on the bolster. I’d got as far as folding the basic parts today, but my mojo decided it wasn’t really up for anything further!

Funnily enough, I did have at the frames with a file, and things are a bit rounded off. It's obviously not enough to show, which leads me to think it’s probably not really worth the effort at this scale. It was hard to get a regular effect among all the step brackets.

I am certainly not looking forward to modifying all the axlebox castings. But then, I’m more than half way to the madhouse anyway! :confused::))
 

Heather Kay

Western Thunderer
Thanks Mike, as ever!

29C8E7A8-E0B1-4FDD-9EDE-8461D6CD2D0E.jpeg

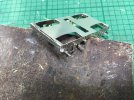
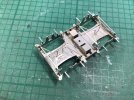
I didn’t listen to Mark's advice. I really wanted to see how the bolsters worked. I’ve only tack-soldered the bolster parts, so they should come out again. I am afraid I had to read the bolster section in the instructions about eight times before it made sense. Unfortunately, the instructions haven’t been updated to match the etched parts, which didn’t help at first. Anyway, once my braincell fired into action, it all almost literally clicked into place. Nice, neat, clever working bolsters. I think I may have to add weight to the coaches, but until I’ve got a running set of wheels I can’t be sure.

I suppose I’d better extract the parts again before worrying about brakes. I am also pondering the best way to slot the backs of 192 whitemetal cast axleboxes without losing much more of my sanity! :confused:
 

OzzyO

Western Thunderer
I suppose I’d better extract the parts again before worrying about brakes. I am also pondering the best way to slot the backs of 192 whitemetal cast axleboxes without losing much more of my sanity! :confused:

In what way do you want to slot the axleboxes?

OzzyO.
 

Heather Kay

Western Thunderer
Given the quantity, how about asking around for someone who can do a 3D CAD and then 3D print the 'box?
Not a bad idea, for reasons I shall expound in due course.

In what way do you want to slot the axleboxes?
The hole where the top hat bearing goes needs to be made a little longer so the wheelset can move up and down while the casting is fixed to the outside frame. It probably doesn’t need much, maybe a millimetre or so.

A problem has arisen, however, in that the D&S axlebox and spring castings are about 1.5mm short at each end, and don't align with the shock absorber brackets in the Rumney etch. They do, obviously, fit the D&S bogie kit etch. I will be consulting with the client about the way forward.
 

Heather Kay

Western Thunderer
300E92AF-2D66-4F22-B4A2-70F3919DD548.jpeg

While axlebox and spring shenanigans are ongoing - there is a drawing heading my way, which may lead in interesting directions - I decided to press on with the bits that weren’t cast metal. The bolsters were removed without much effort, so in go the very neatly-designed brakes. From the outset, the alignments are designed for S4/P4, with a note in the instructions that the hanger assemblies can be positioned to match narrower gauges if desired. I’ll bung the bolsters back in, then have a good think about making up the yokes and pull rods.

My aim, if possible, is to get wheelsets installed as soon as possible. All the detail castings can await developments, leaving the "hot soldering" stuff to be completed.
 

Daddyman

Western Thunderer
axlebox and spring shenanigans
Yes, I modified a D&S casting, used it as a pattern and cast replacements in resin.
I’ll bung the bolsters back in, then have a good think about making up the yokes and pull rods.
Be aware that the yokes won't fit with narrow-gauge wheelsets - 00 at least, not sure about EM. A rod between the brakes at the outer ends of the bogies is a good compromise.
 

Heather Kay

Western Thunderer
could you pop a photo of the axel box up showing both sides?

Your wish is my command!

A4533FFC-D29C-4965-8DC0-427F81F9206C.jpeg

The moulded hole for a pinpoint/top hat bearing needs to be made more oval in the vertical direction to allow the internal suspension system to move up and down a bit. In the original D&S bogie, it uses a simple flexible chassis system.

I hope to get the suspension and wheelsets installed today. That might make things a bit clearer as to why adjustments are needed on the cosmetic castings.
 
Top