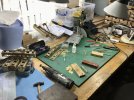
4mm On Heather's workbench - on a Holden to…Yarmouth?

Joining bodies to underframes

Heather Kay

Western Thunderer
After what seems like years, but in fact has only been weeks, I’ve stopped prevaricating and got on with things.

The specific things in this instance being how to attach the bodies to their underframes.

IMG_3133.jpeg

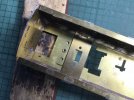
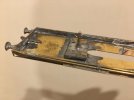
The kits provide an etched spacer. This fits into slots in the bottom angle of the body. Holes match up, suitable for bolts to go through. Way back near the start of this odyssey I tried out how this worked and found it more or less did. Then a third party set of bogies made an appearance, with different mounting arrangements. I got a bit confused. I elected to not worry about it while other stuff got done, hoping a solution would arrive eventually. In the photo, I’ve shown how the spacer aligns with the underframe - it’s offset to show the various holes.

IMG_3134.jpeg

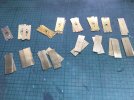
One of the problems I had was a lack of spacers. There are reasons, mainly that this project was begun many years ago, and parts were mislaid between then and the stuff arriving with me. Suffice to say, I was short of about half the spacers. I originally intended to replicate the etched parts, then the brain cell woke up and realised I really didn’t need to go to all that effort. I just needed a strip the right width, with suitable holes to align with the underframe.

Suitable scrap etch was found, attacked with various implements to make it the right width to fit the coach bodies, then hacked into strips. A quick measurement sorted out the various holes. You can’t see them here, because at this point I’d only marked and punched for the central hole to clear the bogie mounting bearings.

IMG_3136.jpeg

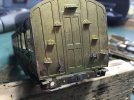
Another issue the early fitting turned up was the body simply would not fit between those little tags on the headstocks. I fretted over this for far too long. I tried angling the tags out, I tried rebuilding the body, but all to no avail. I’ve no idea what the problem is, but my executive decision has been to just chop the blighters off. I doubt they’ll be missed at this scale. I know they had a purpose on the real coaches, but they’re just a plain nuisance for me.

IMG_3138.jpeg
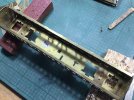
A routine was soon worked out. Ideally, the spacers should be fitted to the body, which is then attached to the underframe. Obviously, because I’m building things, I had to allow for my usual dimensional upsets. By temporarily fitting the body and spacers to the underframe with bolts, adjustments could be made to ensure things were aligned as near as possible before committing to soldering the spacers in place. I also decided to use one kit spacer and one home-brew one per coach. There was a reason which escapes me. There will be one coach that ends up with all home-brew spacers.

I got four coaches put together today. With more application, I could work more quickly. Still, they’ll get done soon enough. Interiors can be considered then. I suppose I should begin detailing bogies at some point. If that doesn’t tip me over the edge, I don’t know what will!

IMG_3139.jpeg

A sight that’s not been seen on the bench for a while: organised chaos. I have to say, it does feel quite good to be somewhat productive again. I hope it lasts.
 

Heather Kay

Western Thunderer
All the coaches are now with chassis installed. Before I begin tackling such things as superdetailing bogies - which is, I freely admit, something that scares me right now - I felt I should work out the passenger communication gear.

You will not be surprised to hear I was short of the valve box castings. As they are simple square affairs with some holes in, and I only needed five to make up the shortfall, I set about some Evergreen stock of suitable dimensions. With that done, I can glue the parts on the ends when I’m ready, and make up the flag rods and the pipework down the ends.

Now, how about that ultrasonic bath I’ve been promising?
 

Mick LNER

Western Thunderer
Re the Slots on the Headstocks post. They are possibly "Stops" no idea of the correct name, that were fitted on the outside of the Body to prevent the body moving forward in a accident etc.
 

Heather Kay

Western Thunderer
May we please see how the coaches look after their treatment?
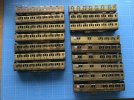
They’re in the airing cupboard to dry off for a few hours.

To be honest, they don’t look a lot different. There was a lot of brass dust in the bottom of the bath, and the water was pretty filthy, so I hope a lot of flux residues were cleaned off. Some of the older kit parts might need some further attention with a stiff brush to deal with whatever kind of flux the original builder was using.
 

Heather Kay

Western Thunderer
IMG_3309.jpeg

After a night in the airing cupboard, the state of things. You can see things aren’t exactly sparkling, and I never expected them to be. Much of the tarnishing on some of the bodywork is because those kits were at least 20 years old, possibly older. They had been started many years ago, and left somewhere where the atmosphere could get at them. Newer kits show up as cleaner and brighter. I’m going to give the bodies a visual inspection, and where necessary have at the worst surface imperfections with the Dremel and a brass brush wheel. Some may need fibreglass scratch brush treatment.

As ever these days, personal life is getting in the way. Progress may well remain at geological pace for a while yet.
 

paulc

Western Thunderer
View attachment 193188

After a night in the airing cupboard, the state of things. You can see things aren’t exactly sparkling, and I never expected them to be. Much of the tarnishing on some of the bodywork is because those kits were at least 20 years old, possibly older. They had been started many years ago, and left somewhere where the atmosphere could get at them. Newer kits show up as cleaner and brighter. I’m going to give the bodies a visual inspection, and where necessary have at the worst surface imperfections with the Dremel and a brass brush wheel. Some may need fibreglass scratch brush treatment.

As ever these days, personal life is getting in the way. Progress may well remain at geological pace for a while yet.
Things don't need to be sparkly for the etch primer to do its work .
 

Mark Tatlow

Member
Hi Heather

A caution that these bogies are best mounted to a fixed bolt and then secured with a nut rather than the more normal way of putting a nut on the underside of the chassis.

The reason for this is that most other bogies have a fixing point at their tops so there is little room for the bolt to slop around any looseness in the nut. With these, due to fixing points being below the bolster the distance from the chassis to the fixing point is rather more significant. Thus, any looseness is exaggerated.

The picture below is how I do it. The slightly scrappy appearance is because I also like to seperate the the fixing point from the chassis by a layer of double sided paxolin. This is to take away the possibility of a touch of a brake block to a wheel on one bogie inadvertently connecting to another but on the other side! I do the same with couplings between coaches.

I suggest that you have a go with this method and get one going in the first instance to see how it goes.


1692643183635.jpeg
 
Last edited:

Heather Kay

Western Thunderer
It's been hard to settle this week. We were out Monday, yesterday I spent chasing my tail (eventually catching it), and today the mojo wandered off.

I forced myself to review as much as I could find concerning gangways and roof details. I think gangways can be dealt with fairly easily by making adjustments to one of the generic kits available from various sources. Roofs, now, there’s a kettle of fish!

Logic, and experience, tells me that ventilators on gangwayed stock were generally fitted over compartments, and often over the corresponding corridor. Every compartment had a ventilator. Roofs were festooned with the things.

There is little information in the kits. The client loaned me several issues of the GER Society journal, so I spent a while armchair modelling to see if any photos helped with ventilator disposition. Unfortunately, many of the photos were taken of vehicles at the end of their lives. It seems, at some point between the Grouping and Nationalisation, ventilators were removed. A pattern was revealed, but made little sense. I found one image of a nearly-new coach which conformed pretty much to my gut feeling of ventilators everywhere.

Referring to drawings in the Ian Allan "Historic Carriage Drawings" (Jenkinson and Campling), my gut feeling was backed up. So, I shall assume that every compartment got at least one ventilator, offset from the centreline of the roof.

Unless you know better, of course. ;) :thumbs:
 

Heather Kay

Western Thunderer
As a rather broad claim, ventilators were taller than oil and gas lamps. So ventilators were located towards the edges of a roof (and not along the centre line) so they fitted inside the loading gauge.

A good point, Richard. The coaches I’m building have been converted to electric light. I have the little dome features fitted over the lamp positions. Could we assume, perhaps, the ventilator positions were adjusted when conversion from gas to electric was done?

The photos and drawings do show ventilators on the centreline for the brake third, at least over the van section.
 

Richard Gawler

Western Thunderer
I don't like assuming things, I always get into a pickle. I bought a packet of Slater's ventilators to add to my Dapol Stroudley coach, but the contemporary photos I find always show coaches with oil lamps but not ventilators.

I want to think ventilators came along with gas lighting (surely?!) but I don't know and I have no reference books on early coaches. If the conversion was directly from oil to electricity, perhaps some ventilators were overlooked and omitted.
 

Heather Kay

Western Thunderer
If the conversion was directly from oil to electricity, perhaps some ventilators were overlooked and omitted.

I think these coaches were built with gas light. They date, mostly, from the 1910s. I’m still confusing myself, but I’ll have to rely on my judgement. I can’t ask the client because I have all his reference material here! :))
 

Heather Kay

Western Thunderer
I think a pattern has emerged, regarding roof vents at least.

I think they were installed offset over smoking compartments, the lavatory compartment, and sparingly along the centre of brake/guard compartments. Presumably the door vents and opening drop lights were deemed sufficient elsewhere.
 

Dave Holt

Western Thunderer
Heather. I have no idea what the required corridor connections look like, but Masokits do some very nice, but fiddly, working scissor types in 4 mm. Might be worth taking a look.
Dave.
 
Top