The Heybridge Railway, 1889 to 1913

Richard Gawler

Western Thunderer
Conclusions

I think the build of the Slater’s class F deserves a record of my own conclusions and opinions, if only because it has been such an eye-opener to me. I will never know exactly who is reading this; but I guess there will be people who built this kit thirty years ago, people who are toying with having a go, and people who tried and gave up.

To my mind, a “kit” ought to be a set of parts designed to let the buyer build a model; and usually, this is a model of an actual prototype. Fundamentally, this kit includes plenty of optional parts but does not attempt to reproduce even one specific prototype. The kit cannot build into a working model where the wheels go round, even an unpowered one, because it leaves the modeller to sort out the front crankpins. It cannot build into a complete model because it indulges in obscure parts like a cab for a Wantage tramway loco but leaves the buyer to make the splashers. It is tricky to build into even a broadly representative model because the spectacle plate is wrong for a class F, though the cab is correct. So at face value, this is a poor kit, or at least a poor choice for someone used to kits which go together.

The instructions are atrocious though I accept they are of their time. There are far too many directives on what not to do and this approach to technical writing brings doubt and improvisation. The writing is littered with unhelpful remarks and a bizarre use of exclamation marks, these dotted around as if to add emphasis. I found the narrative intensely frustrating and fundamentally I suspect this is because the writer did not know how to build the model. The low standard of the instructions meant that some parts of this build, especially on and around the firebox, needed rework of rework and became laborious (though not especially difficult) to put together.

Fortunately, I got a bit of a pep talk just before Christmas; and so I can give this post a reasonably cheerful ending. This pep talk came from the proprietor of a one-man craftsman business who actually cares about his customers. I will leave him anonymous to avoid embarrassment, though I suspect others have had the same discussion with the same man. Firstly, I have got to get into my head that this is a thirty-year-old kit. In its day, it was a revelation. Fold-up subassemblies were then so novel it was a miracle if they actually fitted onto themselves let alone into the model. It was perfectly normal (and expected) to have to break them apart and rework them to make them fit. It was also normal for parts to be wrong. And, perhaps above all, I need to realise that in the intervening years the manufacturer will have done absolutely nothing to put anything right. I also need to accept and understand that for any and every shortcoming I try to feed back to the manufacturer, I will rapidly discover I am the first person to ever point it out.

So . . . the kit did not identify any single prototype in any depth, and I chose one of my own and worked towards this. I altered the kit parts and made new parts to build my model. Arguably, I have used the kit as an aid to building from scratch though fortunately by using a great deal of the kit to do this. What is not so good is I have done this out of necessity not choice.

I still have no idea what to expect from a modern kit, something providing many times more complexity; but I will certainly be asking here before attempting purchase. I know in my heart I will never want to build any kit exactly as supplied, but I do feel I can now see much better what to expect in the hobby, and what to try next.

I would have never completed this kit without the help of more experienced modellers on WT. I remain especially grateful to @Allen M, Dave (@wenlock) and @Rob R for the photos of their completed models. A special note goes to High Level Kits for putting such useful drawings of their gearboxes on their web site. These ought to be useful for many other 7 mm models with a 1/8 inch axle.
 
Last edited:

simond

Western Thunderer
I was apparently either brave or foolish (or possibly both) when some twenty five years back I bought my second 7mm kit, a Martin Finney 47xx. Prior to this, I built the 45xx that recently was rebuilt on my workbench thread, before which I’d done a couple of decent kits in 16mm and scratchbuilt quite a bit, preceded by some N gauge and the typical 00, where I’d discovered that whilst cast whitemetal and Araldite can work, my teenage efforts had never been satisfactory. I could, in those days, do a decent Airfix kit build…

The Finney kit was exactly what you describe. It fitted together and built a model of the prototype. It was big, complicated and expensive, but excellent value as it took me a good nine months to build, and I wholly enjoyed the experience. The instructions were adequate and accurate. The only difficulty I experienced was getting it to cross a Peco crossover (fundamental requirement if you’re ever going to a club or mate’s track) with which I persevered, and eventually succeeded.

I fear that many modellers buy something small and cheap as they very reasonably do not want to risk an unhappy outcome on a larger outlay when they feel their experience might not be up to the job. We have discussed, in these pages, kits that should not be on sale without a “government health warning”, though I would not have expected a Slaters kit to fall into that category; perhaps it really was the norm some thirty+ years back. Technology moves quickly, five years ago, I doubt many of us would have considered a 3D printer as part of our toolkit.

I trust you are rightly proud of what you’ve achieved!

Happy New Year
Simon
 
Last edited:

Overseer

Western Thunderer
Now I am intrigued. I bought one of the Slaters MW F class in mid 1988 and partially built it with hardly any tools while working in Nairobi. I remember replacing the turned boiler but don’t remember other problems. I will have to get the box out and have a look. Back then it came with a very nice coreless motor and gearbox. Might be time to finish it.
 

Overseer

Western Thunderer
£81 from Puffers of Kenton in 1988. I am sure the turned boiler provided was meant to be in a different kit so I made a boiler from some 10 thou brass, and also made a 10 thou brass wrapper for the saddle tank to replace the impossible to form etched part provided. Apart from that, I think everything fitted together without modification and all the brass and white metal castings are very nice. Even the coupling and connecting rods are etched steel to keep Adrian happy. The etches are marked Design by Peter Truman in 1986.

I wonder if the instructions have been rewritten as the ones I have seem clear and provide positive directions. There are a number of exclamation marks on some of the pages but electric typewriters didn't provide many alternatives for emphasising points. The diagrams are clear, and I think drawn in CAD which is impressive for 1986 when CAD drafting was in its infancy - ie not user friendly.

This was the first etched kit I started and was only not finished as I was working with hardly any tools and it didn't fit in with other things I was modelling when I got home. I would say it is a substantially better kit than many other 7mm etched brass kits still available, a few of which I have completed. It will build an accurate model of Wantage Tramway No7 (which didn't have splashers over the leading wheels for most of its life) out of the box (MRJ No 6 published in March/April 1986 has an article and good drawing) and provides alternative parts for quite a few of the 150 Manning Wardle F class locos. I will dismantle the chassis, make some new longer axles and complete it in S7 so I can run it.

mwf2.jpg
mwf3.jpg
 

Richard Gawler

Western Thunderer
I think it is really good to see an opinion from an exerienced modeller. I arrived here from kits like Airfix and Faller where the parts are precisely made and they fit together, and the instructions are clear and without ambiguity. It was a good move for me to begin with some kits from Connoisseur Models because they go together as well.

I . . . also made a 10 thou brass wrapper for the saddle tank to replace the impossible to form etched part provided.
I never tried to use the original tank wrapper because I drilled the holes for the handrails while it was flat and then decided I ought to drill them after forming the tank. The instructions did not give me a clue as to when I should drill these holes. I used some 0.3 mm brass sheet so it's a relief to read the original actually is impossible to form. I didn't have a clue how to manipulate it to the radii required.

I would say it is a substantially better kit than many other 7mm etched brass kits still available, a few of which I have completed.
I really will ask here before buying.

Fraser, thank much for all of your review.
 
'River Pant' (freelance 0-4-0)

Richard Gawler

Western Thunderer
One of our most favourite paintings (it makes us both smile every time we look at it) is also our smallest, the painting itself being just 3" x 2.75".
The artist was Brian Cunningham and we acquired it in 1992, believing it to be newly painted.

Having taken it apart yesterday to clean the mount and glass I studied it further - the locomotive's origin had always been a puzzle and the coaches seemed too short.

I now wonder if this scene might have been painted in 1892, not 1992 (it merely shows 92), and remounted / reframed a hundred years later before it came our way.

In which case - could what we are looking at here be an accurate rendition of a Heybridge Railway train?
Could that really be EH or EE waving at the painter from his recently converted private coach?

If so, you have some more homework - the train comprises 3 x very short and very early 4 wheel coaches, what are the origins of the locomotive (it must be the Railway's or hired in as it is not a known GER type), there is an overbridge, and the line appears to have been fully signalled (unless this view is of the HR train on the GER branch, but then surely the signal posts would be timber not iron lattice....).


View attachment 184895
When I was sketching out the history of the Heybridge and Langford Light Railway, I imagined the railway had three locomotives of its own. These were ‘Blackwater’ (a Manning Wardle K class), ‘Kingfisher’ (a larger but still lightweight 0-6-0T) and ‘River Pant’, an 0-4-0 of unknown origin. Of the other locos I have described in this thread, the MW class F and Nellie the crane tank would have belonged to the foundry of E H Bentall; and the GER Y14 belonged of course to the GER. So it is sensible to now think about a second loco for the railway itself.

I imagine ‘River Pant’ to have been less than a complete success and to have ended up as a stationary boiler inside the foundry of E H Bentall, but I chanced upon a Starter Loco kit by Connoisseur Models so I am going to try to build her. She would have remained in traffic until the railway acquired 'Kingfisher'.

DSC_5761.jpeg
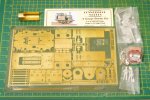
The kit provides one large etch, some detail castings, and minor parts like axle bushes and wire and hardware to complete a model. There is even a driver and fireman, so all I have to find is the wheels and a motor/gearbox. The wheels will be Slater's 7837K "3 ft 2in Kitson Industrial" and these are a scale 4 inches smaller diameter than the 3ft 6in wheels which would build the kit as designed.

The idea is to build a loco having much the same length and width as the Starter Loco, but about a scale foot shorter top to bottom. This reduction will come about by using smaller wheels (saves 1 mm of height), slimming down the frames (saves 2 mm) and reducing the height of the cab, tanks and smokebox (another 4 mm). So hopefully the loco will look a little less upright, and indeed a little more like the illustration kindly posted by Tony :)

A Happy New Year to all at WT
 

Richard Gawler

Western Thunderer
1. Running Plate and Cab Steps

The arrangement of the running plate is going to set up much of the character of the loco so it seems sensible to start here. I want to try for a loco in the style of smaller designs by Worsdell after he left the GER for the NER; maybe this will imply the design here is the work of a pupil. The fundamental thing is to put the running plate between the buffer beams instead of on top of them.

The two buffer beams need to be at the same height so for simplicity I am afraid I must ignore the rather stylish under-swept arrangement shown below the cab in Tony’s illustration.

DSC_5766.jpeg
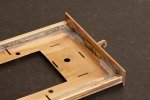
There are some really clear photos of the NER class H2 (LNER J79) in volume 43B of Yeadon and I am going to keep coming back here for details. The buffer beams here scale to about 30 mm thick so I have laminated the parts from the kit onto some scrap etch to give me 0.8 mm in all.

DSC_5768.jpeg
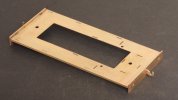
The running plate extends behind the smokebox (it hides a frame spacer here) and I have lopped out this area to give the model a more lightweight appearance.

DSC_5819.jpeg
The running plate is now 0.5 mm shorter at each end so the insides of the buffer beams will still fit snugly across the ends of the frames.

I wanted to use some 1.5 mm brass strip to represent the valances but when I tried, it dawned on me the kit has been etched from 0.34 mm (13 thou) sheet and this material has very little body to it (*). It bends ever so easily. So I used some 2.3 mm square tube left over from exactly the same role on Nellie my crane tank.

I have put the running plate itself upside-down because this hides some half-etched marks for locating lamp irons which I want to omit.

DSC_5817.jpeg
One coupling hook is laminated from the two hooks supplied in the kit, the other is from two hooks from my spares box. There is no springing here because I don’t think it will have any benefit with the short trains on my layout, and because fixing the couplings solid lets me set them upright and they will stay upright for the camera.

Anyway, the footplate sits flat (no rocking) on a mirror tile so it should give me a good foundation to work up from.

(*) This kit dates from when the price new was £75. The kit I used to build Nellie, bought new in May 2022, was etched from 0.45 mm material and this is much sturdier.
 
Last edited:

Richard Gawler

Western Thunderer
I think the cab steps are worth a mention because this is the first time I have put some together without struggling.

DSC_5835.jpeg
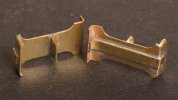
The main thing is the reinforcing strip on the back. This ought to discourage bending under rough handling, and even stop the bottom step falling off. The top flange is folded backwards to let the assembly tuck in behind the box-section valance.

It took me about and hour and forty minutes to prepare the parts and build these. I have never built a model completely from scratch (though I have gone quite close with model buildings) and I do wonder, even if I ever manage to get all of the skills together, whether I have the patience and endurance to see something like a loco through to the end.
 

Richard Gawler

Western Thunderer
You need to be proud of that work, neat, tidy, looks good.

Graham thank you for your kind words.

An awful lot comes with practice and trying fresh approaches. Jim's instructions for building the steps are first class, but this time I think I did everything in the exactly the opposite sequence.

The reinforcement on the back went on first, but left overlength at the bottom. Then I folded up the left and right edges of the steps, so I could squint at them and tweak them from both front and back; and only then I folded up the backs, soldered them up and fettled the corners. The bottom step went on first because it is easy to clamp it with the forceps while folding up its reinforcement. Then the top step goes on, and finally I formed the reversed flange at the top.

Of course, this works for me but the original sequence may be better for other people.
 
Last edited:

Richard Gawler

Western Thunderer
2. Boiler and Smokebox

I have been able to borrow a set of GW rolling bars for the weekend and these have been extremely useful.

The Starter Loco comes with a pre-rolled boiler and this has a nominal outside diameter of about 28 mm. I want the boiler to be a little smaller, to reduce the apparent mass of the loco.

DSC_5826.jpeg
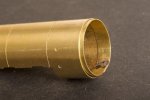
I trimmed about 5.5 mm from the circumference, then put 1 mm back in with a length of wire, and ended up with a nominal 26.3 mm diameter. Ovality is barely 0.2 mm, which I think is good enough. The trick for rolling the boiler (or any complete cylinder) is to lay some offcuts of thin sheet metal on each side and overlapping the join. These will guide the metal through the rollers and form the curve up to the very edges of the material.

DSC_5847.jpeg
I also rolled a flange to slip inside the front of the boiler. This is from 1/4 x 0.016 inch strip. The flat at the bottom with the ends overlapping makes it easier to get a snug fit.

DSC_5839.jpeg
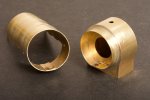
Having borrowed the rolling bars, the smokebox wrapper is simplicity. I don't want the wing plate supplied for the front of the smokebox so I trimmed this part down and put it inside the smokebox to hold an electrical power socket.

DSC_5841.jpeg
This is the smokebox front resting inside the assembly to show how well the rolling bars will form metal. The wrapper came adrift while I was fixing the former wing plate, I wouldn't want anyone to think things haven't gone wrong from time to time.

DSC_5853.jpeg
This is my complete smokebox, with the flange I made earlier soldered onto the back.

DSC_5850.jpeg
So I now have a complete boiler and smokebox assembly . . .

DSC_5851.jpeg
. . . and I can still pull it apart for painting and to fix the nut on the back of the power socket :cool:

The GW rolling bars can form point blades as well as train parts, maybe now is the time to buy a set of of my own.
 

Chas Levin

Western Thunderer
Lovely work Sir! Also very interested to read of your success with the GW roller, as I just got one as a Christmas treat but haven't used it yet. Your tip about sandwiching the workpiece between two thin offcuts is very interesting too, as I have to form a turnunder right up to the edge of an etch with doorways cut into it too.
 

Osgood

Western Thunderer
For sandwiching, would you advocate two pieces half the thickness of plate being rolled (e.g. for 1mm plate use 2x 0.5mm) or thinner still?
 

Richard Gawler

Western Thunderer
The instructions for the GW rolling bars explain, they will cope with sheet metal up to about 0.5 mm thick. I imagine, this means brass or nickel silver. Thicker brass might be possible if you anneal it lightly first.

I used two pieces of 0.45 mm brass to make the sandwich on the 0.34 mm boiler and the going was starting to get tough. After all, the friction between the layers makes everything behave like a thicker sheet. Next time I would try to use the thinnest sheet brass I could find to make the packing pieces. All it is doing is guiding the material between the rollers.
 

Richard Gawler

Western Thunderer
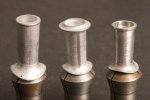
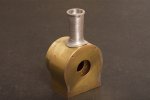
I think 'River Pant' needs a GER-style stovepipe chimney and I have made this from the casting supplied in the kit.

DSC_5862.jpeg

The mandrel is two offcuts of brass tube, one jammed into the top of the casting. The tailstock chuck adds cautionary support but next time I would have this holding some tube as well.

DSC_5870.jpeg
Three castings from Connoisseur Models to show the difference in sizes. A GER chimney left over from the Y14; a starter loco chimney left over from building 'Nellie' the crane tank; and the new chimney for 'River Pant'.

DSC_5872.jpeg
The proportions look good. I might end up gluing this not soldering it.

DSC_5889.jpeg
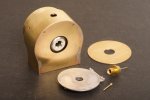
I have made a start on the smokebox door too. The new boss has a hollow spigot on the back to tuck into the power socket. The idea is, this will support the door centrally on the smokebox. The front of the boss has a 0.5 mm hole to hold the handle.

DSC_5886.jpeg
So with these parts assembled loosely, the result looks like this. The handles are a veneer pin and a Markits “long” handrail knob.

I need to think about a peg and a magnet or at least some friction to hold the door in place and stop it turning, but the idea is here. Sometimes I get a bit too absorbed in the details and I suspect the charging socket could end up elsewhere on the model. If so the door can be fixed. I want to work up the frames and the body, see where the motor and gearbox and batteries can go.
 
Last edited:
Top