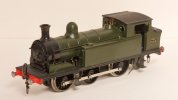
The Heybridge Railway, 1889 to 1913

Osgood

Western Thunderer
What is involved in power-cycling (another phrase for re-establishing the link between transmitter and receiver?) and how long does it take compared to waking up a dozing DCC-fitted loco?

Apologies for the apparent ‘inanity’ of the questions - just trying to weigh up the usability of this interesting tech!
 

Richard Gawler

Western Thunderer
From the user's point of view, power-cycling involves turning the model off and back on again. So it seems sensible to have the power switch accessible and I want to put mine in one of the coal bunkers, surrounded by coal to hide it.

After moving the switch off and then on again, then if the transmitter is within range of the receiver the system proceeds to re-establish a control connection ("binds") and the LED lights up solid within I suppose two or three seconds. You can then drive the train again.

The Micron system differs from the Fosworks one (in my Y14) in that at power-up (or after power-cycling) the Micron receiver immediately tries to bind to its previously-known transmitter. If it fails to do this promptly (for example, if you have left the transmitter switched off) then it enters its bind mode. I don't yet know the exact sequence(s) of events needed to recover from this, because I had an intermittent short circuit during much of my testing last week. Which made me quite weary. So I make sure the transmitter is switched on before switching on the model. Conversely, the Fosworks receiver arrives already set up to bind to the transmitter. I don't know the process to cause the Fosworks receiver to try to bind, but I do know can switch on either the transmitter or the receiver first and the system always immediately comes to life.

I haven't worked out the maximum range of the Micron radio system. It was completely reliable across a diagonal of the NEEGOG track, at which distance the train is getting difficult to see in detail. Around 12 metres.

Opinion: The usability of the Micron system is good if you accept the factory settings. You have to carry out a bind operation but only once. It is sensible to switch on the transmitter before the receiver. The usability gets difficult when you decide to alter the settings. The user interface to do this is the LED discussed above plus two push buttons, which you use to navigate the many menus. One button to advance through the menus, one button to accept a setting and proceed to the next level, multiple LED flashes to tell you the present level or setting. Micron have hinted at a graphical user interface to replace this, which sounds helpful for people who aren't good with these low-level, engineering-style interfaces.
 
Last edited:

Richard Gawler

Western Thunderer
Continuing with usability for a moment . . .

If I actually wanted a headlamp I expect I could apply myself to providing one. But to my mind, this turns the loco into a child's toy, because the headlamp would be there to improve usability and not for any prototypical reason.

For the class F, the Micron MR601a is the only product on the market small enough to fit inside and still able to drive a conventional Mashima 12-volt motor. So I will stay with this receiver if I can.

The behaviour of the receiver at power-up depends on whether it can connect to its associated transmitter straight away. The receiver has a LED to show it's current state, but I don't want to see this LED (or a repeater of it) if I possibly can because it is unprototypical.

What I don't know is whether I can get away with being disciplined in the way I power up the model; or maybe this won't be good enough and I will need to be able to see the LED. If this happens, I can drill out the epoxy plug. This is better for me than adding another LED with its associated wiring and programming.

The model is dismantled now, and I expect to have it running again in March, after painting.
 

Richard Gawler

Western Thunderer
The Hudswell Clarke is a lovely thing and its headlamps do look large enough to house a micro LED. Nevertheless, I convinced myself that incandescent bulbs are the only satisfactory way to represent the light from oil lamps when I put new lighting into my Dapol Stroudley coach.

Such bulbs are probably unsuitable as the visual indicator for programming the MR601, because the firmware uses a rapid (brief) flash to represent a setting of 'zero' (because an unlit LED cannot readily convey such information) and such a bulb will struggle to respond in a visible sort of a way.

DSC_5640.jpeg
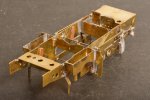
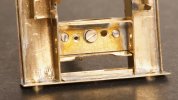
I put some copper clad pcb into the chassis a while ago to let me have pickups if I ever decide to abandon the radio control. With the loco dismantled, I have added some cut-outs in the motion plate to let electrical wires go from the front pick-ups to the rear pickups, and from there to the rest of the model wiring. It is easier to do this now, even if I never put these wires in.

I could try some grain of rice bulbs fed from my high frequency lighting unit, but I won't be giving them precious milliamp hours from the loco battery. Clearly, I could install pickups to drive such bulbs, but this is looking like feature creep not model making. I want to call this model "finished and ready for paint", otherwise it could go on for weeks or months. So no illuminated headlamps.
 

PhilH

Western Thunderer
I'm not familiar with the Micron RC system but I have several large scale locos with RC systems including Deltang and Fosworks. I believe that Micron now produces some of the Deltang items, e.g. my Deltang Tx22 transmitter is now produced by Micron as their Tx22v2. Its always recommended practice to turn on the transmitter before the receiver. However if you're carrying out the binding operation with the Fosworks system (and I believe its the same with all these systems) you turn the receiver on first then the transmitter with the bind button (or buttons) depressed and when the light on the transmitter stops flashing the binding is complete. There is also as you say a corresponding light on the receiver but I've very rarely had to check that on any of mine.

If you really must see the light on the receiver what about a small hole in the bottom of the boiler, then if you need to check it just turn the loco on to its side.
 

Giles

Western Thunderer
All fair enough...... for the record, the little LED you used in the coach is undoubtedly a 'cool white', and not the 'warm white' that one needs to represent incandescent lighting (or indeed oil lamps). As I'm sure you know, LEDs and grain-of-wheat are not interchangeable in regard to the receiver outputs.
 

Richard Gawler

Western Thunderer
If you really must see the light on the receiver what about a small hole in the bottom of the boiler, then if you need to check it just turn the loco on to its side.

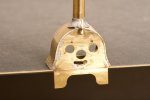
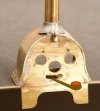
I like the sound of this, but I think below the smokebox would be even better. So at the risk of letting the model resemble a piece of Swiss cheese, I have added a fresh hole through the front frame spacer, running plate and smokebox bottom.

DSC_5643.jpeg
This is the small empty hole here. I can thread a bit of fibre optic through this and back into the boiler towards the LED on the receiver. If I end up with a red glow on the ballast and decide I don't really want any light coming out of here I can pop in a small machine screw instead and nothing will show when the loco is on the track. If the light has a moderate brightness, I can keep a dental mirror to hand.

The larger hole here is for the aerial wire, which needs a larger hole to let me manipulate it through from the inside of the smokebox.

I never expected a blob of Araldite in a hole could encourage so much input, but reckon I will see the operation of this LED one way or another, if indeed this turns out to be useful.
 

Richard Gawler

Western Thunderer
All fair enough...... for the record, the little LED you used in the coach is undoubtedly a 'cool white', and not the 'warm white' that one needs to represent incandescent lighting (or indeed oil lamps). As I'm sure you know, LEDs and grain-of-wheat are not interchangeable in regard to the receiver outputs.

Giles, I feel your comments here could mislead some readers.

I did not use a LED in my Dapol Stroudley coach. The coach arrived with LED lighting, and the technology involved means these LEDs and the extra example I photographed have a high blue output and a rather acid tinge to their flare. So I settled for incandescent bulbs. Two sets in fact, 12V then 3V.

The MR601a has a couple of FET outputs which can switch an external supply to the negative rail. With a positive ground in my model, I could arrange a small bulb to connect from the chassis to a FET output and need only one wire back to the receiver. This is logically feasibly but I would find out the current rating of the FETs before trying. It is difficult to know just how much to write, and suspect I often write too much :thumbs:
 
Last edited:

Richard Gawler

Western Thunderer
Field Effect Transistor

For our purposes here, a solid-state switch built into the radio receiver. This switch lets us turn a flow of current, coming from an external source of power and passing through an external device, on and off. The "return" part of the circuit is by way of the negative supply to the receiver. As it happens, Micron sell add-on boards to let you add extra FET outputs to their receivers, and the schematic on their web site explains the arrangement rather neatly: Micron Radio Control : FET Switch Buffers

Further details are only really of interest if you thinking of buying a Micron receiver and you know what you want to achieve; or (like me) you already have one and are pondering the possibilities for a future model. Useful information here:
Micron Radio Control : Micron MR601a DSM2/DSMX 13V Receiver with 1.2A Bi-Directional ESC

The design appears to be flexible and open to further development. In particular, Micron explain, "The standard output configuration is described on the Outputs tab. If the wiring or configuration options do not meet your needs, please contact us to discuss your requirements".

I would definitely recommend spending the extra few pounds to have some wire leads attached to all of the output pads. The pads for auxiliary circuits are ever so small.
 

Richard Gawler

Western Thunderer
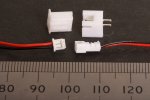
I wouldn't consider using magnetic connectors, as they can pick up a bit of wire and short out by accident. I use prewired 1.25mm JST connectors myself, and epoxy them in to both road and rail chassis, as they are nice and small below is a 4mm landrover with its charging socket on the left.


My profuse apologies - no inte to mislead - I'll leave well alone!

Giles, I welcome thoughts from everyone. And on the strength of your work I have bought some 1.25 mm JST connectors.

DSC_5647.jpeg
These JST connectors make the Molex ones from my stock cupboard look enormous!

The idea is, of course, to add a charging socket to the model. This will make sure I am not tied to using the USB-C connector on the Poover battery, and it will let me charge any battery without removing the saddle tank.

Incredibly, there seems to be less spare space under a 7mm Manning Wardle than under a 4mm Land Rover so I will report back when I have figured out where the JST connector can go. I rather fancy inside the boiler with a matching rectangular hole in the underneath but this may be too challenging to make :)
 

Richard Gawler

Western Thunderer
View attachment 194983
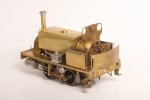
I bought the kit for the MW class F in November last year, when I felt the Y14 was going to work out okay. I am hoping this kit is a sensible progression for me. It is my first loco with outside cylinders, first with suspension, first with sprung wire pickups, and first with a two-stage gearbox.

It is also my first brass kit for any coach, wagon or loco not created by Connoisseur Models; and so my first without Jim’s marvellous instructions and a first without the unwritten but frequently re-quoted words, “they go together”. Slater’s have few loco kits on their web site but this one has the year 1985 on its etches, and even the name of the designer too. Their wagon kits are good, so I can be optimistic.

View attachment 194984
There are four etches for the body from 0.4 mm brass, one for the chassis from 0.5 mm brass and one for the side rods from steel. There are alternate parts for different cabs and spectacle plates and one of the etches is devoted to an enclosed cab. The parts are numbered on the etches, which looks good, but I see numbers 1 to 6 at least are used twice, perhaps not so good.

View attachment 194986
The detail castings are of a very good standard so if they fit I should be able to build a good-looking model. I am guessing the metals here are pewter as well as white metal and brass. Nice touches include turned steel buffer heads (though I might take these for my GER van) and plenty of spare half-etched holes to practise embossing rivets. The boiler has been machined as a brass cylinder and will need work to open up space for the motor.

I have stumbled upon an essay on these locos in MRJ number 6, and gone on to find their magazine project to build the loco from scratch in 4 mm scale. I could never cope with the intricacy in the smaller scale, but in 7 mm I think I have a chance.

View attachment 194987
The bench is rarely anywhere near this tidy!

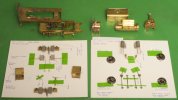
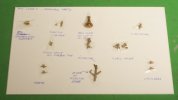
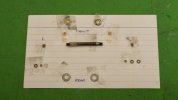
I am waiting for some minor hardware to arrive so in the meantime I have arranged the subassemblies and detail parts for painting. Probably a bit over-obsessive but if the loco can run as well after painting as it did ten days ago I will be very happy.

DSC_5663.jpeg
Smaller items fixed down onto card with tape, thread and even some nuts.

DSC_5668.jpeg
Plus the parts to go on after painting. I still haven't worked out what the lever on the injector sprue is for.

DSC_5670.jpeg
And the oily bits, including the custom front crankpin bushes.

So, from one kit to another and the only difference is in the granularity of the parts.

One thing I must always remember about this kit is, all of the new parts came from my stashes of brass and nuts and bolts. I didn't need to buy any fresh castings or other detail parts.
 
Last edited:
Richard Gawler

Western Thunderer
DSC_4904.jpeg

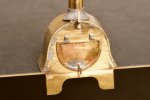
The kit includes three smokebox doors. I am using the plainest one because this gives me a choice of two slightly more ornate designs to backdate ‘Blackwater’, my Minerva class K.

Thank you to @Dan Randall for pointing out how the two hinges here don't match each other. I would have never noticed this until after painting.

DSC_5719.jpeg
So, "Lady Marion" has a better smokebox door. This is aligned with two dowels and will be retained by two magnets.

DSC_5737.jpeg
I have included a lashing point for a length of thread so the door cannot get lost.

DSC_5735.jpeg
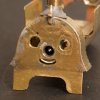
Lady Marion is a happy little engine so it seems only right for her to have a smile. And the LED on the receiver board will be visible straight through here, possibly assisted by a light pipe :D

This takes me to the end of the snagging on the model except for the two mating magnets and these can go on after I have sorted out a battery charging socket.
 

Richard Gawler

Western Thunderer
Long-suffering members of the congregation will know this, but for those picking up this thread in the future I am building a Manning Wardle class F with radio control. Most of the hardest parts are thought through and indeed resolved: battery, receiver, aerial, even the power switch.

The coolest pace to put the charging socket is inside the smokebox.

View attachment 204217
The door here would come off with a whiff of the microflame torch and this would reveal a large round hole behind. Which would be perfect to secure a mounting of some kind for the socket.

Please, could I have some pointers towards how to arrange working hinges for the door? Given that this tiny socket is too big to hide convincingly anywhere else I would settle for slightly overscale hinges instead of a visible lump.

36. Battery Charging Connector

Thank you to everyone who posted on my question about hinging a smokebox door, which has its own thread. You have let me find a solution.

I have been trying to think through an arrangement for charging the battery for ages. I remember unpacking the kit last summer and failing to see anywhere a connector could go. Some well-meaning people at the Bury show suggested using the track or even the buffers but these methods are difficult to manage, especially with the model on other people's layouts.

DSC_5748.jpeg
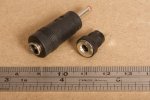
I have bought some coaxial power connectors. These are 1.3 x 3.5 mm ones, this is a relatively popular size below the usual 2.1 x 5.5 mm. Well, they were the only smaller size I could find in to buy in the UK. The smaller connector can fit into the smokebox of 'Lady Marion' so it ought to be small enough for all new locos I build. I can retrofit one onto my Y14 too, so I can end up with the same connector on every loco. In the meantime, I have the adaptor.

DSC_5745.jpeg
I can glue the connector into the smokebox after painting.

DSC_5747.jpeg
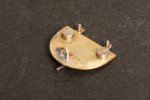
The vestigial remains of the boiler now carries a 6BA stud.

DSC_5741.jpeg
This stud can support the back of the connector with a wedge of hardwood after painting.

Nearly there . . .

For many years, coaxial power connectors have used the convention of a positive central pin and a negative sleeve. The power plug will likely bridge across the model metalwork and the connector sleeve during insertion and withdrawal, so I have rebuilt the battery positive terminal so it is electrically isolated from the model.

DSC_5717 (1).jpeg
In essence, the support is two layers of copperclad pcb strip with the copper strategically removed and all encased in epoxy glue.

So at last . . . this completes the construction of the model before painting :)
 
Last edited:
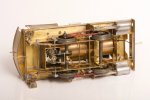
. . 'Lady Marion', completed model

Richard Gawler

Western Thunderer
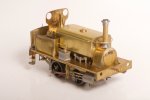
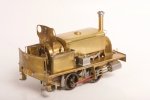
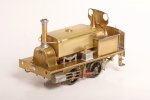
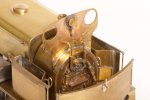
MW Class F 'Lady Marion', Unpainted

These are my photos of 'Lady Marion' unpainted, all taken on 10th December which was the day after the test runs at NEEGOG.

DSC_5604.jpeg

DSC_5609.jpeg

DSC_5606.jpeg

DSC_5614.jpeg

DSC_5615.jpeg

DSC_5611.jpeg
I do think the High Level 'Roadrunner' fitted in well here. It is almost invisible from above. The external trappings of radio control (switch, aerial and charging socket) will be almost impossible to see too.

This is my third 7mm scale loco. The only 4mm loco I ever built was a Wills body kit for a GWR U1, around 1980. The experience was such I never tried again! I also thought a complete 4mm loco would be too intricate for me, but arguably the size of the class F is comparable to many 4mm models except the frames and wheels are further apart.

DSC_5750.jpeg

So, with something here for the GWR folk as well as for the industrial ones,

I wish everybody at WT a wonderful Christmas and a peaceful, prosperous and above all happy New Year.
 
Top