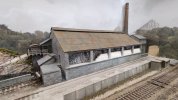
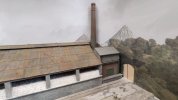
4mm Polsarrett: BR(S) N Cornwall Clay, The Final Countdown

Point rodding plans
  • Pencarrow

    Western Thunderer
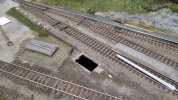
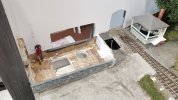
    Finally bit the bullet yesterday and trashed a perfectly good ballast shoulder to install the first length of point rodding. Yes, I should have done this prior to ballasting. I am however glad I'm doing this now before fencing, platforms and other obstacles go in!

    It's only roughly placed insitu at the moment but it gives a good idea of the finished effect.
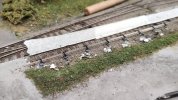
    IMG_20220327_182915_1.jpg

    The left hand end near the level crossing will have to go lower and some 'timbers' installing in the roadway over the rodding.

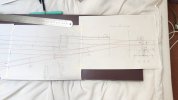
    After many abortive attempts planning this little lot I resorted to working it out full size and produced a base plan by tracing the track on the layout.

    rps20220328_062820.jpg

    The loop crossover and associated FPL at the platform will be controlled by a separate ground frame which will be released from the SB. Finding a sensible route through for the rodding runs wasn't easy and the route in the current plan wasn't by any means the first shot.

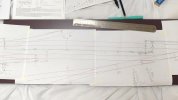
    IMG_20220327_165752.jpg

    IMG_20220327_165755.jpg

    IMG_20220327_165758.jpg

    It's unlikely to be perfect but it would work, all the pushes and pulls balance, and I've used the 5 compensators. As an added bonus the rods end up at the SB in the correct order. Going to be a serious test of the eyesight though.

    Certainly kept me quiet yesterday afternoon!
     
    Last edited:
    Signal installation
  • Pencarrow

    Western Thunderer
    Something I really wanted to find a place for on the layout were the two LSWR lower quadrant signals that Fred Shilton made for Treneglos.

    Fred is no longer with us and I have fond memories of exhibiting the layout with him and others. A great model engineer, fun to have around and sadly missed.

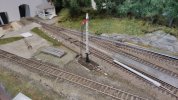
    Here's the hole cut for the first:

    IMG_20220402_120456.jpg

    And it slotted neatly on place:

    IMG_20220402_120512.jpg

    The base is going to need some hiding and there are repairs to be made to the signal but it's a good start.

    rps20220402_121654.jpg

    The position is probably a bit contrived, and perhaps should be on the end of the platform, but that's where it fits on the layout.

    That's the easy one, the tall co-acting one is next...
     
    Final plaster added to the layout, it's all green from here...
  • Pencarrow

    Western Thunderer
    So today after making two holes, I've mostly been filling holes.

    The platform has been fixed down and the plaster filler applied to the landform. Hopefully tomorrow it will be greened if dry.

    IMG_20220402_160805_1.jpg

    In the above photo you can't really see that I've smoothed over the apron in front of the clay dries - more cracks and holes filled.

    After making a socket for the co-acting signal, the ground was made up around it as below.

    IMG_20220402_160856.jpg

    And the wall in front of the cottage was fixed in place and the ditch created.

    IMG_20220402_160749.jpg

    The cottage is still removable, as are the trees and clay dries, as it won't help having them fixed before fitting the backscene. Kicking myself for not checking the opening hours.

    IMG_20220402_161452.jpg
     
    Level crossing gates trial fit
  • Pencarrow

    Western Thunderer
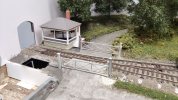
    Just before popping down the pub last night I had time to consider the location of the level crossing gates. I decided to be conventional and put them either side of the track over the road.

    IMG_20220402_182928.jpg

    I'm using a MSE kit which includes white metal castings for the gates and posts, some etches, some netting and various bits of wire. Oh and some very confusing instructions which leave you to guess which post is which.

    The crossing is bigger than I expected, so I may have to move the Megapoints controller servo board. That is is I haven't already drilled through it...

    The gates will be moveable but unpowered for the first show bit if anyone has any ideas on how best to move one gate then the other by servo then let me know.
     
    Backscene finally arrives but...
  • Pencarrow

    Western Thunderer
    Which is a good job because I need to finish this blessed layout by the 22nd and it's definitely fighting me.

    Now the backscene. This is version 3 (don't ask)...

    rps20220408_122655.jpg

    The two main things in the written specification I gave were: 1. Matt finish. 2. Must be able to bend down to a 100mm radius for the corners.

    Well. Item 1 was the cause of this being version 3, long story. Item 2, well let's just say it is somewhat noncompliant. The best it can manage, with some force, is 300mm and then you get wrinkles in the front.

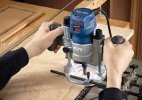
    I'm going to mull this one over but a router may be involved. By that I mean this sort of router
    download (1).jpeg

    Not this sort
    download.jpeg
     
    Car load test - it fits
  • Pencarrow

    Western Thunderer
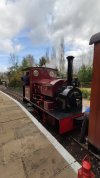
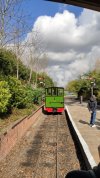
    I had friends over this weekend and, after the obligatory Friday visit to a Tap House in Ashby de la Zouch, we had a day of small and smaller trains at the Statfold Barn Railway on Saturday.
    IMG_20220408_163722.jpg

    IMG_20220409_121239.jpg

    IMG_20220409_134132.jpg

    IMG_20220409_140907_1.jpg

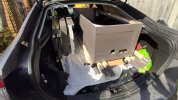
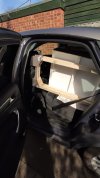
    Today has been a walk across the fields to a pub for Sunday lunch. But prior to that I did make use of the extra hands to lug all of Polsarrett down stairs and outside. The aim of the game was to settle my mind that everything would fit in the car...

    IMG_20220410_102912.jpg

    IMG_20220410_102921_1.jpg

    It did, with room to spare. Panic over. Thoughts are now turning to the blessed backscene...
     
    Backscene fitted
  • Pencarrow

    Western Thunderer
    Initial thoughts were that I'd solved the problem but...

    The routed off, thinned backscene worked in so much that I was able to curve it around. But, after a few minutes in place the photo print decided it would start creasing and parting from the backing board. Looked horrid (zoom into the corners in the photo below).

    rps20220410_181858.jpg

    So, after experimenting with a part at the bottom, I decided to just go with the flow. If it didn't want to stick to the backing board so be it. I pulled the entire print off the backing board and fitted the adhesive backed vinyl photo directly to the layout... Drastic measures pt2.

    rps20220410_182006.jpg

    Not perfect but I think it's as close as I'm going to get with this print. Will have to remember where all the trees went now.
     
    Last edited:
    Clay dries fitted
  • Pencarrow

    Western Thunderer
    Ticking more jobs off today.

    > Painted the headshunt buffer stop and bedded it in.
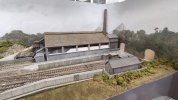
    > Painted the bag store and chimney.
    > Added vegetation around the back of the platform prior to putting the trees back.
    > Attached the clay dries to the board and the water tank to the dries.
    > Painted the fence railings for around the cottage.
    > Prepared and primed the railway boundary fence.
    > Added vegetation around the bottom of the backscene.
    > Added some red sections and oily blobs to the other two buffer stops.

    IMG_20220411_175232.jpg

    IMG_20220411_175328.jpg

    IMG_20220411_175248.jpg
     
    Top