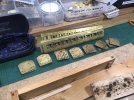
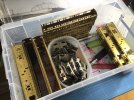
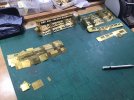
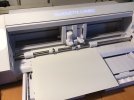
4mm On Heather's workbench - on a Holden to…Yarmouth?

On to bodywork

Heather Kay

Western Thunderer
With most of the underframe work complete, and still feeling a distraction from detailing the bogies is worth the effort, I turn to bodywork assembly.

As you may recall, I had assembled sides and ends some time ago. Theoretically it would be possible to join corners with only the aid of a square or three. This may be okay for a couple of bodies, but I’ve got 16 of the blighters to blunder through. Some further help in the form of a basic jig seemed sensible.
9345999D-C88F-4032-AA5A-DEFFCB0E912C.jpeg

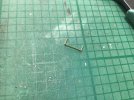
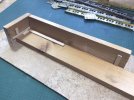
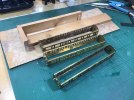
I spent far longer thinking about a jig than it took me to cast around for scraps of hardboard and timber, plug in the hot glue gun and just build it! I think you should be able to work out how it operates. An end can be wedged in place, with the corresponding side likewise. Adjustment should be minimal, with just a smidge of wiggle room, and the parts held enough that a couple of quick dabs of solder can be applied to join things together.
C29DF1BD-180B-40BC-9E33-0D4EE3C0A05E.jpeg

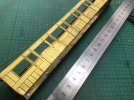
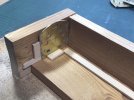
Here’s an end. Of course, all the detail is in place on the ends. I don’t want to damage any of that, so the strips of wood at the bottom allow for the depth of the end steps and the turnunder. I have since modified the nearer upright to allow for sliding the second side in place. You’ll see what I mean in a bit.
4AB76EB6-F7BE-4731-9583-AA7520168031.jpeg

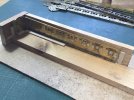
Add a side, tweak and adjust things along the joint by Eyeball, Human, Mark One - the end goes inside the side - drop of flux and in and out with the iron. I’ve taken to tack soldering. There doesn’t seem to be a need to run a seam, and tacking avoids the danger of overheating the relatively thin brass.

What I found, with the first attempt, was the end steps still got damaged. This was mainly during the extraction process, because the fit is meant to be tight. To solve this, and to check I got the turnunder curve correct at the much earlier stage, I reinforce the steps from inside. The resulting blobs are not pretty, but they’re not going to be seen. I also find I need to deal with the occasional loose lamp bracket, which is annoying but unavoidable. One's soldering isn’t always as good as one would hope.
0A0E2CD2-AC0A-41AE-906E-CE53440587DD.jpeg

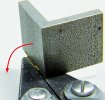
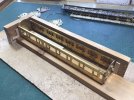
After joining an end and a side, I extract them from the jig and check for alignment. Sometimes, the end isn’t square - yes, even with my fancy-pants jig - so I lay the side flat on the bench and slap an engineer's square against the end. Some careful bending usually solves the problem. Sometimes, the end hasn’t seated neatly aligned with the side, so a bit of gentle persuasion against a flat surface and the application of the iron lets things click into place.

My original scheme was to join a pair of ends-and-sides on the bench. I realised the jig would make this easier, with one sub-assembly wedged in place and the other offered up. It takes a bit of a fiddle sometimes, but It does work. There’s no point that I can see to adding any more woodwork to aid the process.
469F1DC9-E3C9-420E-950A-D2C30B4EA2BF.jpeg

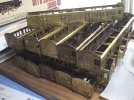
And after a bit of obligatory cursing and singed fingers, three composite bodies are made. They’ve just had a bath to rinse flux off. One final check, once both halves are joined, is using the square to check the corners are within a gnat's semi-quaver of 90°.

Now I know the jig works well enough, I can plough on with the other bodies. I think I’ll need to sort out storage again. In flat pack form storage was manageable. Now I’ve got 3D bodies to stack up.

Anyway, I’ve had enough for today. More construction next week.
 

D6356

Western Thunderer
A neat jig arrangement certainly useful even if just making one, singed fingers - part of the fun? I look forward to progress- quicker than my glacial progress.
Robert
 

Herb Garden

Western Thunderer
With most of the underframe work complete, and still feeling a distraction from detailing the bogies is worth the effort, I turn to bodywork assembly.

As you may recall, I had assembled sides and ends some time ago. Theoretically it would be possible to join corners with only the aid of a square or three. This may be okay for a couple of bodies, but I’ve got 16 of the blighters to blunder through. Some further help in the form of a basic jig seemed sensible.

View attachment 180111

I spent far longer thinking about a jig than it took me to cast around for scraps of hardboard and timber, plug in the hot glue gun and just build it! I think you should be able to work out how it operates. An end can be wedged in place, with the corresponding side likewise. Adjustment should be minimal, with just a smidge of wiggle room, and the parts held enough that a couple of quick dabs of solder can be applied to join things together.

View attachment 180112

Here’s an end. Of course, all the detail is in place on the ends. I don’t want to damage any of that, so the strips of wood at the bottom allow for the depth of the end steps and the turnunder. I have since modified the nearer upright to allow for sliding the second side in place. You’ll see what I mean in a bit.

View attachment 180113

Add a side, tweak and adjust things along the joint by Eyeball, Human, Mark One - the end goes inside the side - drop of flux and in and out with the iron. I’ve taken to tack soldering. There doesn’t seem to be a need to run a seam, and tacking avoids the danger of overheating the relatively thin brass.

What I found, with the first attempt, was the end steps still got damaged. This was mainly during the extraction process, because the fit is meant to be tight. To solve this, and to check I got the turnunder curve correct at the much earlier stage, I reinforce the steps from inside. The resulting blobs are not pretty, but they’re not going to be seen. I also find I need to deal with the occasional loose lamp bracket, which is annoying but unavoidable. One's soldering isn’t always as good as one would hope.

View attachment 180114

After joining an end and a side, I extract them from the jig and check for alignment. Sometimes, the end isn’t square - yes, even with my fancy-pants jig - so I lay the side flat on the bench and slap an engineer's square against the end. Some careful bending usually solves the problem. Sometimes, the end hasn’t seated neatly aligned with the side, so a bit of gentle persuasion against a flat surface and the application of the iron lets things click into place.

My original scheme was to join a pair of ends-and-sides on the bench. I realised the jig would make this easier, with one sub-assembly wedged in place and the other offered up. It takes a bit of a fiddle sometimes, but It does work. There’s no point that I can see to adding any more woodwork to aid the process.

View attachment 180115

And after a bit of obligatory cursing and singed fingers, three composite bodies are made. They’ve just had a bath to rinse flux off. One final check, once both halves are joined, is using the square to check the corners are within a gnat's semi-quaver of 90°.

Now I know the jig works well enough, I can plough on with the other bodies. I think I’ll need to sort out storage again. In flat pack form storage was manageable. Now I’ve got 3D bodies to stack up.

Anyway, I’ve had enough for today. More construction next week.
Loving the jig, hope you don't mind me borrowing your good ideas....

I know what you mean about storage.... When I worked in sheet metal fabrication our shop floor supervisor used to call it the popcorn effect when something went from a pile of flat plates in the corner to a huge entity taking up more than it's fair share of floorspace.

I may be wrong but it seems to me that unbuilt kits and to a lesser degree fine shed stock take up a normal amount of space..... Half built things seem to take over the entire work bench....
 

Chas Levin

Western Thunderer
As others have said, excellent jig! Just in case you haven't come across them though, you might be interested in Coffman clamps, which can hold two flat pieces at a right angle while soldering:
Coffman Right Clamps - especially the Long Combo Right Clamp
The ones with the orange pads are heat resistant for soldering.
I use a combination of jigs like yours (though not as sturdily built as yet!) plus these clamps for some jobs - not cheap, but a really useful addition tool.
 

Heather Kay

Western Thunderer
Hi Chas! Sorry for the delay responding, but thank you. I have considered clamps before, but the slight problem is coaches tend to have a subtle turnunder on sides and ends. These sides, being half-etched for the panelling, are also a bit prone to distortion. For wagons, I suspect such clamps would be ideal. Sadly, I have no wagons in the build queue. :(

Things have been plodding along here. Mrs Mojo keeps wandering off, and there’s been a good deal of thinking about whether I want to carry this malarkey on much longer. This generally happens on or around birthdays, and as each year adds one to the score I begin to wonder about Life, The Universe and Everything and how it affects me and mine. Then I glance in the general direction of the waiting pile of stuff…

Anyway, I’ve not updated this thread of late chiefly because things are boringly slow and repetitive as I work through making up bodies from parts.

539CA0F5-B6B5-43EA-88F9-1D46320977A8.jpeg

The jig more or less works as I’d hoped, but has needed some subtle hacking about to accommodate different end features, and side rails, on the brake thirds. This pile of bits is for the all thirds. The process works a bit like this:
  • Cut back the top body side internal strip a bit to allow an end to sit snugly. (Most sides are etched with the rebate, but it’s not consistent in size.)
  • Clean and tin the inside ends of the sides.
  • Reinforce the end steps with a dab of solder inside. This is so they can withstand being jammed into the jig!
  • Clean and tin the mating edges of each end.
  • Check, and if required adjust, the ends and sides for the turnunders.
  • Assemble a side and end in the jig, tack solder.
  • Remove parts from jig.
  • Find they are misaligned.
  • Swear.
  • Try again!
  • Sort of hold both pairs of sides/ends so they can be tacked together.
  • Spend a bit of time making small adjustments so things are aligned neatly.
  • Rinse and repeat until either bored silly or I’ve run out of parts.

296CFE20-D3EF-4334-9A90-4FDBD8C88598.jpeg

Now things are becoming more three-dimensional, better storage than ice cream tubs is required. Yes, of course I still have to detail all the bogies. I’ll get there, one day. Storage will get a bit more complicated once the bodies join the underframes. I’ll worry about that when I get there.

Past Me left a bit of a boo-boo for Future Me. Present Me is still annoyed, but I hope Future Me will be happy with the fix. Essentially, the problem comes down to the cross-brace parts for the bodies. They’re meant to include mounting holes for bolts to attach the bodies to the chassis. They do, in fact, but because we are mixing and matching third party bogies, the bogie mounting plates don’t include the relevant holes for the bolts. As I was wondering how to sort that out - more another time - I realised that, for whatever reasons, I only had about half the number of body cross-braces I actually need. This lack wasn’t caused by me, but the original owner/part-builder of the kits many years ago. I will need to make up my own cross-braces for the rest. More, as I said, another time.

That's enough blether from me. I’ll document the cross-brace saga when I get to it.
 

Jordan

Mid-Western Thunderer
Past Me left a bit of a boo-boo for Future Me. Present Me is still annoyed, but I hope Future Me will be happy with the fix.
Past me, Present me & Future me... hmm, not a fan of the wonderful Calvin & Hobbes cartoons, are you, by any chance?
Those who are, will probably know which adventure I'm thinking of. ;)
Those who aren't, I apologise for the gobbledegook. :oops:
 

Daddyman

Western Thunderer
Past Me left a bit of a boo-boo for Future Me. Present Me is still annoyed, but I hope Future Me will be happy with the fix. Essentially, the problem comes down to the cross-brace parts for the bodies. They’re meant to include mounting holes for bolts to attach the bodies to the chassis. They do, in fact, but because we are mixing and matching third party bogies, the bogie mounting plates don’t include the relevant holes for the bolts. As I was wondering how to sort that out - more another time - I realised that, for whatever reasons, I only had about half the number of body cross-braces I actually need. This lack wasn’t caused by me, but the original owner/part-builder of the kits many years ago. I will need to make up my own cross-braces for the rest. More, as I said, another time.
In Past You's defence, Past Me may have misled you slightly in post #13...
 

Heather Kay

Western Thunderer
In Past You's defence, Past Me may have misled you slightly in post #13...

I'm not sure you did, you know. I’m often as guilty as anyone of just piling into a project without thinking far enough ahead to avoid silly errors that come back to bite me in the backside.

not a fan of the wonderful Calvin & Hobbes cartoons, are you, by any chance?

I am a fan, but not enough to know that’s a likely source of the Past/Future Me meme. I just picked it up from other places that have used it, and it seemed to suit the way my life seems to go sometimes!
 

Heather Kay

Western Thunderer
I know, I know. It’s very difficult being motivated at all at the moment.

I roused myself last week and completed the remaining coach body assemblies. Now I’ve 16 bodies, 16 underframes, 32 bogies. I still need to arrange the body cross beams, but I’m not in the metalbashing mood at present. I really ought make a bazillion commode rails and attach all door ironmongery to the bodies. They need to be soldered in place, which is going to make painting a bit of a chore, but I really don’t think fixing after painting is going to work.

Anyway, today, I began assessing the innards.

A461B36A-0879-4E12-B64B-BFA08AABB877.jpeg

Like the bodies, some had been partially assembled already. For whatever reason, the kits are designed with insufficient etched compartment partitions. This wouldn’t have been a problem when I began the job, because the client wasn’t intending there to be any detailed insides beyond the supplied compartment parts. Now we have settled on seating as well as a some figures. I need more compartment partitions, then.

(I think the intention is you cut more partitions from some of the plastic sheet provided.)

I had decided to deploy my Silhouette Cameo on the job. I bought it with this sort of work in mind, aside from the plastic plane paint stencil stuff. I scanned one of the etched partitions, and traced the shape in Affinity Designer. I generally prefer to do the artwork and layout in that software, because it’s far less clumsy and downright annoying than the Silhouette software. Exported as an SVG, I could bring it into the cutter package and fiddle around until I was ready to try a cut.

C9C07780-6A86-4E6B-9311-6E86919F7631.jpeg

I had some 22 thou plastic sheet in stock. I trimmed it down to about the maximum the cutter can handle without needing a larger desk. The settings for the cutter were very much suck it and see. I’d not done a score cut before, so I applied some settings and tried it to see what happened. I didn’t really want a full cut, preferring something scored enough that I could snap pieces out of the sheet later.

The first run wasn't quite deep enough. The cutter is pretty accurate, so I was able to feed the sheet back in and do another run with a slightly deeper and stronger cut and it all lined up again. I expected to waste a sheet, but I needn’t have worried.

D1D4E9BE-CD8C-47C4-9AD3-46D523352168.jpeg

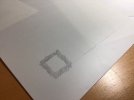
I have rubbed a soft pencil over one of the shapes to highlight it. This is the first sheet after the second run. I can live with that, even if a little scalpel work will still be needed. At least I haven’t got to trim each shape myself.

While I was drawing the partitions I also worked out a roof shape. I intend to try and use the kit supplied vacuum-formed roofs, but I wanted to reinforce the shape if I could. Scanning and tracing one of the coach ends gave me what D&S thought was the right shape. I created a crescent shape, with a squared off bit at the bottom that should slot between the tops of the coach sides. I plan three or four of these along each roof, just to give a little rigidity to the shape, and some method of fixing it to the coach itself.

DFC1B815-9715-4729-B71B-9552A57A24F4.jpeg

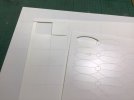
Here is the result. Again, none has scored as deeply as I’d have liked, but it’s far enough that I can work at a piece to snap it out without too much effort. A bit of help with sharp blade doesn’t hurt.

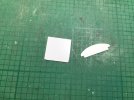
2FBBDC34-ED6C-4790-9343-D0E449D423BC.jpeg

A quick rub with a sanding stick cleans up the edges. Pretty happy with that. By the by, plastic compartment partitions will help with attaching the plastic seating, once I’ve ordered sufficient. I must work out how much I need!

Well, that was a job I’d been putting off for ages. This was partly because I really don’t enjoy fiddling with the computer any more, and partly because I'm always afraid of making a mess of something, or breaking an expensive tool. I have to admit, the Cameo has pretty much handled most things I’ve thrown at it. I just need to use it more often to get comfortable with the software and hardware.

I suspect there will be another gap before a further update. Life's like that at the moment.
 

Rob Pulham

Western Thunderer
Hi Heather,
I find that multiple cuts, gradually increasing the blade depth between passes works best for cutting styrene. As long as you don't unload the cutting mat/work piece, it will retain its registration between each cut.
It also has the benefit of prolonging the life of the blade.
 

michael mott

Western Thunderer
Thanks for the description of the work with the silhouette cameo Heather, I have been considering getting something like one for myself for some time now. Perhaps this birthday or next.
Michael
 
Give us a hand - rail

Heather Kay

Western Thunderer
Truth be told, my heart's not been in this project for a while. To keep it going, with some vain hope it might one day be completed before either I or my client drop off our respective perches, I try to attack it in little pieces. There's a modern day business parable that fits, called "eating the frog".

Every day, a worker gets in to work. Every day, they are confronted by a massive frog on their desk, as well as all the other work they have to do. Every day, they ignore the frog, and do the other work because it’s easier than dealing with the frog. Every day, the massive frog is still there. What they really should do is get the worst job - eating the massive frog - done first. Then every other task is easy. I need to learn to eat that frog.

Anyway, today's little piece was handrails.

These coaches have an annoying handrail. It’s basically straight, but has a tiny right-angled bend right at the top. Think of a very thin inverted L and you’ll know what I’m mean. I can’t go the easy way and simply fit straight handrails because the etched holes are offset. I pondered this task for far too long. I was sidetracked into thinking I really needed some clever gewgaw to aid bending to ensure each bit of brass wire was the same, and to make the job reasonably fast because I need dozens of the things.

What I really needed was a pair of pliers.

26C06B94-CA3B-4D2B-A6C5-20D2AD89BAF6.jpeg

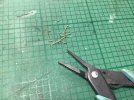
Inevitably, I ended up with a fair bit of wastage. These are failed handrails. They are too long, or bent the wrong way, or both.

D35049F8-559B-4069-87BF-A628219BFE24.jpeg

Eventually, I got one bent the right way. It was still too long - not by much, but enough to be annoying. I saved this one to act as an aide memoire, because I’m a bit thick and will easily forget to bend the right way.

9B28F644-3D71-4FEB-9ECC-36AC720C5BCC.jpeg

After a bit of rude language, I got into something of a swing. I have managed four handrails. I decided to quit while I was ahead - I didn’t sleep all that well last night, and concentration is somewhat lacking. I will pile into the handrail manufacturing game tomorrow, aided by some loud music and strong coffee.

Eating that frog. Ribbit.
 
Last edited:

DavidB

Western Thunderer
Heather. Do you have a Bill Bedford handrail jig? They will enable you to make handrails of a consistent length. As for folding the end, I suggest holding the handrail in a pair of - (parallel) pliers with just a bit sticking out, then rolling the top over using a small block of (square ended) steel. I have used a back to back gauge. Hold the handrail tightly, put the block against the handrail and roll it over. After a couple you will know how much to have protruding and should be consistent.

The handrails I was making needed both ends rolling over, but I am sure you can work out how to do yours. :)
_MG_4376.jpg
 

James Spooner

Western Thunderer
Heather, you have my sympathy. Having made a number of these coach kits now, I have got into a swing of making the grab rails but one, maximum two, coaches and I’m reaching for the gin and looking for something else to do modelling wise before venturing back. Making up the number you are (did you say sixteen?) has to be a recipe for a complete loss of mojo. I’m not sure I have any encouragement for you apart from the old adage about eating elephants (one mouthful at a time).

Good luck!

Nigel
 

Heather Kay

Western Thunderer

I do, but I’m afraid I’ve never really got on with it. (Sorry, Bill.) I will dig it out and see if it’ll help with maintaining consistent overall length, though.

I experimented with my Hold’n’Fold as well, but just eyeballing it with the pliers turned out simplest in the end.

apart from the old adage about eating elephants

Frogs, elephants, whatever, they will get eaten eventually. :thumbs:
 

Heather Kay

Western Thunderer
B4DA5338-977E-44CB-8247-6047CCB16BB7.jpeg

It has been, I happily admit, something of a slog. However, this pile of bodies now has a full set of commode and grab handles affixed. Still to do, tidy up inside each body. The tee handles for the doors will wait until painting is complete, I think. Then again, perhaps that’s not a bad thing to fix next.

I'll think on that.

The slog has been down to mojo walkout, and various domestic health issues. Best Beloved, as many of you may know, is not in the first flush of youth. He's been finding it difficult to walk for some time, even with an aid. It got so bad of late we have acquired a wheelchair so at least I can get him to medical appointments in a reasonable time. The medics have been consulted, and blood tests are under way, and hopefully we might get to the bottom of what ails him. So, I’ve found myself being called upon to honour those wedding vows and have become a pretty much full-time carer. Just another thing that’s persuading me it might be time to start thinking about winding operations down a notch or three. It’s also meant we have decided not to travel to various meets and shows. If you miss us, you’ll know why.

The eagle-eyed will spot a plastic kit box lurking in the photo. A 1975 vintage Airfix Short Stirling is giving me an interesting diversion from brass and solder. It won’t look much like Airfix intended it once I’m done, mind.
 

Osgood

Western Thunderer
Sorry to hear of your collective troubles - how frustrating life can be.

Looking at all those coaches, I think that you have adopted a far safer stacking method than that used by Vic Berry for stacking rats.....
I'm now looking at my stable stack of 42 x Peco iron ore tippler kits and thinking - Nope, that really isn't the problem I once thought it was! smiley sweat.gif
 
Top