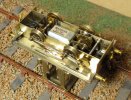
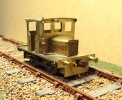
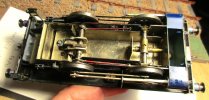
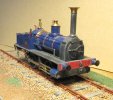
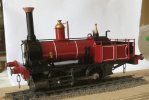
Wantage Tramway Jane No. 5 in 4mm

AdeMoore

Western Thunderer
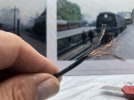
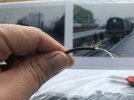
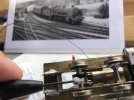
Have you tried mouse tail wire? As in the fine flex in computer mice wires (pre Bluetooth). It is very fine and flexible.
Overseer, sorry don’t know your proper name! Brilliant tip worked very well.

4F86F8B2-F034-4A9E-B3B2-D6667ED192EE.jpeg


48110A04-A8DF-46CF-843E-A7B49B11C39C.jpeg


7C798E82-F104-4242-9290-9379B6F57F46.jpeg

7C647229-F56B-44FC-8B7A-9C124ACD565E.jpeg


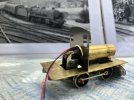
Which led to a bit of a milestone,

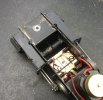
To get there I risked inserting the tiny grub screw that goes in the gear hub on the axle!
Dropping it would of seen it gone forever in the van!

A8D12671-4318-430F-BDE1-53F850FF4D78.jpeg

E42D8A9A-19AB-493A-A036-A7A09774D551.jpeg

2CEA3982-B94C-49BF-9F74-B4EC06E9E444.jpeg

Tiny don’t know how the 2mm guys do it! Blue tack on the tip of the small screwdriver did the trick.
Reviewing the video I see I need to get the springs on the hornblocks done, Although Dave didn’t do compensation so I’m wondering whether to solder them in and forget any compensation.
Now I know it works time to remove the footplate and sort the well tank etc.
Cheers all for looking in and the advice.
 

Overseer

Western Thunderer
I would certainly recommend compensation for small, light locos. A central pivot on the front axle should be easy to fit, and easy to conceal as the well tank extended over the front axle. Compensation gives reliable pick up and adhesion without needing to add lots of weight.
 

Ian@StEnochs

Western Thunderer
I would certainly recommend compensation for small, light locos. A central pivot on the front axle should be easy to fit, and easy to conceal as the well tank extended over the front axle. Compensation gives reliable pick up and adhesion without needing to add lots of weight.

Certainly for any four couple loco, but especially one with only four wheels, the single pivoted axle is easy to arrange and improves running no end. You don’t need much rock, 1/2 mm plenty, but pickup is transformed.
Ian.
 

AdeMoore

Western Thunderer
I would certainly recommend compensation for small, light locos. A central pivot on the front axle should be easy to fit, and easy to conceal as the well tank extended over the front axle. Compensation gives reliable pick up and adhesion without needing to add lots of weight.

Certainly for any four couple loco, but especially one with only four wheels, the single pivoted axle is easy to arrange and improves running no end. You don’t need much rock, 1/2 mm plenty, but pickup is transformed.
Ian.
Thanks chaps but I feel I could do with some guidance on what your saying.
I was going with a set of hornblocks and some spring wire bearing on them.
I probably used the wrong word when I said compensation, as thinking about it that’s like a rocking motion between 2 axles?
I‘ll have to have a search and see what the options are from what you have said.
Cheers for the comment.
Ade
 

Ian@StEnochs

Western Thunderer
Ade,

I understand where you are coming from. My first pugs were sprung on all wheels and their performance running wise was good. However with the short wheelbase and long overhangs they were very unrealistic in motion as the body tended to pitch forward and back in a nodding donkey sort of way! I had used commercial hornblocks and guides with coil springs on which the loco rode.

I now favour 3 point suspension on my pugs and find running qualities just as good but without the fore and aft motion.

Here is a photo of one of my more recent pugs sans body. I hope it’s clear enough but photographing black things isn’t that easy.

4824D17F-025A-4C5C-A37B-35C6A9015160.jpeg

The 0-4-0 is driven on the rear axle which has bearings fixed rigidly in the frames. The front axle runs in axleboxes and guides, just a brass block and two pieces of brass angle, with about 1/2 mm up/down movement. The boxes are held out against the frames with a piece of brass tube. At its centre a pivot pin, brass wire, soldered to the front spacer, sets ride height and permits the axle to rock. I have soldered a small piece of flat sheet on the tube on which the pin bears. That was used to fine tune height, by trying different thicknesses until the loco was level. It also stops the tube rotating. The hole to the left is simply for lubricating the axle.

I hope this helps,

Ian.
 

simond

Western Thunderer
Ade,

assume your rear axle is running in fixed bearings. You want the front axle to be able to rock a little to ensure that both wheels, on both sides of the loco, can stay in contact with the track, if there is any twist, or ‘umps & ‘ollers. Effectively, to allow the axles to deviate from parallel in front view.

There are a few options.

Fraser’s suggestion of a rocking pivot in the centre of the front axle is probably the simplest. You can form a bit of sheet, or stiff thick wire to form something for the axle to run on, and this controls the ride height of the front of the loco. The hornblocks slide up & down, but ensure that the axles stay parallel in plan view, and provide a surface for the washers that prevent too much side play in the axle. Actually, you could just slot the frames as the load is carried by the fulcrum, and the fore&aft forces are tiny.

the other options would also include hornblocks, which can be sprung with piano wire, or coil springs

hth
Simon

Edit, Ian posted as I was composing this. Copy what he’s done!
 

AdeMoore

Western Thunderer
Ade,

I understand where you are coming from. My first pugs were sprung on all wheels and their performance running wise was good. However with the short wheelbase and long overhangs they were very unrealistic in motion as the body tended to pitch forward and back in a nodding donkey sort of way! I had used commercial hornblocks and guides with coil springs on which the loco rode.

I now favour 3 point suspension on my pugs and find running qualities just as good but without the fore and aft motion.

Here is a photo of one of my more recent pugs sans body. I hope it’s clear enough but photographing black things isn’t that easy.

View attachment 165405

The 0-4-0 is driven on the rear axle which has bearings fixed rigidly in the frames. The front axle runs in axleboxes and guides, just a brass block and two pieces of brass angle, with about 1/2 mm up/down movement. The boxes are held out against the frames with a piece of brass tube. At its centre a pivot pin, brass wire, soldered to the front spacer, sets ride height and permits the axle to rock. I have soldered a small piece of flat sheet on the tube on which the pin bears. That was used to fine tune height, by trying different thicknesses until the loco was level. It also stops the tube rotating. The hole to the left is simply for lubricating the axle.

I hope this helps,

Ian.
Ian a perfect explanation thanks, Simon thanks also.
This build now in its 4th year! I was supposed to be doing that all along ! So long since I read the instructions clean forgot about it.
@Dave Sutton sent me his build notes recently, guilty of not reading those yet!
Found the relivant bit in the 7mm instructions.
3F6BD565-1364-4627-AAAB-01052030449D.png


Cheers for all the advice and Ian for the pic.
 

Overseer

Western Thunderer
The centre bearing for the rocking axle doesn't need to be fancy. This HO scale 18.3mm gauge 1930s diesel has a piece of brass soldered to a cross member. This has 9.6mm diameter wheels, so smaller than Shannon, and runs very reliably. The motor is a 1015.

mm IMG_6534.jpg
mm IMG_6538.jpg

Or a 7mm scale example.
ge IMG_6546.jpg
ge IMG_6544.jpg
Yes, Shannon in original condition in S7. The well tank hides everything.
 

Richard Gawler

Western Thunderer
In the 7 mm example, can I imagine the two shortest lengths of brass tube are simply filed down to make some flats and then soft soldered together? It looks so simple. Many thanks.
 

AdeMoore

Western Thunderer
The centre bearing for the rocking axle doesn't need to be fancy. This HO scale 18.3mm gauge 1930s diesel has a piece of brass soldered to a cross member. This has 9.6mm diameter wheels, so smaller than Shannon, and runs very reliably. The motor is a 1015.

View attachment 165459
View attachment 165458

Or a 7mm scale example.
View attachment 165461
View attachment 165460
Yes, Shannon in original condition in S7. The well tank hides everything.

In the 7 mm example, can I imagine the two shortest lengths of brass tube are simply filed down to make some flats and then soft soldered together? It looks so simple. Many thanks.

What a sweetie.

After doing here in 4mm I then did her in 7mm too...a glutton for punishment!

View attachment 165473
Thanks all fabulous stuff, @Dave Sutton you built both of them in record time over on RMweb shame the photos have gone. Makes what was an immersive thread not yours specifically but all the old ones pretty fruitless reading.
Lets hope they can sort it. Glad I duplicated all my threads on here. Some I copied photo links and all so I’ve had to replace those but it wasn’t many to do.
Cheers all for your contribution.
Cheers
 

Overseer

Western Thunderer
In the 7 mm example, can I imagine the two shortest lengths of brass tube are simply filed down to make some flats and then soft soldered together? It looks so simple. Many thanks.
It is simple but not quite as simple s it looks. The top pivoting piece of tube was cut in half so can be lifted off the pivot rod. The axle tube has a top hat bearing in each end so the full length of tube is not in contact with the axle to reduce friction. But yes the two pieces of tube are just soldered together. I found on an earlier model that a solid tube pivot tended to jam up with old lubricants or grit, half tube avoids that.
 

Richard Gawler

Western Thunderer
. . . The top pivoting piece of tube was cut in half so can be lifted off the pivot rod. The axle tube has a top hat bearing in each end so the full length of tube is not in contact with the axle to reduce friction. But yes the two pieces of tube are just soldered together . . .

To just disect your arrangement because I want to arrange two rocking axles on a forthcoming loco model . . .

Screenshot 2022-06-20 06.44.04.jpg

A. Two lengths of wire stop the hornblocks dropping out of the chassis when the model is lifted off the track
B. Length of tube cut down to a half-round
C. and D. butt joints where the ends of a brass rod meet the frame spacers
E. Two top hat bushes

Please, does this sound right? I am beginning an 0-4-2 tank and I'd like to do this for the leading axle and the trailing axle.
 

simond

Western Thunderer
An 0-4-2 tank presumably needs drive on one of the axles, so will require double rocking beams to provide clearance for the gearbox. The trailing axle therefore needs to rock sideways, and this design is a good solution for that.

the “three legs of the stool” are the centre of the trailing axle and the two rocking beam pivots.

the rocking beams can bear on the hornblocks, or, if you’re less bothered about a scale appearance for the chassis, can carry the axle bearings directly. Either way, the frames are slotted to allow vertical movement of the drive axles.

Don‘t fix the middle axle, it’ll either act as a fulcrum, or not reach the track!
 

AdeMoore

Western Thunderer
A little 4 month interlude to enjoy summer and it was a scorcher, still very warm now here in Somerset no heating on yet!
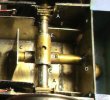
Bit more done at lunch the pivot for the front axle soldered in! well did it twice! First time soldered on the bottom!
Never going to be neat but it’s there, and as yet untested.
Put her back together tomorrow for a test.

37D0996D-E998-4E9F-A816-04DF1BE7F092.jpeg

1B2141DD-7019-4721-95B4-2282412C2C68.jpeg

Cheers for looking in and the continued advice and support.
 
Last edited:
Top