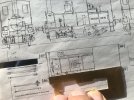
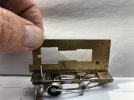
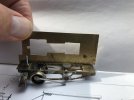
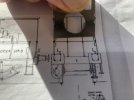
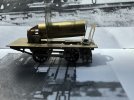
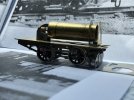
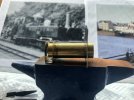
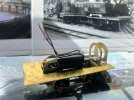
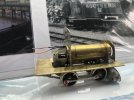
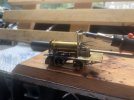
Wantage Tramway Jane No. 5 in 4mm

AdeMoore

Western Thunderer
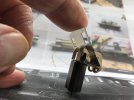
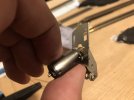
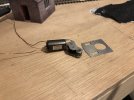
I think I mounted the motor with the flats on the side so I could feed the wires down the sides rather than the top/bottom, it's veerrryyy cramped in the firebox but there is a smidge of space at the sides. If I mount that way I do have to open out the screw holes. After bodging and grinding the gearbox to cut away the excess, I did think about soldering a piece of scrap etch across the top to strengthen it, but it seemed absolutely fine so didn't bother.

I do put a tiny spot of epoxy or solder on one side of the shafts just for peace of mind that they don't move, if I solder it's a very quick in-out with the iron then clean up with a file.

Yep I use a cutting disc in an expo to cut the shafts.
Cheers Dave much obliged as ever.
 

AdeMoore

Western Thunderer
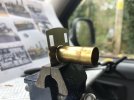
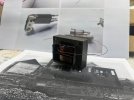
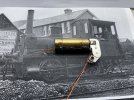
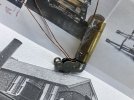
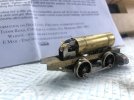
Need to test if those transformer wires are still insulated but they fit in the boiler barrel along side the motor.
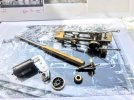
took the chassis apart for the first time in probably 2 years!
Forgot the tiny bushes were in the coupling rods! Good tip I always model in the van with a cloth on my lap, be surprised how many things been saved from the van floor.
Now I note I need to narrow the bushes for the axle soldered in the frames. To get the gearbox in, undecided whether to file em, or get the cutting disc out!

BF1D523C-74B5-40A1-B85E-53578F97675C.jpeg
05BE5019-D2A9-4C96-BDDF-B0A39FF926C1.jpeg
24F3A2C2-DDBB-4EF7-9C58-2E15D476126E.jpeg

67FBDA67-14FC-4311-928F-180124F050B7.jpeg
More soon.
Cheers.
 

AdeMoore

Western Thunderer
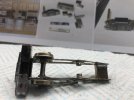
Ummm only had a nasty 300mm hacksaw in the van in a handle.
Didn’t go well started cutting the bushes back but then decided the snagging was too much and left it.
63411746-2C85-4CC9-969D-6CD1A795872E.jpeg

it all looks a bit shoddy now the frames I mean and the cylinder blocks. Considering starting again.
But on the other hand it’s a reflection of where I started and how life was treating me then.
I certainly don’t have the spare time to dedicate to it,
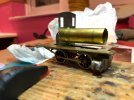
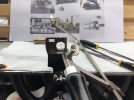
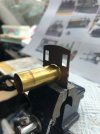
Next I filed up the boiler barrel and then trimmed out the hole in the cab sheet to fit. It wasn’t the best, I blame poor light that day in the van! I’ll sort it with some green stuff model filler, wrapping the barrel with a fag paper.
D061324C-1D78-4C84-9EB9-C467E03FB563.jpeg
01CA0ED2-3242-4839-8906-9B01A5FAD76E.jpeg
38B7916D-3F30-40CD-9264-13FF19767D4B.jpeg
Now thoughts are turning to how to make it so the motor and gearbox can be removed.
The firebox and back plate will have to be removable. Which then means the cab rear sheet and roof need to be removable. So then I can access the screws to the motor from the gearbox.
Then the smokebox and boiler barrel need to be removable to access the motor.
Seems a fair bit! Then how to achieve that, I’m thinking screws from below that turn into soldered nuts to the cab rear sheet. Roof could stay put soldered on or have some springy brass turned down to the inside the cab sides and springing outwards enough to hold it seen that done elsewhere.
The smokebox is already screwed on from below.
Cheers for the likes and support chaps.
Ade
 

Dave Sutton

Active Member
I dropped the motor and gearbox in as one so the motor poked out of the firebox, I then slid the boiler over the motor and fixed the smokebox with a screw up through the cylinders, this works well as there is no movement between motor and boiler. It does mean that to remove the motor and box you have to remove an axle but I figured the chances of that happening are pretty slim.....I hope...

Does your postcode still finish with '3NF'? if so I hopefully have some bits for you that might come in handy.:thumbs:
 

AdeMoore

Western Thunderer
I dropped the motor and gearbox in as one so the motor poked out of the firebox, I then slid the boiler over the motor and fixed the smokebox with a screw up through the cylinders, this works well as there is no movement between motor and boiler. It does mean that to remove the motor and box you have to remove an axle but I figured the chances of that happening are pretty slim.....I hope...

Does your postcode still finish with '3NF'? if so I hopefully have some bits for you that might come in handy.:thumbs:
Hi Dave I did re study your photos after I posted the above. I figured thats how you achieved it. I’ll probably follow suit.
Thanks for the valuable info.
Yes still at the same address. I need to pay you for your kindness.
Cheers for looking in.
 

AdeMoore

Western Thunderer

Little more done called for a bit at home to use the cutting disk.
Didn’t photo but carved off the width of the frame bushes to allow for the gearbox width.

4AC9C2F8-936D-491D-BF26-D696DA1F09C6.jpeg

Dave’s suggestion of dropping the gearbox through the cab front was way off!
Not for long though!

403D3E4F-6AFE-4DC1-B775-046A408E2707.jpeg
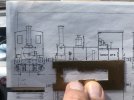
Next been trying to figure out the length of the footplate. I cut mine from a reduced photocopy. It appears over long.
The back should be flush with the frames the front does over hang the front frames but by how much.

18B5CE0F-61A8-4247-B4DE-99D2F5210DCB.jpeg
1417A2E1-E7BD-4071-BE64-A8DB901D075E.jpeg
9D2AA10A-DF34-4A9E-9C55-3319C40A9475.jpeg5A88130A-8DBA-4097-9041-9B85D1390535.jpegB8DB291A-35C6-4572-AAE2-C92DDBB6BD32.jpeg
Cab front just to be sure on the drawing to check.
Slice needs coming off the back of the footplate.

D6C622B1-850D-4E12-885D-D0B7418E6B46.jpeg

Wired up the motor to test before I stick the shafts for good seems fine.
Video included.
Sort the footplate and then get that on, fold up smoke box, solder on cab front and fit boiler barrel, then we’re probably ready for a test run on a wander lead.
Thanks for looking in and the likes.
More soon.
 
Last edited:

AdeMoore

Western Thunderer
Well The very very generous chap @Dave Sutton has been at it again. Sending me very very agreeable gifts!
You‘ll probably see it in the following photos.
Dave thanks so much you really shouldnt ! But amazing thanks. So perhaps there will be another van build!
So I now have a cheat to gaining correct dimensions!

EAE8509C-0E84-4A77-AD54-D8E6652AFDBD.jpeg
712E3ADC-9BC7-4DE4-88FE-A52B69BB10D4.jpeg

So I then snipped that to the correct length.
Below pretty pleased I had the fold lines cut right on the smokebox.

5E285D97-8EB5-455A-ACDE-E0E19B91E24D.jpeg

What you couldn’t see from the last photo in the post above a crafted photo to disguise the nut and bolt. As photo below.


3B2675B8-B163-41EC-AC1B-0EBDAB2178EF.jpeg

Back to the comfort of the modelling table at home and the disc cutter soon sorted that.

8B60F122-6CAD-488B-90A2-D65095B4A00D.jpeg

No vice left in the van did not want to waste time getting i. Magnet on a g clamp sticking to the axle no problem!

5DF0EF24-DD84-4934-A80F-C1B5AB5B1A43.jpeg

Footplate resting on nut below as I ran out of time.

A8D1BC3E-447F-4F51-9F5D-71CCC28B28C2.jpeg

More later
 
Last edited:

AdeMoore

Western Thunderer
While I was indoors I thought I’d re drill the badly located hole in the bottom of the smokebox.
Oh dear tried it without my magnifier.. drill slipped disaster.
I tried elongating the holes to meet up but only made matters worse.
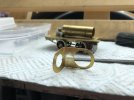
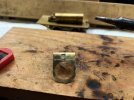
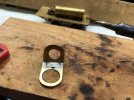
ended up soldering a plate in, van soldering at lunch today.

530A95C6-5F05-4EFF-BFE0-0D5B427E9076.jpeg

E338F961-9F50-4908-A081-5090CC5BADE7.jpeg

FDEEA0E0-B670-48AA-BA29-51746CE78421.jpeg

Drill it again time next!
Cheers for the likes and looking in.
Ade
 

AdeMoore

Western Thunderer
Got some more done but hit a snag which I can’t quite get my head around!
It appears the gearbox will not come up any higher as it needs to, to make the boiler barrel level.

574F6102-9D72-48AF-B32F-94F248600678.jpeg

Without the cab front all looks fine. I’m suspecting I need to lower the hole for the boiler barrel in the cab sheet.

A2DE89BF-7A61-4728-9935-A96A321A03AF.jpeg

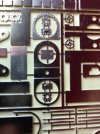
My smoke box distance footplate to barrel underside looks the same as Daves on his etch.
My footplate material is thicker by tiny bit. So a bit contributing there.
I need to get the vernier out, but in my view the cab sheet end needs the barrel hole dropping a bit.

04C55363-46FA-4C60-B3CE-69DC0E5C6E68.jpeg

Cheers for looking in and the likes.
Ade
 

Dave Sutton

Active Member
Interesting, I don't think Robin had that issue. I wanted the open cab so never tried the full cab etches.

I did get some pics of the a 7mm version that another modeller built from my etches and it looks superb!
 

AdeMoore

Western Thunderer
Interesting, I don't think Robin had that issue. I wanted the open cab so never tried the full cab etches.

I did get some pics of the a 7mm version that another modeller built from my etches and it looks superb!
Ah that’ll be because you drew it right!
Definitely boiler hole to high up in cab sheet.
Thinking what’s going to be the best way to fill a big hole and still make the barrel removable when I do it.
 

AdeMoore

Western Thunderer
On to sorting the problem.
Compared to the smokebox it didn’t seem a massive amount to take off I was thinking it would be much more.

C7113E66-7E00-4719-AB1E-1D49B93BBBA9.jpeg

Then a shot of what will need filling back in on top of the boiler barrel. Hope I don’t regret not cutting another, we’ll see.

4F0F75C5-4E72-430C-8848-127A92613FA7.jpeg

Apologies for not cleaning up the rust on the anvil but at lunch time is of the esence.
DD439C7A-30D4-406C-961C-EE76D4A766C8.jpegFED3B3B6-4921-4AAD-83D9-8455441B0A25.jpeg
More filing then I’ll dry run it again.
Cheers
 
Last edited:

AdeMoore

Western Thunderer
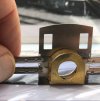
I'l send a message to Robin to see if he had any issues with the full cab sheets.
Cheers Dave I doubt he did as he would of accurately measured running board if that’s what it’s called to smokebox/boiler barrel bottom centre and transferred it to the cab sheet. Unlike me trial and error!
Cheers though all the same thanks for the encouragement.
Ade
 
Last edited:

AdeMoore
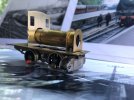
Western Thunderer
Moving on towards a test.
Footplate temporarily tacked with 70 deg solder. Badly! More heat was needed but good enough for a test.

57FBECB1-0AD0-475B-A94F-009F24CBB5D5.jpeg
Unfortunately the varnished transformer wire peels off when you bend it, so I tried some blue enamel paint to insulate it. On a multi meter that worked.

321EAC0F-36A4-4489-AC1C-3C661F0B60F3.jpeg

then slipped on the boiler barrel and cab sheet.

03706B2B-8A59-4C1C-A5B5-0F6FB9683601.jpeg

Also tack soldered the cab front with 70 deg to stop it floating around.

839F4B29-3B53-4B01-B1A7-4BAAB42BC6A2.jpeg

Next retest insulation insert grub screw on gear wheel (if I can see it!) and give it a whirl.
Thanks for looking in and all the likes.
Cheers
 
Top