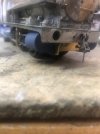
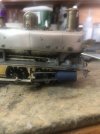
SimonD’s workbench

AJC

Western Thunderer
Perhaps Mr Churchward focussed on the big ones and let the students have a crack with the little ones?

Or the Cornwall Minerals Railway/Sharp Stewart legacy - wasn't Holcroft meant to be involved with these? He was in everything else...

Adam
 

Lancastrian

Western Thunderer
Another option is to turn down or thin the crankpin boss and have a coupling rod with an offset boss. On the 8F, the leading coupling rod was offset towards the frame and also had an offset boss.
Modified version of the MOK rods for my S7 8F.
20210218_202404.jpg
 
Crosshead clearance

simond

Western Thunderer
The Saddle Tanks were a legacy from the minerals line, and I believe the pannier version was closely based on them - I should have a look at the Holcroft books again. Clever bloke…

I was hoping that, given the rails are closer than scale in G0G 0F standards, if I made the cylinders etc to scale width, it would be reasonably easy. Of course, tolerances are bigger, and they, and clearances, don’t scale. There’s only about 0.2 sideplay. I really don’t want to get into skimming wheels, though it is an option if necessary.

Once I’ve sorted Chris’ loco, I shall build my ST. I imagine I’ll have all the same problems :(
 

Pencarrow

Western Thunderer
The Saddle Tanks were a legacy from the minerals line, and I believe the pannier version was closely based on them - I should have a look at the Holcroft books again. Clever bloke…

I was hoping that, given the rails are closer than scale in G0G 0F standards, if I made the cylinders etc to scale width, it would be reasonably easy. Of course, tolerances are bigger, and they, and clearances, don’t scale. There’s only about 0.2 sideplay. I really don’t want to get into skimming wheels, though it is an option if necessary.

Once I’ve sorted Chris’ loco, I shall build my ST. I imagine I’ll have all the same problems :(

The old 1366 certainly seems to be falling into the "challenging" and "character building" category. It's already given much of both to me and it looks like it's more than happy to keep on giving! Will be excellent once bashed into submission will engineering skill and knowhow though.
 

Paul Tomlinson

Western Thunderer
The Saddle Tanks were a legacy from the minerals line, and I believe the pannier version was closely based on them - I should have a look at the Holcroft books again. Clever bloke…

I was hoping that, given the rails are closer than scale in G0G 0F standards, if I made the cylinders etc to scale width, it would be reasonably easy. Of course, tolerances are bigger, and they, and clearances, don’t scale. There’s only about 0.2 sideplay. I really don’t want to get into skimming wheels, though it is an option if necessary.

Once I’ve sorted Chris’ loco, I shall build my ST. I imagine I’ll have all the same problems :(
Simon, it occurs to me that there is ample scope to take a little off the inner edge of the slidebars if necessary? I'm presuming they're currently to scale width? Cheers.
 

simond

Western Thunderer
More Pannier entertainment on which I will expand in due course, but a setback which I assumed was my fault, or at least that I’d done something wrong: not so fast Moriarty…

I originally drew / modelled the left cylinder for Chris 1366, and simply mirrored the right cylinder, using the built in mirror function. I’d done it a second time, having remodelled the cylinder mounting to the frames.

What I had not realised when I had come to assemble the right cylinder was that the complete failure to be able to insert the slidebars was not because I’d not supported the print correctly, or the Saturn had treated it differently to the left, but because the mirror function had not mirrored the damn holes. Well, it had, but only about a millimetre deep. this became evident when I printed six pairs of cylinders and all the left ones were good and all the right ones were not.

I then cut sections in the CAD model, and the feature is present, but not modelled correctly.

It’s trivial to fix, but rather annoying…. Now the model has been corrected, and I’ll print it tomorrow. Grrr.
 

Pencarrow

Western Thunderer
That must be frustrating Simon, when helpful technology isn't. But like autocorrect on the phone, or MS Word 'helpfully' changing things, or like the lane assist in the car trying to put you in a hedge...
 
Last edited:

Rob R

Western Thunderer
More Pannier entertainment on which I will expand in due course, but a setback which I assumed was my fault, or at least that I’d done something wrong: not so fast Moriarty…

I originally drew / modelled the left cylinder for Chris 1366, and simply mirrored the right cylinder, using the built in mirror function. I’d done it a second time, having remodelled the cylinder mounting to the frames.

What I had not realised when I had come to assemble the right cylinder was that the complete failure to be able to insert the slidebars was not because I’d not supported the print correctly, or the Saturn had treated it differently to the left, but because the mirror function had not mirrored the damn holes. Well, it had, but only about a millimetre deep. this became evident when I printed six pairs of cylinders and all the left ones were good and all the right ones were not.

I then cut sections in the CAD model, and the feature is present, but not modelled correctly.

It’s trivial to fix, but rather annoying…. Now the model has been corrected, and I’ll print it tomorrow. Grrr.
Repeat after me (slowly) "3d printing is fun....."
 

simond

Western Thunderer
3DP has become pretty routine, so it's not that aspect that hacked me off. I'm a reasonably competent Solidworks pilot, (I even have a certificate!!!) but there are some functions that do not always behave as desired, and it appears that "mirror part" is one of them;


the instructions are pretty clear but the result was bizarre. It may have been to do with the way I had created the original part but the holes in the rear cover face were extended into the body in the LH version, and were not in the RH. The trouble was that this was pretty much invisible unless you either sectioned the part or you carefully lined it up and looked up the hole!

One thing that is perhaps annoying about the process is that the results are very dependent on the final stage of aligning and supporting the part, and so if, as in this case, the part model is wrong, you have to do the "fiddly bit" again - it would be great if Chitubox understood that you liked the part orientation & supports, and kept it so you could just drop in a revised part - maybe the advanced version does, but the version I have does not seem to allow that.

Anyway, hopefully, this one is ok!

1709817294683.png

ATB
Simon
 

Osgood

Western Thunderer
That must be frustrating Simon, when helpful technology isn't. But like autocorrect on the phone, or MS Word 'helpfully' changing things, or like the lane assist in the car trying to put you in a hedge...
Off topic moment:
When I got my first PC with auto spelling correct function, I produced and sent off 3 x mineral resource site investigation reports to big clients before I noticed that the clever little machine had changed ‘borehole’ to ‘brothel’…..:oops:
 

simond

Western Thunderer
Smellchequers are hilarious.

Some years ago, I received a text from MrsD - it required some thought, so I replied “mmmm” by way of letting her know I was on the case.

as I hit the send button, the autocorrect changed it to “knob”.

I do wonder if artificial intelligence is any match for natural stupidity…
 

Pencarrow

Western Thunderer
Off topic moment:
When I got my first PC with auto spelling correct function, I produced and sent off 3 x mineral resource site investigation reports to big clients before I noticed that the clever little machine had changed ‘borehole’ to ‘brothel’…..:oops:

That would be an ooops but also highlight if anyone actually read the report :))
 

simond

Western Thunderer
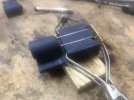
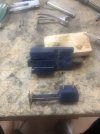
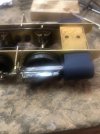
Well, after the cylinder fight, I can finally assemble the RH slidebars.

image.jpg

I printed the jig - the inspiration here was from the Templot Plug Track discussion in which it was pointed (sorry…) out that the resin is pretty impervious to soldering temperatures, and so it has proven.

Once soldered, it is a tad tight to get off the jig…

image.jpg

But it fits on the loco…

image.jpg

Which I guess is a bonus!

(Don’t worry about the CSB wires, they will be threaded through the motion brackets at some point

And it rolls :)

Clearances are about a fag paper (a 7mm scale one) and a little fiddling is still required, but we are moving forwards.

This is looking hopeful too

image.jpg

image.jpg

More soon, I hope
Simon
 

simond

Western Thunderer
Thanks Rob,

The fag paper’s not enough, unfortunately. I put the nuts on the cylinder studs & snugged them up, and the rods now catch on the slidebars :(.

Options at this point are shims between cylinders and frames, eliminating the remaining side play in the front axle, thinning the slide bars, or thinning the coupling rods. More radical options might include printing cylinders with offset centres and attacking the wheels in the lathe. It’s not supposed to be so difficult!

I shall attempt to reduce the already microscopic sideplay in the axle. I very much doubt that moving the cylinders outboard half an inch full size would detract from the appearance, so I guess these are the first two steps to take.

meanwhile, rugby’s on.
 

simond

Western Thunderer
Well, it’s a step on the road

It’s not got a decoder so it’s DC but running on DCC (Lenz controllers allow this) which accounts for the horrid noises.

It’s only got pickups on the middle and front axles due to a design error by someone who should have known better :oops: but at least we have a route out of that particular visit from the well known Cap’n.

There’s something wrong with the pickups - I need to look at them again too.

And the motor is only secured by virtue of being in the firebox

The cylinders are not fitted but they are now, finally, clear of the rods.

But it runs!


Next steps, sort out the issues above, then make crossheads and get the connecting rods fitted.
 

Pencarrow

Western Thunderer
Well, it’s a step on the road

It’s not got a decoder so it’s DC but running on DCC (Lenz controllers allow this) which accounts for the horrid noises.

It’s only got pickups on the middle and front axles due to a design error by someone who should have known better :oops: but at least we have a route out of that particular visit from the well known Cap’n.

There’s something wrong with the pickups - I need to look at them again too.

And the motor is only secured by virtue of being in the firebox

The cylinders are not fitted but they are now, finally, clear of the rods.

But it runs!


Next steps, sort out the issues above, then make crossheads and get the connecting rods fitted.
Great stuff, well done that man. Sounds like an angry little dog/wasp cross!
 
Top