You are using an out of date browser. It may not display this or other websites correctly.
You should upgrade or use an alternative browser.
You should upgrade or use an alternative browser.
7mm Pencarrow - Cornish BR(S)
- Thread starter Pencarrow
- Start date
Pencarrow
Western Thunderer
For 15 quid, you could buy a pot of acrylic medium, a bag of chinchilla dust, and have enough over for a beer.
of course, it would be hard work mixing it, and it might not work.
but you do get a beer.
Sorry, you lost me at beer...
Compton castle
Western Thunderer
When I worked in the building trade the renderers would often use a bit of broken paving slab to polish the render in a circular motion to remove any lumps and bumps, I’m wondering if you could sand the plasticard to roughen it up and then some thinned grey washes until you get the desired colour effect.
Pencarrow
Western Thunderer
When I worked in the building trade the renderers would often use a bit of broken paving slab to polish the render in a circular motion to remove any lumps and bumps, I’m wondering if you could sand the plasticard to roughen it up and then some thinned grey washes until you get the desired colour effect.
This is what I did in 4mm on the Polsarrett cottage:
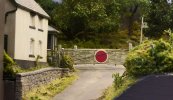
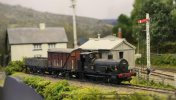
Plasticard surface harassed by sandpaper then painted over.
michael mott
Western Thunderer
Nah you’re just pulling our legs, that first pic is just down the road, you can’t fool us.
NHY 581
Western Thunderer
View attachment 182721
Plasticard surface harassed by sandpaper then painted over.
Nice Beastly Wild Tank.
Pencarrow
Western Thunderer
Nice Beastly Wild Tank.
Cute aren't they, and so much nicer and well mannered than a Pannier tank...
Pencarrow
Western Thunderer
At very different dates iirc. Got it writted down somewhere. I know getting 30586 with the early crest was deliberate though.Mmmmmm........ just out of interest, when did all three acquire the late crest, roughly.....
NHY 581
Western Thunderer
Would that imply a works visit and repaint took place, or were new emblems applied at depots?
I've now found an image showing 30586 in Eastleigh, freshly repainted with late crest in Feb 1960.
Pencarrow
Western Thunderer
Always nice when the dates fit.I've now found an image showing 30586 in Eastleigh, freshly repainted with late crest in Feb 1960.
Osgood
Western Thunderer
And as a bit of fun...
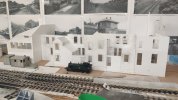
Comment was made elsewhere that it was difficult to get a sense of scale of these buildings. So, out with the Western Standard Yardstick, a 00 Prairie tank:
...
It would have looked so much more impressive if you'd used a 16BA nut instead of the 00 Prairie.
Just sayin'.
Pencarrow
Western Thunderer
It would have looked so much more impressive if you'd used a 16BA nut instead of the 00 Prairie.
Just sayin'.
Particularly if I'd claimed it was a track bolt...
Pencarrow
Western Thunderer
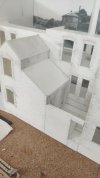
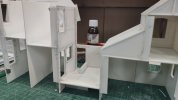
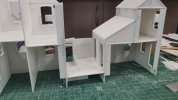
As well as the courtyards, I've been making a start on the roofs. The main profiles have been added - that's another sheet of plasticard gone.
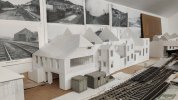
I then started thinking about chimneys. I want these to be part of the roof structure and not added afterwards. So a bit of planning involved and thinking about construction sequence. But first a bit of fag packet sketching:
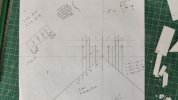
Two different heights, four different depths, same width. Plus a reminder to self that my two outside stacks will be different to reality as I've tacked the newer building on the opposite end.
A few photos from GoogleEarth of the remains of the real chimneys....
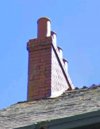
The 4 potter which is at the lean-to end, but which needs to be a 6 potter on my model.
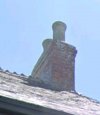
The 2 potter which will stay as is.
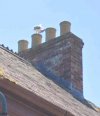
The 5 potter (one missing) with added seagull which will stay as is.
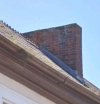
The somewhat knocked around and decapitated 6 potter which will be a 4 potter on the model.
I've made a start on the 5 potter first, just to sort the method. It's made like a glove and fits snugly over the roof former. The coursing at the joins needs adding after the solvent has set.
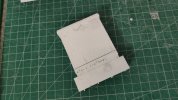
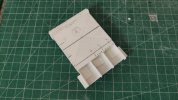
And on place on the building. Not glued yet though.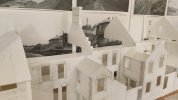
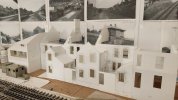
From left to right in the above photo, the chimney stacks will be:
- 4 potter tall
- 5 potter tall
- 2 potter shorter
- 6 potter shorter

I then started thinking about chimneys. I want these to be part of the roof structure and not added afterwards. So a bit of planning involved and thinking about construction sequence. But first a bit of fag packet sketching:

Two different heights, four different depths, same width. Plus a reminder to self that my two outside stacks will be different to reality as I've tacked the newer building on the opposite end.
A few photos from GoogleEarth of the remains of the real chimneys....

The 4 potter which is at the lean-to end, but which needs to be a 6 potter on my model.

The 2 potter which will stay as is.

The 5 potter (one missing) with added seagull which will stay as is.

The somewhat knocked around and decapitated 6 potter which will be a 4 potter on the model.
I've made a start on the 5 potter first, just to sort the method. It's made like a glove and fits snugly over the roof former. The coursing at the joins needs adding after the solvent has set.


And on place on the building. Not glued yet though.


From left to right in the above photo, the chimney stacks will be:
- 4 potter tall
- 5 potter tall
- 2 potter shorter
- 6 potter shorter

