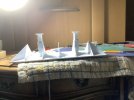
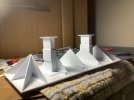
Monks Ferry: a layout for the Grandchildren.

jonte

Western Thunderer
I’ve not spent much time at my temporary modelling bench of late for one reason or another, but that which I have has seen me making slow progress with the station roof. The tiling’s finished, it’s just the ridge tiles are proving a little problematic, a process I find best tackled in piecemeal fashion. More of which in due course.

A quiet afternoon for once, saw me at my bench once more but for reasons already mentioned, I found myself with a modelling window available, but unable to make any further progress on the roof at this stage.

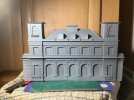
So my attention returned to the ‘side-door’, the outline of which I posted up recently. Drawn onto a piece of scrap styrene sheet, the idea was to use it as a guide upon which the door and frame could be constructed. So, collecting up several more bits of scrap styrene strip, I arrived at this a couple of hours later:

IMG_2373.jpeg

My usual go to styrene letters not only proved too large for the job, but also were one or two letters short of the planned ‘Parcels’, ‘Goods’ etc.. Luckily, I came across some very small letters which I’m not quite sure what I bought them for, but they saved the day. In the event, I plumped for the all embracing ‘Office’, which I suppose could serve a multitude of purposes.

I’m not sure when I’ll find another modelling window, but when I do, it’ll be back to finishing those challenging ridge tiles.

Cheers.

jonte
 

jonte

Western Thunderer
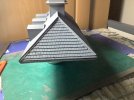
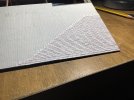
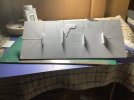
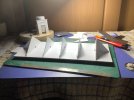
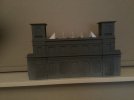
The main section of roof is now thankfully complete, a task that was delayed both by circumstances and the application of 3D printed ridge tiles:
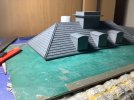
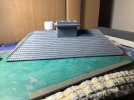
IMG_2378.jpegIMG_2379.jpegIMG_2380.jpegIMG_2377.jpeg

Incidentally, the wavy sections beneath the lower edges of the ridge tiles are an attempt at modelling addled mortar, which will become more apparent after painting.

The ridge tiles per se were excellent models in themselves, however, the material from which they were formed wasn’t exactly modeller friendly. Brittle to say the least, they were difficult to cut/shape without shattering and frequently broke into smaller sections or just bent upwards with even the lightest of sanding to remove the ‘pips’, ensuring they could only be glued in bits n bobs. And a pretty penny to boot, I’m not sure I’d use them again, preferring even my own homemade iterations to them.

I’ll leave the flashing until after I’ve painted the roof etc..

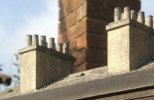
Elsewhere, the jury’s still out on how to model the chimney stack. This was a previous attempt using Howard Scenics (paper) embossed bricks:
IMG_2369.jpeg

The subtle profile of the bricks, in contrast to some rather exaggerated embossed plasticard varieties and especially some laser cut kit offerings, is appealing. However, the best results are obtained by cutting a V groove to the rear to go round the corners of the skeleton chimney breast, which relies on the corners being true, lest you end up with rounded, unrealistic, edges (the left hand edge of the capping to the right hand chimney in the above photo as you look, is a prime example).

The chimney in this project appears okay, thus far, however as I’m to construct another two, the chances are I may not be so lucky. Thus, I’m leaning more to my original idea of representing a stone block version and shying away once more from Blackfriars with its brick built stacks. This picture of Cirencester is what I have in mind:


IMG_2374.pngIMG_2375.png

A base colour followed by masking prior to adding a top coat of a different hue, via masking tape, should pay dividends.

Tomorrow, I’m hoping to schedule in a visit to a distant model shop to stock up on styrene sheet, to address the sides and their rooves, as I’m totally out of materials. But before that, I need to address a more pressing matter with the build, that of the ‘leaning towers’ or turrets. This is the consequence of changing plan after starting the build. Originally designed to be removable along with the intended platform roof, when plans changed, I merely glued the top section into the available slot. Whilst as tight as a nut, it was only later I discovered the slight lean, and as much as I’ve tried to ignore it….well you know how it goes.

And now I realise at long last, that before I go any further, the time has eventually come to get down to brass tacks and deal with it, before access is lost after fitting the sides. After mulling over it for some time now, I reckon the only solution involves drastic action, involving the use of drills, nuts, bolts and washers, such is the force required to get the brute to yield. Once a satisfactory level is achieved, only then can supports be glued in place to provide a permanent fix.

And so, onward and upward; and outwards, it seems.

jonte
 

jonte

Western Thunderer
Well, guys, it’s the morning after the nite before, and I’m absolute that I just can’t live with that roof.

It’s only a toy admittedly which is destined to get bished and bashed, but to me - whatever fate may have in store for it - it’ll always be an eyesore to me, so changes have to be made.

It’s the tiles in the main that offend: they’re just too regular and thick so they’ve got to go.

I might try rubbing the whole back to the plastic shell and start again with my home made jobbies (shouldn’t have been so impatient in the first place!), but if I’m still not happy (I still think the roof line is too high and should be lower like that of my previous effort in the earlier post), then action will be more drastic.

In short, I’d be happier with something like this:

IMG_0519.jpegIMG_0520.jpeg

Heigh, Ho: the angst of the impatient modeller. No one to blame but oneself.

jonte
 

jonte

Western Thunderer
Well, for what it's worth, I agree that the it's the right decision, just loads more time, effort and cash, but the job satisfaction will be worth it. Did your model shop run go ok?

John
Thanks, John.

Just waiting for the floor fitter to arrive, then off to Widnes :thumbs:

Jon
 

jonte

Western Thunderer
This takes me back to the age of 16 when I was waiting for my 0 level results. I tiled a small cottage and coloured my work with Colron wood dye . . . Allan Downes had a lot to answer for :thumbs:
A further ‘indeed’ from me too, Richard :)

I too used to enjoy his wit and light hearted ramblings in the Modeller (and of course, his wonderful modelling) which seemed in stark contrast to the pretentiousness of the three-piecers, replete with pocket watches and abbreviated middle names, that frequented in the main, and it was one of the many benefits of online fora when I eventually- like many others - managed to exchange the odd post with him before his sad demise.

Cheers,

Jon
 

Roger Pound

Western Thunderer
Just been catching up with the thread Jon. I guess that the roof was quite alright to the average spectator, but to your good self, it would have stuck out like the proverbial sore thumb each time you looked at it. Plus being a persistent annoyance, always drawing the eye :headbang:. As one among many others who have shared similar experiences in modelling, my sympathies. Equally my admiration at your prompt action to rectify the situation. Your new-born grandson will no doubt be delighted with the result, as he grows to enjoy playing trains :).

Roger ;).
 

jonte

Western Thunderer
Just been catching up with the thread Jon. I guess that the roof was quite alright to the average spectator, but to your good self, it would have stuck out like the proverbial sore thumb each time you looked at it. Plus being a persistent annoyance, always drawing the eye :headbang:. As one among many others who have shared similar experiences in modelling, my sympathies. Equally my admiration at your prompt action to rectify the situation. Your new-born grandson will no doubt be delighted with the result, as he grows to enjoy playing trains :).

Roger ;).

Thanks, Roger; most kind, sir. As a family we’re delighted with our new addition :)

Indeed, our new born provides some much needed stimulus after this recent catastrophe, although despite the frustration, it’s reassuring to know that even those of greater experience in the hobby have trodden similar paths ;)

As you rightly point out, Roger,I had to bite the bullet as I just know that proceedings would have come to an eventual and abrupt halt with the build, as it just didn’t sit right to mine eye, despite it being merely a toy, resulting in even greater wastage of time and resources. An itch that needed scratching…..

To that end, I made a start earlier this morning, spending about a mere hour or so before my grandaughter arrived, removing the roof and its supports, including that ruddy awful conning tower of a chimney which will be replaced by a couple of separate items, more in keeping with the original.

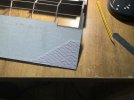
After recovering the 3D ridge tiles I made mention of previously, I began drawing a sharp blade along the joins in the ridges in the roof, which - I have to say - took some doing so robustly had I constructed it, the idea being to salvage the 2.5 mm base which I considered an appropriate place to start and reduce wastage in the process, until I ended up with this:

IMG_2384.jpeg

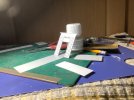
To save having to clear the base completely, I merely sanded the edges smooth again, before turning it over - checking against the building that no obstructions were present - and marking out the centre lines etc. And with just an hour or two’s fumbling this evening, I eventually arrived at the skeleton of a new, ‘lower’seated roof:

IMG_2383.jpegIMG_2385.jpeg

Just the angled side reinforcements to fit to each end, before constructing a couple of chimneys which will be fixed to the base, like the conning tower version that preceded them….

So that’s it for now, Roger. A classic case of ‘two steps forwards, one back’, but at least I now feel as though I’m on the right track ;)

Many thanks for your welcomed interest as usual, Roger.

Jon

Edit: spelling.
 
Last edited:

jonte

Western Thunderer
My sincerest apologies for failing to update the thread of late, however, now that the Trades had all but ceased their visits in one form or another, the time had finally arrived for me to address one or two of my own domestic chores, especially in the garden, before they return once more to wreak havoc…….

Consequently, it’s at least two weeks since I waved a blade in anger (perhaps in this day ‘n’ age, one should choose one’s words more carefully….), such that little more has been achieved since my last scribblings.

However, I have managed to ‘fashion’ a chimney or two, again employing modellers’ licence by placing the ‘fairings’(?) at the top rather than just below as per the real thing, the thinking being that by doing so, it makes them appear more elongated and thus elegant? Perhaps it’s just my overreaction to that awful chunky conning tower-like appearance of its predecessor, but I think they look ok.

Awaiting polishing to remove the joins where each piece of scrap used to construct has been joined to the next, they’ve just been placed to give an idea:

IMG_2410.jpegIMG_2409.jpeg

A reminder of what they should look like:

IMG_2042.jpeg

At the next opportunity, formers will be fitted between each triangular former to support the 1mm base for the slates, to stop it bowing in between, before fitting the bases and ‘slating’as before.

However, as there is a short sojourn planned in the next few days, followed by me eventually having to face decorating the last two bedrooms I avoided last year, the embryonic roof may lie gathering dust for just a little longer.

jonte

Edit: the section used for the fairings was the thinnest the model shop could offer, as my own stock was way too bulky for the job.
 

John57sharp

Western Thunderer
Great to hear of your progress Jon, hope the gardening AND decorating aren't too taxing and you’ll soon be slicing up plasticard again.

Those chimneys look great.

John
 

jonte

Western Thunderer
Great to hear of your progress Jon, hope the gardening AND decorating aren't too taxing and you’ll soon be slicing up plasticard again.

Those chimneys look great.

John

I’m extremely lazy by nature, John, so dreading it :(

Thanks for the compliment; glad you like ‘em too, and it’s not just me trying to kid myself :thumbs:

Thanks for your interest.

Jon
 

AdeMoore

Western Thunderer
Jon just completed a massive catch up on this build! Dunno sure I subscribed, but as many times on WT I don’t get the updates to followed topics email.
Good work coming along nicely, not sure I would have redone the roof! But if it was a fence that had to be jumped, jump it you have.
Hope all is going well and I expect this recent decent weather will have seen you out in the garden!
Cheers
Ade
 

jonte

Western Thunderer
Jon just completed a massive catch up on this build! Dunno sure I subscribed, but as many times on WT I don’t get the updates to followed topics email.
Good work coming along nicely, not sure I would have redone the roof! But if it was a fence that had to be jumped, jump it you have.
Hope all is going well and I expect this recent decent weather will have seen you out in the garden!
Cheers
Ade
My sincerest thanks for your kind interest and likes for this somewhat run of the mill project, Ade, but as always, it’s encouraging to receive them to say the least.

I’m sorry you didn’t receive my updates for what they’re worth, but as a technophobe, I couldn’t begin to explain what happened there……. Glad, in any case, you managed eventually to track down the thread.

You’re absolutely right about my current whereabouts in the garden, which has almost reached its conclusion (thankfully) for me, as from this point on, it’s back to the builders to lay the resin pathways.

Next will be clearing out my modelling den (another onerous task due to all the clutter I’ve managed to hoard) transferring tools and materials to my workshop in the garage,which has served as a store for the builders materials and tools since the end of January, such that once I’ve finished decorating two of the remaining bedrooms, I can once again turn my attentions to making some progress with the layout (commencing baseboard building of a day; getting on with completing the roof you referred to during the evening).Well, that’s the plan.

Cheers,

Jon
 

simond

Western Thunderer
Jon just completed a massive catch up on this build! Dunno sure I subscribed, but as many times on WT I don’t get the updates to followed topics email.
Good work coming along nicely, not sure I would have redone the roof! But if it was a fence that had to be jumped, jump it you have.
Hope all is going well and I expect this recent decent weather will have seen you out in the garden!
Cheers
Ade
Ade,

I have updates turned off because I prefer to choose when I look at stuff,rather than have it foist upon me.

i suspect you do too, but I think you can turn them on. click on your name at the top right of the page, and then have a look at your account settings.

cheers
Simon
 

AdeMoore

Western Thunderer
Ade,

I have updates turned off because I prefer to choose when I look at stuff,rather than have it foist upon me.

i suspect you do too, but I think you can turn them on. click on your name at the top right of the page, and then have a look at your account settings.

cheers
Simon
Thanks for that Simon, have had a look but it’s all ticked and saved, seems I get some but not all. Checked my Junk nowt there. One of those kwerks I guess.
 
Top