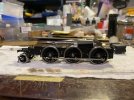
Mike G's Workspace.

Rob Pulham

Western Thunderer
Interestingly on some LNER coaches at least, it was the other way around - coach handle on left door locking handle on right. That doesn't help you with the mail coach however, sorry
 

Mike Garwood

Western Thunderer
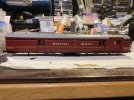
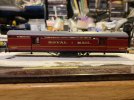
Well I'm pleased to say that the Royal mail coaches are finished and Robin has taken delivery. I'm looking forward to seeing them run on Barrow Road sometime in the New Year.
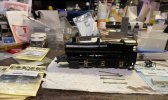
While I was up in Tewkesbury, I took the opportunity to add more pieces to the Std class 4 tank, balance weights to the wheels and also put the front steps on as well. So, having reviewed the video of the of it running I realised that there was a lot of light showing through on the rear bogie. Out with the plastic card and fabricate a rear portion of the frames to close off that loop hole. Running trials showed some rubbing so I'll have to take the P4 modeling file to resize the wheel arches. Unfortunately I didn't take any video of the trial, so you won't have to suffer watching :) .

Royal mail large finished.jpg

Royal mail small finished.jpg

It's really been fun to build these two. The only frustration has been taking so long to do the painting. But a solution to that problem may have reared its head today.
I had to go to a dear friends funeral this morning, someone I have known since I was two or three. On returning to the office, I was summoned to my bosses office and on entering recognized the HR lady - never a good sign. Already in the office were the rest of the contractors. Guess who's had his contract pulled for next year? Happy Christmas from CAF. The upside of this is that it might force my hand to retire completely and that being the case, my shed to house Hengoed High Level and a paint shop will definitely be happening...every cloud and all that!

Observations on the coaches welcomed. The next project is completing a GWR 63xx (that I built and painted 10 or more years ago) and then sorting out the running of the Std class 5. Jumping the gun a bit...Std 4 to a finish first and a boring video of it running on my plank to prove it :) .

And if you're due your fourth COVID injection don't be too surprised to feel a little rough for a couple of days after...

Stay safe

Mike
 

Yorkshire Dave

Western Thunderer
Nice job on the two Royal Mail carriages vehicles Mike :thumbs:.

Now they been decalled and lined I presume it was much ado about nothing as far as the waterslide decals were concerned :).
 

Mike Garwood

Western Thunderer
Yeah to write up a sequence of steps and then read them made it seem daunting. But doing the job is easier than it is written down. The three tips that really helped were the gloss finish - an absolute must - use the tip of tissue paper to soak up excess water from the edge and an ear bud to roll them down and press. Those made everything easy.

Thanks for the comments.

Mike
 

Phil O

Western Thunderer
(Sorry I forgot to insert the quote, from Mike after his meeting with HR.)

I found that the best job, I never had, was early retirement. I wish I could have afford it a decade or so earlier. My to do and round tuit pile is bigger than when I gave up work.

You'll find that lots of friends and family will ask, if you could just do this or that and the other.
 

Mike Garwood

Western Thunderer
I sincerely hope you all had a fabulous Christmas, I certainly did. So, before I post more misadventures in P4 land, I'd like to thank the moderators for making this, probably, the most informative of sites on the web and to wish you all a very Happy New Year.

May your files never grow blunt and your soldering irons never get cold.

See you next year.

Stay safe

Mike
 

Mike Garwood

Western Thunderer
Since my last update, I've been made redundant again! To be fair I'd completed the project that I had been hired for but it was still disappointing. I haven't given much thought to another job - so I guess I've retired.

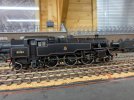
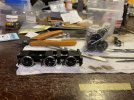
Work has been completed on the Std cl 4 tank. Balance weights have been added, as have the front steps. The light showing through the gaps in the rear bogie has also been dealt with. The engine doesn't run smoothly on low revs, still some work to be done to find the problem. My first thought is that the pick ups are acting as brakes. The original pick ups have been used.

Std class 4 tank.jpg

It needs weathering, and on that front there's some good news...my wife goes away for a week in March, so the dinning room will once again become a spray booth!
Here's some footage of the engine on the go. Not the best video I've ever shot!


I had also done some work on the Std class 5, which now runs very smoothly. But throws a short when I attach the tender. Odd to say the least. Come Monday back at the bench to sort the remaining problems.

Stay safe

Mike
 

Mike Garwood

Western Thunderer
Having done some work on the Std class 4 tank, after easing the pick ups, I can now get a really smooth crawl...which was really satisfying. However, I have failed to find the short on the Std class 5. And in undoing the chassis from the tender body I now have a chassis that sits on an angle to the body of the tender! I'm not pleased with the way the tender chassis runs anyway, so I may resort to building one of my own sprung versions (the same one that the tender of the Brit runs on). This all depends on whether I can find where I've put the etches! Anyway, another problem to be solved.

More years ago than I care to remember, I built and chassis and tender for a friend of mine for a GWR 43xx. The tender is from the Malcom Mitchell series as is the chassis of the engine. The body of the engine is Mainline. Now I built the chassis of the engine using Gordon Ashton springing units. Everything is painted. But there's still an awful lot of work to complete.

The first thing I've done is to review my work. So set the chassis up on the red box jig and made sure axle centers and coupling rod centers matched. Then I looked more closely at the thickness of the wire I had used in the springing units...not great. The one lesson I've learned from springing is 'less is more'. Now I use Ernie Ball guitar wire for all my springing needs. And I think I must have used a 13/14 gauge wire. Way too thick. So the first job was to remove the existing wire and replace it with something more practical that will actually smooth out the ride.
The next problem was motor and gearbox. The gearbox was a Roadrunner, but the motor was a Mashima 1626. Not a great combination to get any sort of weight into the body at the firebox end. I've bought one of the new (ish) 1219 motors from High Level and a new worm to fit the motor. This is a coreless motor and from the write up on the site, just the thing for my engine.
The new website that's been developed is first class...easy to navigate and all gearbox instructions available as downloads. This suited me even more - as I'd lost mine!

I've built the motor and gearbox and the combination of the two is amazing. So quiet and you really have to try very hard to stall the engine by pinching the axle between your fingers. There were a few fitment problems which resulted in some filing on the gearbox and on the bearings in the chassis. Next thing is to prepare the Alan Gibson wheels and get them quartered on the chassis and see if I have a running chassis.

This is where I'm too in the build.

GWR 43XX.jpg

And to my mate, Dave Hagger...I'm so sorry that I forgot about this.

Stay safe

Mike
 

3 LINK

Western Thunderer
Morning Mike,

I have also had similar issues with various types of pick ups over the years so on my latest build I decided to try the American method of current collection. The main reason I decided to give it a go was because with this loco I have fitted working inside motion and there was to much going on between the frames to fit either plungers or wiper pickups without a lot of fiddly work involved. And to be honest everything worked first time with the American method and the locos a very smooth runner right from the start, bingo that’s a result for me.

So from now on any loco and tender builds that I do, I will use the American method, apart from modelling a piece of paxolin into a drawbar and earthing out the wheel rims on alternate sides and a dab of glue on the buffers that’s it. Well chuffed ( pardon the pun )..

All the best,

Martyn.
 

Mike Garwood

Western Thunderer
Thank you Martyn - I've always wanted to try American pick ups but have always chickened out due to the shorting of the wheels. I must bite the bullet and have a go.

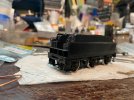
It's been a good day at the salt mine. The drivers are all set to be installed in the chassis, I've completed the tender chassis - including brakes. I cheated on the brakes and used the Gibson plastic ones. I still had to remove a pile of unwanted plastic on the brake shoe as they were too thick. The tender chassis runs really well. It's a few years since I used compensation in any of my work.

GWR 43xx tender wheeled.jpg

Wheel up the engine tomorrow and see where we go from there.

Stay safe

Mike
 

Mike Garwood

Western Thunderer
It's been a long day...

Having wheeled up the tender and made the compensation operational, I decided to put it altogether...

GWR 43xx 2.jpg

Usual things left to do for completion.

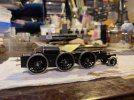
I moved onto the engine chassis. I must have been really tired when I did this. I'd put the brake mountings in the wrong place - I only noticed this once I'd tried to put the wheels on. Snip, snip and a bit of re-soldering and the brake mountings were in the right place.
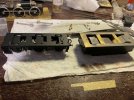
I knew when I bought the chassis that there was a cover to the chassis but this was only available with the full kit. Having sorted this I ploughed on with the wheeling. Got the driven axle sorted, ran the wheels, no wobble...only to notice that I'd put the final drive on the axle the wrong way round so that the gears were not meshed! :rant:
Off with the wheels and start again! Thankfully the other 2 axles were straight forward. I had to put some washers on the front axle to take up a lot of sideways slop - a rather large 1.5 mm on both sides. I may still have to put some washers on the middle driver. On with the front pony, no further excitement with this.

By the time I'd done this I'd had enough for the day.

GWR 43xx 1.jpg

No more playing trains till Friday - Grandchildren to play with on Weds & Thurs. The plan for Friday is to get the body weighted. I did try the body to the chassis and there are some clearance issues for the wheels, nothing a bit of grinding won't solve.

Stay safe

Mike
 

Mike Garwood

Western Thunderer
Did I weight up the engine..no, I weighted up the tender instead. I also added the sprung buffers (Kean-Maygib). Transfers and a little bit of red paint for the buffer beam still to do.

GWR 43xx 3.jpg

But, the day was really made peachy by the chassis. I put the coupling rods on and it runs a treat - no sign of binding. The balance weights were added as well. I am really pleased. I also added the sprung buffers to the body, a REAL PIA (Alan Gibson).

GWR 43xx 4.jpg

The only blot on the landscape are the coupling rods. There is not a lot of room between the crossheads and the coupling rod. Whats even worse is that the coupling rod bosses are quiet thin. This makes my normal technique a bit redundant and as the wheels are Gibson I can't fit the Ultra scale parts on a coupling rod as the thread is larger than the Ultrascale one. So, if anyone's got an idea, I'm all ears!

But in better news I may have a solution to my shorting tender...and I have found the etch for a new chassis should it call for it.
A really good day!

Stay safe

Mike.
 

Dave Holt

Western Thunderer
Mike.
I thought Gibson use M1 crankpin screws and Ultrascale 14BA. These threads are quite similar, both being 1 mm O/D. The profile angle and TPI are slightly different, but I've found in practice that screws and nuts (perhaps including a shortened Ultrascale front nut) can be mixed and matched. It certainly might be worth a try at the risk of wrecking an Ultrascale front retainer.
Dave.
 

Mike Garwood

Western Thunderer
Mike.
I thought Gibson use M1 crankpin screws and Ultrascale 14BA. These threads are quite similar, both being 1 mm O/D. The profile angle and TPI are slightly different, but I've found in practice that screws and nuts (perhaps including a shortened Ultrascale front nut) can be mixed and matched. It certainly might be worth a try at the risk of wrecking an Ultrascale front retainer.
Dave.
Cheers Dave - thanks for that , certainly worth a try.

Hope you’re doing ok. Any news on the Scot?

Mike
 

Dave Holt

Western Thunderer
I'm fine, thanks, Mike.
I haven't really done any physical modelling since the Jubilee accident which rather squashed my enthusiasm. Hopefully, it will come back before too long. I have been plotting and scheming for a future project, though, so not a complete loss of interest.
As far as I can remember, the Scot is structurally complete, though it needs a repair to one lamp iron that is just hanging on by a thread. Next stage is to strip and paint the chassis and I have been struggling to find a suitable shade of red for between the frames and inside valve gear. The official BR painting spec states black inside the frames and bare steel valve gear but I think in practice that works continued to use red.
Dave.
 

ullypug

Western Thunderer
Did I weight up the engine..no, I weighted up the tender instead. I also added the sprung buffers (Kean-Maygib). Transfers and a little bit of red paint for the buffer beam still to do.

View attachment 179534

But, the day was really made peachy by the chassis. I put the coupling rods on and it runs a treat - no sign of binding. The balance weights were added as well. I am really pleased. I also added the sprung buffers to the body, a REAL PIA (Alan Gibson).

View attachment 179535

The only blot on the landscape are the coupling rods. There is not a lot of room between the crossheads and the coupling rod. Whats even worse is that the coupling rod bosses are quiet thin. This makes my normal technique a bit redundant and as the wheels are Gibson I can't fit the Ultra scale parts on a coupling rod as the thread is larger than the Ultrascale one. So, if anyone's got an idea, I'm all ears!

But in better news I may have a solution to my shorting tender...and I have found the etch for a new chassis should it call for it.
A really good day!

Stay safe

Mike.
Mike
when I did my Mitchell mogul I set the cylinders further out than they should be by about 0.5mm and also set the slide bars off centre by another 0.5 mm . Both a John Brighton idea IIRC
 

Ian Rathbone

Western Thunderer
Red between the frames. I usually use red oxide for all ‘red’ frames. Once the body is on it just looks like a dull red. I can’t recall noticing any red between the frames during my years of train spotting, so a model with bright red in there just looks completely wrong to me.

Ian R
 

Dave Holt

Western Thunderer
Ian.
The LMS painting spec states red oxide between the frames. I notice that the preserved Scots have vermilion, or similar, but perhaps that isn't true for the BR era?
Dave.
 
Top