Mike G's Workspace.

Mike Garwood

Western Thunderer
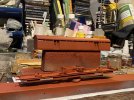
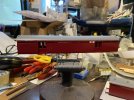
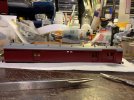
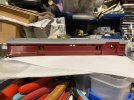
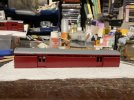
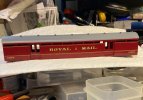
With the heat wave well and truly over, and some modeling time becoming available in the evenings the build has been completed. I'm pleased with the result.

Royal mail build finished.jpg

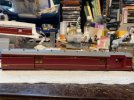
I just hope Robin has built the bogies to see these Royal mail coaches run as a pair. I'm hoping to get this into paint in the next week or two so I can start the lining.

Royal mail build finished 2.jpg

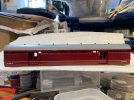
Just taken this for a good scrub so at some point tomorrow I can get the primer on - providing it stops flippin' raining. Then once the sides are done, both coaches can have their roofs and ends completed.

Next back into works will be the Std class 5. As you've seen in my short video (post 47), the front bogie isn't taking enough weight of the engine - with the result that the bogies wheels on occasion slip and not turn. I have had etched a sprung bogie that I'll try out before adding more weight to the smokebox. On this engine the crosshead is also tangling with the locking nut to the coupling rods. A little bit of filling needed to help it pass should do the job.

All good fun...

Stay safe

Mike
 

Mike Garwood

Western Thunderer
Progress! While waiting for it to stop raining in S Wales for the last fortnight (at least not raining while I'm off). So today having come back from a short Grandchild visit, I've been able to get this coach into primer.

Royal mail 2 in primer.jpg

Tomorrow will see the underframe go into black and in a week or so the top coat for the sides will go on. Then the fun starts...lining. I love being able to take my time in doing this, because for me this makes or breaks the model.

The keen eyed among you will realise the new position of the dynamo and vaccum cylinders. This is because, I'd transposed them wrongly and these vehicles had 9" bogies and when I put a card cutout on the bogie centres the one end there was no room for the one end for the bogie to turn - even slightly. But now everything fits as it should.

I've also started paying attention to the 3 wagons I built so I'm patiently waiting for transfers to drop thru the door. And the transfer are also done on the Syphon...that's turned out really well, just needs some weathering to go, it should look filthy!

As soon as these jobs are done I can pay attention to the Std class 5!

Stay safe

Mike
 

barrowroad

New Member
Progress! While waiting for it to stop raining in S Wales for the last fortnight (at least not raining while I'm off). So today having come back from a short Grandchild visit, I've been able to get this coach into primer.

View attachment 170356

Tomorrow will see the underframe go into black and in a week or so the top coat for the sides will go on. Then the fun starts...lining. I love being able to take my time in doing this, because for me this makes or breaks the model.

The keen eyed among you will realise the new position of the dynamo and vaccum cylinders. This is because, I'd transposed them wrongly and these vehicles had 9" bogies and when I put a card cutout on the bogie centres the one end there was no room for the one end for the bogie to turn - even slightly. But now everything fits as it should.

I've also started paying attention to the 3 wagons I built so I'm patiently waiting for transfers to drop thru the door. And the transfer are also done on the Syphon...that's turned out really well, just needs some weathering to go, it should look filthy!

As soon as these jobs are done I can pay attention to the Std class 5!

Stay safe

Mike
Looking good Mike and I can't wait to see it finished. I must remember to put the transfers in the post.

Robin
 

Mike Garwood

Western Thunderer
It's been a busy weekend...visited my good friend Morgan Gilbert, who made his spray booth available for me to complete the sides of the smaller of the 2 Royal mail coaches. He then gave a master class in cellulose painting and I'm very grateful for his help. The tips I picked up from Morgan will be invaluable...the next time the wife goes on holiday :)
Saturday saw a visit to the Scale 4 society show in High Wycombe. Well worth the trip, great show, the venue was excellent and the catering was really good. So well done the Scale4 committee, superb effort.

Royal mail sides and roof.jpg

My wife chose to go to the opera this afternoon, which left me with an opportunity to get the air brush out and get the roofs done on both coaches. She's out tomorrow evening as well - so that will see the ends done. Never miss the chance to slosh paint on!

I couldn't find the colour I used on the large coach and I wanted a matching pair as they would likely have been married for pretty much all of their working lives.

Roal mail large sides and roof.jpg

So some much needed progress. Back gloss the ends tomorrow and then on with the transfers.

Stay safe

Mike
 

Mike Garwood

Western Thunderer
The lining on the RM coach 1 is now finished, just to add the Royal Mail emblem and wording - which are waterslide.

Royal Mail 1 lining finished.jpg

And lining part finished on RM 2.

Royal Mail 2 lining finished.jpg

Tomorrow will see the rest of the lining finished on this coach. Just the dreaded waterslides to finish them off. Coat of satin varnish and then the glazing. What could possibly go wrong...

Stay safe

Mike
 

Mike Garwood

Western Thunderer
Did you use decals for the lining?
Pressfix, the big Royal Mail insignia and emblem are waterslide. Having recently learned to use a lining pen I chickened out for these coaches. But I do have another 3 finished LMS coaches which will be lined out...gulp!

So this is what 2 hours at the bench get you. I had the coach numbers printed by Mark Seward, quality job, thank you Mark.

Royal Mail 1 lined and numbered.jpg
Royal Mail 2 lined and numbered.jpg

So, just the big waterslidey things to put on, I feel a visit to Morrison's coming on for more Southern Comfort.

Stay safe

Mike
 

Mike Garwood

Western Thunderer
Transfers completed, now for the satin varnish and glazing.

Royal Mail 1 transfers finished.jpg

Royal mail 2 transfers finished.jpg


The difference in colour is down to the lighting.

I've also started putting transfers onto the rolling stock I built some years ago (well it feels like that). The weathering paints have also come out. I shall put more photos up when they are finished.

Stay safe

Mike

Has anyone else experienced delays in getting transfers from Modelmaster?
 

Mick LNER

Western Thunderer
Modelmasters has turned into a nightmare seller. On par with the even worse Coopercraft.

Hopefully you have paid via Paypal or a Credit card, if so claim a refund if under 6 months since payment.

Read here


Daddyman

Western Thunderer
I can see Mick's point, but it's not quite that bad. If things are in stock with Modelmaster, you'll get them, but if not, you may never do. It's worth phoning him to check if things are in stock - the website has no stock alert, and I'm not sure if he answers emails these days (he never did in the past). I placed an order over the summer and got the two in-stock things immediately, and lots of promises, all broken, about the out-of-stock item, which never arrived.
 

Mike Garwood

Western Thunderer
True to his word the transfers turned up. 2 months after ordering them. Never the less they arrived.

The last few weeks have been a complete world wind. My Grandson - Harry - was taken very ill and had to be admitted to hospital. The first few hours were very tense. But after a few days intense care Harry was released from hospital and we all breathed again. I'm indebted to the Doctors and nurses at the Grange Hospital, Cwmbran for the care they gave. Harry still isn't out of the woods but is on the path leading out.

Then this Monday I came down with a real heavy amount of aches and sweats - fortunately not COVID. It eased thru this week and I finally felt like doing something Thursday afternoon. The real bummer was I had planned an excursion to Barrow Road this Friday, but feeling so under the weather I thought pulling the plug on that was safer for me driving and also possibly passing on the same bug to my friends.

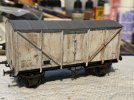
I decided to put the transfers on the BR fish van (starting post 63) and start the weathering process. I finished that today. I had a photo to work from, courtesy of Justin Newitt.

Fish van complete.jpg

I'm calling this finished and can now go into revenue earning service.

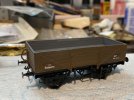
Post 79, BR 5 plank open, transfers finished, weathering still to be started.

LMS 5 plank open.jpg

A long way to go with this. Now the colour is supposed to be bauxite. I choose the equivalent colour from Velljo, it's not bauxite, not even close. But what it is, is a basis for some (extreme) weathering. Now having had a really good play with weathering on the fish van I know how I'm going to achieve a realistic copy of the prototype. Nearly all the weathering on the fish van was done with powders. I'm not saying that this will work completely on this, but some of the techniques will cross over.

BR 12t van post 85

BR 12t van.jpg

Again same problem with the paint. But the same solution applies.

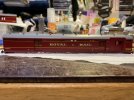
The mail coaches are ready to be varnished and are masked up ready to go. I should have done it all earlier in the week. I'm hoping my wife makes an impromptu visit to her father, so I can set up shop in the dinning room for an hour. Here's hoping!

Comments always welcome.

Stay safe

Mike
 

Mike Garwood

Western Thunderer
Finishing the mail coaches and the larger of the 2 has double single doors. If that’s not too Irish!
Question is what type of door locks/handles did they have. The photos I have are not clear enough to distinguish any recognisable shape. And Jenkinsons book doesn’t show that side in any of his photos.
Logic would dictate that as you look at the coach - the R/H side would be a normal coach handle and the other would be an unlocking lever.
But without proof - a bit stuck.
Can anyone confirm my suspicion?

Mike
 
Top