Stephen Freeman
Western Thunderer
Yes and no. The ones on etch 015 ( Ithink) are indeed upside down! and overscale too. The ones on the Super detail etch for one arm are much better being to scale and the right way up.
Yes and no. The ones on etch 015 ( Ithink) are indeed upside down! and overscale too. The ones on the Super detail etch for one arm are much better being to scale and the right way up.


Thanks, Roger, although still making it up as I go ……Nice work Jon.
Roger

And ‘it’s’ still ‘trying’ tooGlad to say I haven‘t been there and done that, but then I’m yet to build a signal so I’ve got all this to look forward to…..
At least we’re still trying.
John


 ).
). :
:

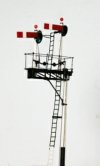
One point to note that the etch does not include the platform surface, which was of wooden planks. Here is one I did some time ago. There is quite a good photo in Adrian Vaughans book, which shows this and other details. Fortunately you may still be able to add it using thin strips.And ‘it’s’ still ‘trying’ too
I won’t speak too soon, but if I can do it, John, then it’s within the scope of all modellers, and I know from your posts that you’re quite capable of turning your hand to different challenges the hobby throws at us, so I’ve full faith in you when the time comes
I think the main challenge with the signals is that there is such an array of moving parts that you’re never quite certain they will remain so after you’ve shaken a hot iron at them, despite implementing all the precautions and hints you’ve read about, so perhaps the best advice is to order more frets than you think you’ll need. That said, I’ve managed thus far with what I’d ordered but it’s a close run thing!
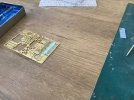
In truth, I’ve made quite good progress as the other single semaphores are almost painted and just require detailing, but it’s this bracket version which I’ve been putting off as, never having built one before, it was case of where to start and in what order to build it. This was exacerbated somewhat by the fact that buying only the odd fret or two from Wizard, I didn’t really have any step by step instructions to go by, picking up the odd bit of advice from some online instructions they provide relating to other kits. For instance, I started by drilling out the stage for the handrails as I knew that I probably wouldn’t get the drill in once the posts were in place, fair enough; in practice, I soon realised that there were too many stanchions in the ones I’d fabricated as I hadn’t taken into account the proximity of the balance arms to the railings, which in this form, would hinder the movement, so into the bin went those. Here’s a piccie to give you an idea of my ‘no idea’:
View attachment 193034
Still, the holes in the stage will still come in handy so not a total disaster.
I think, as well, my recent lack,of interest in the project hasnt helped, apart from to prolong the agony somewhat, although the bitesize approach I’ve since adopted has helped in this respect. Still each time I heat up the iron, I lose a little more hair (hope I’m not putting you off, John).
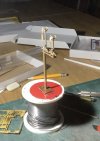
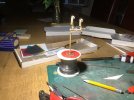
Had another bash today, and managed to build and fit the arms together with their binders, using plenty of oil to prevent gumming up of moving parts, and fag paper spacers as many others have done and which I’m sure you’re aware of:
View attachment 193033
I’ve no doubt serious modellers will have apoplexy seeing the finished result (notice the extra wide gap twixt binder and arm for instance to ensure no more obstructions caused by Modelu’s generously proportioned lamps!), but for a model formed of Peco Code 100 track and Ratio’s ubiquitous station building, I don’t think it needs to be, so the only requirement here is that it works.
I really can’t ask any more of it - or any other aspect of the build - than this
Thanks once again for your interest, John.
Jon

And exemplary too, Stephen, so thank you for posting.One point to note that the etch does not include the platform surface, which was of wooden planks. Here is one I did some time ago. There is quite a good photo in Adrian Vaughans book, which shows this and other details. Fortunately you may still be able to add it using thin strips.View attachment 193048


 . Notwithstanding, I know you will carry on and ultimately triumph so every best wish for your persisting to pursue perfection. Dare I say that you are making a signal effort
  !
!
 )
)Jon, I have every admiration for your fine efforts and sustained struggle with signals. I must, however, confess that if it were me I would have given up on the grounds of retaining my sanity......... Notwithstanding, I know you will carry on and ultimately triumph so every best wish for your persisting to pursue perfection. Dare I say that you are making a signal effort
!
Roger
(Last heard of as being in hiding......)


Apologies, John.Phew! I’m exhausted after just reading that, you carried me along with you.
onwards!
John


Thanks for letting me know, I have updated the link, so it should work OK, the old site was getting too expensive to keep, and I had already updated the current one to be more friendly to mobile devices, just forgot to alter the Western Thunder link. Should all be OK now but you might need to do a refresh,Hello @Stephen Freeman ,
I've been following Jonte's trial and tribulations wrt signals, and your support to him. Interested as I am in some aspects of signalling, I clicked on the tracknsignals link in your signature. And it took me to the defunct(?) borg-rail address; which seems to be populated by Chinese characters (type not fictional) now. Is it just me?
Cheers
Jan
Thanks, Stephen, but I used fag paper doused in oil as well as adding oil to the works as belt n braces.Rather than try to use oil to stop things seizing up, it's much better to use paper as a sort of washer, cigarette paper is probably best but ordinary 80gsm etc works just as well. Just remove the paper afterwards!

Hi DavidHi Jonte
When I was making the spring assembly area for the catch rods on the Lever-frame I used aluminium foil the type you use for cooking it’s very thin, solder doesn’t stick to it and it can be doubled up for different clearances and can also be used to protect other areas that you don’t want flux splatter on.
David

