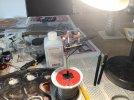
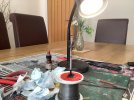
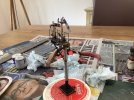
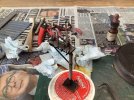
G.W.R. BLT: Almost there.

jonte

Western Thunderer
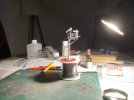
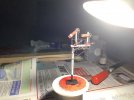
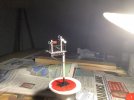
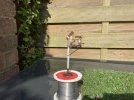
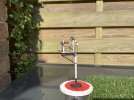
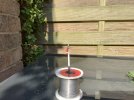
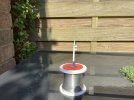
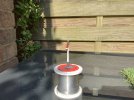
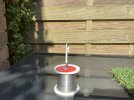
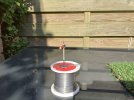
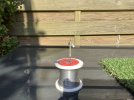
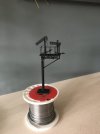
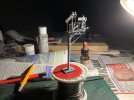
A dark undercoat of Tamiya acrylic matt black was brushed on, followed by several thin coats of Tamiya matt white applied in several thin layers via an airbrush. Research shows that many of these later steel posted signals appeared off white, possibly due to the presence of rust residue, so an ivory coloured acrylic was added to the white, which I think shows up better in photo no.3. An opportunity was taken at this stage to repair the bent rails to the front:
IMG_0160.jpegIMG_1874.jpegIMG_1873.jpeg

An early casualty was the bracket and screw to the base of the support - I disturbed the superglue as it was drying at time of fixing! - so a new one was fashioned and will be applied towards the end after further person-handling.

jonte
 

jonte

Western Thunderer
I should have made a little more progress than this, but still finding it difficult to muster the enthusiasm required to build and paint fiddly signals, most of my modelling time being spent painting and repainting the bracket signal which still manages to pick up overspray no matter how careful I am with the brush/gun or how much masking I apply. It’s proved as much of a challenge to paint as I anticipated, having already attached the multitude of parts; much easier painting as you go as per the single semaphores.

Speaking of which, they’re still only partially along, having been sat in storage for weeks now waiting for me to reach a near conclusion with the bracket. Still a little more painting to be done.

I also managed to locate a central point for fixing of the bracket on the layout, another task I’ve been dreading due to the spaghetti wiring running immediately beneath, which has seen me moving some of the wires out of the way for attaching the servo motor brackets. Still one or two more to move, which will no doubt require extending the wires at that point to take a more circuitous route, so out with the soldering iron and heat shrink it will be. The fact that there will be two servo in close proximity has aggravated proceedings somewhat, but when I look at it now, it could have been a lot worse indeed, so thankful for small mercies. Unfortunately space is at a premium with tiny layouts.

Some pictures to date:

IMG_1885.jpegIMG_1886.jpegIMG_1887.jpegIMG_1888.jpegIMG_1889.jpegIMG_1890.jpegIMG_1891.jpegIMG_1893.jpegIMG_1894.jpegIMG_1895.jpeg

The bowed arms appear to be mirroring my low mood at present……

So many pictures and not a clear one amongst ‘em. Letter to Santa I think, for a cheap digital camera.

jonte
 

jonte

Western Thunderer
Kind of you to say so, Johnny :thumbs:

I hope you and your signals get your wires sorted out soon and we see more progress, they’re looking great.

cheers
john

That’s the benefit of a thread: it forces you into action.

I think deep down I’m really eager to start the grandchildren’s train set, but for the sake of domestic harmony, I need to finish the signal aspect first on this so as to clear the table indoors :oops:

I’d like to chronicle the build, but I don’t reckon there’ll be much call for such elementary subjects on WT so will probably just get on with it behind the scenes as it were.

In this case, the thought of disappointing the children if I lose my mojo will jolt me into action.

Cheers,

Jon
 

jonte

Western Thunderer
This darned bracket job has been keeping me awake at nights, or at least last night to be precise.

Thankfully nearing completion apart from fitting of the finials, lamps and lamp brackets (painted off the model unlike the rest), I couldn’t help noticing a ‘noticeable’ lean from the direction of the outward pointing landing. I knew it had started off straight as the jigs were true - although any future attempt will involve better performing jigs (plus the benefit of a whole lot of other valuable lessons learned) - so something was amiss.

Perhaps, I thought, just a slight adjustment when fitting it into its hole in the board to bring it back to true again would do the trick? But then, I felt the wobble. Kidding myself that the multitude of moving parts would be the source, I soon came to realise that the post - as dreaded - was wobbling on its base. I can’t remember now, but I reckon that I should have used the 80 watter for this job, so now I’m suffering the consequences of its omission.

Worrying about the heat melting the paint as it travelled up the post brought me out in a cold sweat, so ideas ventured forth and ebbed into the wee small hours as how to avoid catastrophe.

In the end, I just strapped it to a suitable section of 2”x1” and went for it with the biggest iron that would fit (a redundant 25 watter) inside the outer tube, without touching it!

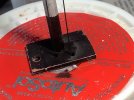
Thankfully, I can with great relief report that all is as was and that no paint was harmed in the process, apart from a slight witness mark which has appeared at the base:

IMG_1924.jpeg

IMG_1923.jpeg

Thank the stars that my pending train set is colour light signal controlled, as was the Southern railway in London from at least the thirties on which it will be based.

jonte
 

jonte

Western Thunderer
Toyed with this yesterday - and the other remaining semaphores - by adding some enamel washes, mixed up from mainly Matt black and brown Humbrol enamels and white spirit. I also tried a touch of dry brushing, which proved a little more difficult than I would have liked in the tight space around the deck, but I’ve done me damndest to tone it all down a tad, and make it look as though it’s been in situ for sometime past:

IMG_1925.jpegIMG_1926.jpegIMG_1927.jpeg

If anything, it’s probably overdone and I very much doubt whether a similar example located on a former GWR Branchline towards the end of the fifties, as in the model, would have looked anywhere near as weather worn. However,I just couldn’t resist attempting to emulate in some way the appearances of my photo references, taken much later in the BR period, although in fairness, not quite as tired looking.

Still, I’m glad it’s another job out of the way and I’m a little nearer making it operate.

jonte
 

JimG

Western Thunderer
If anything, it’s probably overdone and I very much doubt whether a similar example located on a former GWR Branchline towards the end of the fifties, as in the model, would have looked anywhere near as weather worn. However,I just couldn’t resist attempting to emulate in some way the appearances of my photo references, taken much later in the BR period, although in fairness, not quite as tired looking.

I remember taking pictures of colour light signals around Bristol some years ago for a modelling friend who lived in the Far East. I managed to get up close to a good few and the predominant colour on the weather sides of the posts was the green natural growth. :)

Jim.
 

jonte

Western Thunderer
I remember taking pictures of colour light signals around Bristol some years ago for a modelling friend who lived in the Far East. I managed to get up close to a good few and the predominant colour on the weather sides of the posts was the green natural growth. :)

Jim.

Thanks, Jim.

Perhaps they’re not too far fetched then after all :)

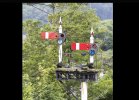
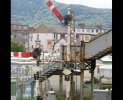
It’s these sorts of examples - and not exhaustive- that I’ve been influenced by, although the second one is at the extreme end of the spectrum I’d venture:

IMG_1845.jpegIMG_1846.jpeg


Jon
 

Osgood

Western Thunderer
The static caravans lend some credence to that last setting being close to the sea?
It would explain the aggressive corrosion on signals, cabinet and footbridge.
 

jonte

Western Thunderer
The static caravans lend some credence to that last setting being close to the sea?
It would explain the aggressive corrosion on signals, cabinet and footbridge.
I didn’t notice those, Tony, so as you outline, this would indeed explain the extreme appearance.

Unfortunately, I just look at pictures and focus on the elements of interest and then file them away on this basis, so am unable to suggest a location or give merit to the photographer.

Many thanks.

Jon
 

John57sharp

Western Thunderer
AE appears to represent Ardmore East in Dumbarton and is indeed by the seaside. Yours look great and well done with the rescue, I've very recently invested in a 80w Antex after finding my smaller ones couldn't hack a 4mm wagon chassis.

Cheers

John
 

jonte

Western Thunderer
AE appears to represent Ardmore East in Dumbarton and is indeed by the seaside. Yours look great and well done with the rescue, I've very recently invested in a 80w Antex after finding my smaller ones couldn't hack a 4mm wagon chassis.

Cheers

John

Many thanks for the kind words of support, John, and I’m sure the big fella will serve you well :thumbs:

I only wish the bit was a little smaller, but I suppose you can’t have everything.

Cheers,

Jon
 

JimG

Western Thunderer
AE appears to represent Ardmore East in Dumbarton and is indeed by the seaside.

I'm not sure about that. Ardmore is quite an open area between Cardross and Helensburgh on the Clyde shore and there are no buildings like the ones shown. Also, the area has had colour light signals since circa 1960 due to Clydeside North electrification, and I can't see any evidence of overhead. :)

Ardmore

Jim.
 
Last edited:

simond

Western Thunderer
the size of the bit is key to the size of the job you can tackle, more than the wattage. The bit is a heat store and it is the stored heat that does the job, generally.

The wattage determines how long it takes to get hot again, (and, I guess, if attached to a big heat sink, how hot it will get, or not).

Of course, bigger bits tend to be bigger wattage too.
 

40057

Western Thunderer
AE appears to represent Ardmore East in Dumbarton and is indeed by the seaside. Yours look great and well done with the rescue, I've very recently invested in a 80w Antex after finding my smaller ones couldn't hack a 4mm wagon chassis.

Cheers

John
Actually, I think the rusty signals are at Abergele in north Wales.
 

Stephen Freeman

Western Thunderer
AE appears to represent Ardmore East in Dumbarton and is indeed by the seaside. Yours look great and well done with the rescue, I've very recently invested in a 80w Antex after finding my smaller ones couldn't hack a 4mm wagon chassis.

Cheers

John
Just wish the bits lasted longer, I think I am going to have purchase a new iron this time as I could not get the old bit out this time. Mind you even an 80w iron isn't enough sometimes.
 

Lyndhurstman

Western Thunderer
Toyed with this yesterday - and the other remaining semaphores - by adding some enamel washes, mixed up from mainly Matt black and brown Humbrol enamels and white spirit. I also tried a touch of dry brushing, which proved a little more difficult than I would have liked in the tight space around the deck, but I’ve done me damndest to tone it all down a tad, and make it look as though it’s been in situ for sometime past:

View attachment 196073View attachment 196074View attachment 196075

If anything, it’s probably overdone and I very much doubt whether a similar example located on a former GWR Branchline towards the end of the fifties, as in the model, would have looked anywhere near as weather worn. However,I just couldn’t resist attempting to emulate in some way the appearances of my photo references, taken much later in the BR period, although in fairness, not quite as tired looking.

Still, I’m glad it’s another job out of the way and I’m a little nearer making it operate.

jonte
Hello Jon
Lovely work, as always. Your artistic eye very much to the fore. Marvellous mimicry in miniature :thumbs:

One negative; on my phone, your work is lost in the fussy background of the newspaper ;)

Cheers

Jan
 
Top