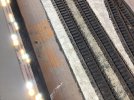
G.W.R. BLT: Almost there.

Roger Pound

Western Thunderer
I feel the ballast will benefit from the suggested toning down, although having seen pink ballast in Scotland, who knows? However, the usual accumulation of oil drips and other gunge at termini would give considerable darker staining to any colour of ballast. Just a thought ;).

Does SWMBO realise that you have nicked the vacuum cleaner yet :eek: :eek:?

Keep up the painstaking efforts, Jon - it will all be worth it in the end.

Roger :thumbs:
 

jonte

Western Thunderer
I feel the ballast will benefit from the suggested toning down, although having seen pink ballast in Scotland, who knows? However, the usual accumulation of oil drips and other gunge at termini would give considerable darker staining to any colour of ballast. Just a thought ;).

Does SWMBO realise that you have nicked the vacuum cleaner yet :eek: :eek:?

Keep up the painstaking efforts, Jon - it will all be worth it in the end.


Thankfully the vacuum cleaner is on permanent loan from my brother in law, in the interests of domestic harmony ;)

With mention of toning down, Roger, here’s what the barbecue remains I’m using, look like when merely glued down with 50:50 Pva/water mix (washes would yet to be applied):

94D01589-78B8-4A76-961E-375E4DD788B8.jpeg

As you can see it’s already lost it’s yellowish tinge :thumbs:

In the interests of ‘just get on with it modelling’, I’m going to give myself free reign over the rough-stuff, and do so under the heading of ‘jen’rul weath’ring’ to which most of us in the hobby allude; free from the chains of working from photographs. That said, inspiration will come from real branch lines such as the terminus at Fairford, and where an online search has unearthed certain gems such as these, which serve to provide a useful reference:

84BA0260-1A43-4BEE-B9F4-C9F7DBE6BDE3.jpegF92096AE-AE2F-427E-9E8C-E4A5C0530FD5.jpeg

With further mention of ballast, it’s my intention to use up some of my ready mixed variety (in proportions of 6:1 beach sand:fine ballast), which I feel not only gives an air of that of a well worn branch line, but also helps not to overwhelm the very thin sleepers of the Streamline track. Here’s an example from previous tests (It’s the unprimed version to the left of the track shown, which has just received a variety of dark enamel washes that I’ll be selecting):

402A0B82-0755-4473-B58D-0EB08E70BFD0.jpeg

Areas where engines stand will be a mix of ballast, sifted barbecue remnants and gyproc mixed with a dark coloured acrylic, to give the ‘compacted between the sleeper’ look, topped off with coal substitute and ‘oil stains’ as per Paul’s marvellous technique.

Sidings will probably be immersed in the ash substitute, up to rail height :)

Hope that helps to give you an idea of what I’m aiming at, Roger :thumbs:

Cheers for now and thanks for your interest and encouragement.

Jon
 

michael mott

Western Thunderer
I am following along with your efforts with the ballast and find that the use of different types of materials is interesting. I am going to be trying some various types of materials myself once I have all the track down.
Michael
 

jonte

Western Thunderer
I am following along with your efforts with the ballast and find that the use of different types of materials is interesting. I am going to be trying some various types of materials myself once I have all the track down.
Michael

Thanks for your interest, Michael.

I must say that with your excellently constructed scale track and auxiliaries, you won’t need to be as selective with regards to particle size etc.as me, due in the main to the very basic trackwork I’m modelling with.

I like Streamline, which is ideal for the low-bar standard to which I work, but as the saying goes: you can’t make a silk purse out of a sow’s ear.

I just have to try my best to make it work.

Jon
 

jonte

Western Thunderer
To continue the saga.

The odd area with a disturbed edge, as described in my last, was lightly brushed with a paint brush to remove the excess and the whole section tamped flat with an offcut of aluminium angle iron, left over from the fiddle yard (the offcut can be seen in the next photo, atop the atomiser).
The area was soaked with water from an atomiser bottle, with a dash of fairy liquid added for good measure (to address the surface tension), and then a mix of 50:50 Pva/water (again with a dash of fairy or any other type of detergent added, although Meths can be used for the purpose I believe, still with washing up liquid) was applied via the former eye dropper you can see in the following photo:

41B642FD-02DC-424D-8E38-E1787A36E0AE.jpeg

A pipette for the purpose would have been better as it can hold a larger volume of liquid, but as this is only a tiny layout, I didn’t think it necessary.

‘Lewis Capaldi’ action ensures the glue does its job, and so is relatively easy to apply for those - like me - who’ve never attempted this before:

8A4FACD2-133E-40B5-96B8-F8E1E7F8377F.jpeg

Some twelve hours or so later, the glue is only beginning to go off due to conditions in my unheated den, but notice the difference in tones between the areas treated in the first attempt to those in my second:

C5A36FB2-DBFE-4770-BF54-C32D2D50815C.jpeg1211EE11-180D-4AF8-8603-5711950F285B.jpeg80484A34-0AEB-497D-8CE4-209A2EDB1BB0.jpeg

And to that all important height aspect, to ensure my humble sleepering isn’t lost into the bargain:

26AB30E0-E91D-4DBC-9321-1A9A7B240906.jpeg02F95A92-1A62-44CA-BDAA-31DE16380C3B.jpeg

Overall, even though it’s early days, I’m quite happy with the look which I’ve convinced myself will pass for ash ballast on a decaying GWR branch line, set somewhere in Middle England or thereabouts. In fact, in comparison, my first attempt looks more like glued down sandpaper; the texture is okay, it’s just that it’s too uniform, if you get my drift?

I should add that following previous kind advice of fellow WT-er @simond, who is far more experienced in these matters than I, I’d already purchased a tin of latex for the purpose, however I changed tack after seeing the rather robust technique employed by fellow WT-er @PjKing1, whose methods I shall be following, which tends to make mincemeat of even the more traditional, rock-hard, Pva/water technique chosen, so there’d be nothing down for the more gentile approach with latex. Sorry, Simon :(

I’m going to leave it now for a good twenty four hours or so, after which I’ll redo the areas in my first attempt before carrying on.

If nobody minds my seemingly interminable ‘granny teaching’ methods at present, I’ll show you the results before proceeding with the ballasting.

Cheers.

jonte
 

Roger Pound

Western Thunderer
Your continuing saga shows immense patience in the pursuit of ballasting perfection, Jon. (Couldn't quite get perfect alliteration ;)) I would add that the colour shot of the Fairford branch does show a darker shade under the loco and leading coach, which cannot be put down to shadow, confirming a positioning of oil stains, which of course you have noted you will apply. Such photographic evidence is a great help in our researches these days, particularly for me when the memory is fading somewhat :(.
Keep up the good work, Jon, you'll get there in the end :thumbs:.

Roger :).
 

simond

Western Thunderer
Jon,

it’s good to see your progress.

Despite your kind comments, I can’t claim decades of experience here, well, actually, maybe I can…., but the point of the latex was that if you’re using real granite clippings, they tend to get a greenish hue if you use PVA. Well, before anyone says “mine don’t”, I got a greenish hue, and I’ve read of others having the same problem! And using latex avoids that.

if you’re using kitty litter, or crushed nut shells or squirrels or something, I don’t think it matters a jot. I did use barbecue ash for the ash pile, and that works with both PVA and latex.

Roger,

how about “patience in the pursuit of pulverised pumice perfection”?

:)

cheers
Simon
 

Alan

Western Thunderer
The great thing about using a latex style blue such as Copydex, is that should you want to make alterations it just keeps off leaving no mess. I used for both track and Track underlay although I did use Klear for the ballasting.
 

PjKing1

Western Thunderer
Coming along nicely Jon, just got to take your time ballasting as it can be a nightmare if rushed.

Keep up the great work

Paul
 

jonte

Western Thunderer
Simon,

Nice one :thumbs:. I later thought of "patient pursuance of perfect permanent way" ;)

Sorry, Jon, I didn't mean to hijack the thread. Humble apologies sincerely offered, :D.

Roger

Roger, my wordsmith friend, your wit, charm and kind words of encouragement, to say nothing of your wisdom and remarkable memories of the real thing as it was (wasn’t even going to attempt the ulitterayshun stuff :( ) are eternally welcome.

Thank you.

Remember: My thread is your thread ad infinitum ;)

Best,

Jon
 

jonte

Western Thunderer
So, after a couple of days drying time, this is what we have:

A7D3FF09-668C-478C-A429-8CB1CCDE1E3B.jpeg153F8CA8-4C25-4C6E-8141-3E68EDE5E70B.jpegBE524D1C-9898-43F8-94FD-817C94D65030.jpeg

It has recovered most of it’s original lighter hue.

Here’s something from Fairford to remind you of where I’m going:

1EED5E47-67CA-4F40-9CA0-61C9FC66BDF5.jpeg

I like the grainy appearance of the area adjacent to where the loco is standing, but I’m aware (mainly from Stephen Williams’ books on GWR branch line modelling) that many of these bylines were more of the consistency of ash to be found in the area just to the right of the point in the foreground of the above photograph; so what to do?

Well, I’m satisfied that I’m going in the right direction, but it still looks a little ‘too’ grainy to my uneducated eye, and even though tamping down has given it a flatter -without being too flat- appearance, and with the second ‘mention’ above in mind, it still needs a little dressing in my humble onion before moving on, so to that end, I’m going to apply a slurry of gyproc which can be sanded down, hopefully without obliterating all the detail thus far.

I’ll report back in due course.

jonte
 

Joe's Garage

Western Thunderer
Hi Jon
I am finding this very informative especially the colour photos of the prototype. It is this part that makes the overall impression of the track.
I am still hooked even though I will be away from my attempt for a while again....
All the best
Julian
 

jonte

Western Thunderer
Hi Jon
I am finding this very informative especially the colour photos of the prototype. It is this part that makes the overall impression of the track.
I am still hooked even though I will be away from my attempt for a while again....
All the best
Julian

Kind of you to say so, Julian, and pleasing to know that at least my meanderings are proving of use (even if only to avoid at all costs!).

As mentioned, I’m trying not to be too bound by photos on this occasion to save getting bogged down again, but they help to serve as a guide, and ward against delving too far into the realms of fantasy. I’m also using material from my own books on GWR subject matter so the results may prove a little mixed for some tastes; hopefully there’s a difference between a hybrid and figment of imagination.

I’m afraid it’s still a case of trial n error at present, but as stated, this aspect is very new to me, so I’m taking it bit by bit in case it all goes awry.

Thanks for your interest and I trust I won’t keep you hanging too long for an outcome, one way or t’other.

Jon
 

jonte

Western Thunderer
It’s the morning after the night before and surprisingly I was pleased to discover that the thin slurry of plaster had dried. The weather must be improving.

Light rubbing over with some wet n dry/sandpiper a couple of times, cleaning up as I went, revealed something more in keeping, I reckon, with branch line track work. Rather than risk removing the soft plaster altogether, I finished off by rubbing over the surface with my index finger, more in polishing mode rather than abrasive, which ensured that ‘flatness’ was maintained while hanging onto the cinders or whatever texture it had, of a real ash recess:

BB388E46-B9E7-42D6-9849-5D77F1C2829B.jpeg1942EB30-E09D-466E-837D-B8724FAA108A.jpegD6FC37A3-4F3A-4D61-A894-672D1F0A6E06.jpeg3B1F9131-3A4C-42D0-B45A-2404A0DED065.jpeg7CC2D681-D58F-48BF-824F-CFB69726710D.jpeg
I think it looks okay and it’s probably the best that this hamfisted modeller can achieve, so I’ll run with it. Apologies if you think I’ve missed the mark.

One or two areas succumbed to the rubbing down process, so I’ll merely revisit with the plaster to hold it in place and fill the hole; paint I reckon acting as a suitable adhesive:

A30B95D3-7837-47E6-9C33-CA5556D80EDA.jpeg


I hope this helps any fellow WT-er following, but if you require clarification, just send me a post or PM with your query.

I’ll continue the process across the rest of the model and then post the results again before I start ballasting.

Cheers for now.

jonte
 

Attachments

  • ECF2C14C-CA84-4836-A1CA-215DC394214F.jpeg
    ECF2C14C-CA84-4836-A1CA-215DC394214F.jpeg
    315.2 KB · Views: 1

jonte

Western Thunderer
It will be intresting to see what it will look like when coloured.
Indeed, Alan; I’m intrigued myself.

If it’s flat and lifeless I’ll be a little disappointed, but I suppose as long as it provides a contrast with the ballast it should be okay.

Jon
 

jonte

Western Thunderer
With mention of colour, it’s difficult to find coloured shots of this type of covering, apart from say the one previously at Fairford.

Funnily enough, whilst reading through my GW Branchline modelling book, Part two, by Stephen Williams, I noticed a thumbnail shot on the rear cover of the Fairford train, coincidentally, at Witney (P.J. Garland) where a glimpse of the ash surface can just be seen in the lower left corner:

E8814DB0-2B99-4A00-9E91-0B318F90DAFC.jpeg

It seems to match the colour of the engine which to my eye appears to be sporting a weathered black hue, and which is pretty much the colour I mixed up for the track after I’d primed it. Indeed, I thought it would have been a little greyer or even beige perhaps, so it just goes to show what ‘thought’ does in these cases.

jonte

NB: photo published for reference purposes only.
 
Top