A Layout Called CHIMTONSTOKE

David Waite

Western Thunderer
Hello again I'm still here I've just been doing others things around home as I was getting a bit of eye strain because of making
these small items.
One of the things I have just accomplished is the restoration of a very old machine lamp that my cousin has
given me to help to with my eyesight, it belonged to his father, my uncle was a Toolmaker all his life I know he started this trade
around WW2 what he did before this I don't know, any how I suppose the lamp came from back in that time it took me a few days
to bring it back to a new like condition and fitted with a modern LED globe, it now resides over my Lathe on a bracket that I mounted on the wall
this Lamp will help enormously there is nothing on the market these days that comes close to the quality and manoeuvrability that this old lamp has.

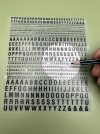
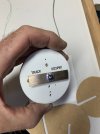
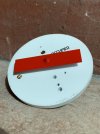
The lettering I have used is the WOODLANDS SCENICS dry transfers it wasn't my first choice I wanted to use the DECAdry ones I had
from when made the Block Instruments but these would only transfer to paper now and not to a painted surface like they should, they are
getting a bit too old which is a shame as the size and shape was perfect.
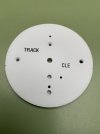
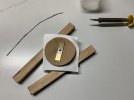
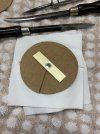
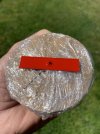
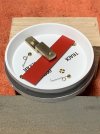
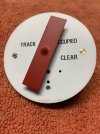
The face plate is stuck to my bench with double sided tape so it doesn't move about.
IMG_0701.jpeg


You will notice small cuts I put around the edge of the Face plate with a Stanley knife blade this was done
before I painted it, the cuts won't be seen they are on the outside hidden from view they are there for me to line
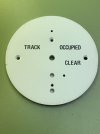
up the Dry Transfers in their correct position so the words CLEAR & OCCUPIED can be seen or not seen by the Banner
as it moves to its different positions.
IMG_0703.jpeg


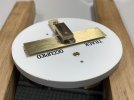
The next disappointment was the RED W/S Dry transfers which I needed for the word occupied they are not the
size that is stated on the packet in fact they are about 1mm smaller in height and 3/4 mm wider in their width
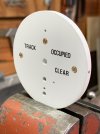
so I decided just to use the W/S Black ones if I had a super magnifying lens I could paint over them with RED paint
but I don't think that's going to happen, its interesting to note that the [SIEMENS and GENERAL
ELECTRIC RAILWAY SIGNAL Co that was formed in 1926] had instruments of a similar style that were supplied
from 1926 these had the word occupied printed in Black so its sort of right.
IMG_0714.jpeg
 

David Waite

Western Thunderer
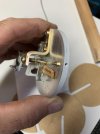
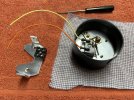
Early this week I started fitting all the items to the face plate,
First was the brass bracket at the rear then the three screws shown in the photo then the coil bracket and coil.
IMG_0779.jpeg


I placed a piece of timber under the armature then compressed it against the face plate with the rear bearing adjusting screw
this was to hold the armature fully extended out from the front of the face plate and firm so it didn't move.
Between this photo and the one before I had pushed the Banner onto the main shaft into its correct position but I forgot to take a photo.
IMG_0808.jpeg


Two pieces of tissue and three pieces of heavy brown paper were fitted to protect the faceplate when soldering'
Bakers flux and lead solder with silver content was used to soft solder the Banner onto the shaft.
IMG_E0806.jpeg


All good no damage
IMG_0813.jpeg


Next was to fit it all up and make sure the Banner was in its correct position in relation to the Armature and it was, all was good nothing moved during soldering.
IMG_0816.jpeg


The front bearing was removed and the face plate protected once again this was so I could scrape away the excess
solder and put a nice shape to it around the spindle.
IMG_0818.jpeg


Etch primer being applied.
IMG_E0819.jpeg


A coat of Tamiya Lacquer Red was applied today and its now basking in the sun on a shelf, if it dries hard by tomorrow
I will lightly sand it and apply the final Red coat then followed by a clear coat to finish it off.
IMG_0823.jpeg
 

AdeMoore

Western Thunderer
David absolutely stunning work.
Every once in a while you come across a thread that is like a book you can’t put down! This was one of them. I count myself lucky to have found it and to be honest it was great I had 8 pages of the most breathtaking miniature engineering to look forward to! The lever frames etc. we’re wow and everything I’ve read since.
I was sorry to read that your sight was giving you trouble, I thought I use my phone when I don’t have my glasses to hand an within a page you then mentioned you had used that trick. If your a user of the iOS based phone I find the magnifying glass better that the camera for clarity on close work. But you can’t beat taking a photo then zooming in more to see what you have in great detail.
Sorry for the lengthy post in your thread, but words fail me on the standards and quality you achieve and I wanted to say thanks for sharing.
Also I must add the thought crossed my mind if you were local I could offer to help out! Not that I could do much other than make the tea then in your post about your trip out in your lovely restored car I realised I’d need to jump on a plane and travel down under!
Cheers David looking forward to much more on these pages.
 

David Waite

Western Thunderer
David absolutely stunning work.
Every once in a while you come across a thread that is like a book you can’t put down! This was one of them. I count myself lucky to have found it and to be honest it was great I had 8 pages of the most breathtaking miniature engineering to look forward to! The lever frames etc. we’re wow and everything I’ve read since.
I was sorry to read that your sight was giving you trouble, I thought I use my phone when I don’t have my glasses to hand an within a page you then mentioned you had used that trick. If your a user of the iOS based phone I find the magnifying glass better that the camera for clarity on close work. But you can’t beat taking a photo then zooming in more to see what you have in great detail.
Sorry for the lengthy post in your thread, but words fail me on the standards and quality you achieve and I wanted to say thanks for sharing.
Also I must add the thought crossed my mind if you were local I could offer to help out! Not that I could do much other than make the tea then in your post about your trip out in your lovely restored car I realised I’d need to jump on a plane and travel down under!
Cheers David looking forward to much more on these pages.
Hi AdeMoore
Thank you for such kind words, I’m so very pleased you have enjoyed what I’ve posted, yes my eyes are certainly not good now and they have been giving me grief lately, today I decided to lightly sand the Banner which I did, however, when I sprayed on the second coat it revealed dreadful marks left behind by my sanding, which can only be put down to not seeing what I was doing clearly so it’s drying now and I’ll try again mid week, fingers crossed.
I tend to use my phone all the time now especially the torch feature it’s so bright and I’ve been using the old lamp from my cousin it’s so good with the new LED globe in it, the lamp is mounted on the wall behind the lathe but it swings out in front of the lathe where I can stand and use it to see what I have in my hand.
If you ever get to come down under I’ll have the kettle on.
David.
 

David Waite

Western Thunderer
For modelling work I have a pair of x3 prescription reading glasses, as part of a BOGOF deal.
Hi Phil
l have a pair of X3.5 glasses they are only cheap ones I purchased from a two dollar store but they seem to be clear and reasonably well built and work fine if I keep a set distance, but lack the ability of not being able to alter their power which I need for different distances away from whatever I’m doing so I use a head piece that I clip different lenses in depending on what I’m doing which go in front of my Multi Focal's that I wear I have one in the train room and one in the shed, my eye problem isn’t just magnification thats needed there are floating particles in my vision and a haze which both are the problem now and won’t ever go away and will only get worse over time this is why I miss letters or complete words when I read about something and it can change the compleat meaning of what ever I read about, it’s a bit like being deaf one can be put off on the wrong track when words are missed or misinterpreted I know this well as my wife was born deaf and either total confusion or very funny situations can arise now and again, such is life.
David.
 

John57sharp

Western Thunderer
On the vision issue, I use a “Magnifying glass with Light” app on my iphone. Very useful, gives 1-5x magnification and variable brightness on the iphone light. It has ads, but can be upgraded for £1.99. I’ve not yet felt the need to do so.
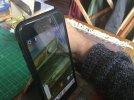
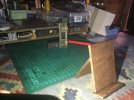
Inspired by this, and being fed up of heavy stuff on my nose all the time, I have started Using this app and built a little wooden stand to hold the iPhone still while I work. The magnification is brilliant as you can see. Good tip @simond

John
5249E857-EF08-4E85-BB77-226638346A71.jpeg

FA9CC180-3B12-402D-A2F6-E5996480D531.jpeg
 

simond

Western Thunderer
John, nice high-tech stand :) I see you went for the no-ads version.
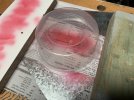
I found that my coffee mug is pretty much the right height to look straight down on small stuff.

Now, if I can arrange a holder on the milling machine so it moves with the cutter…
 

John57sharp

Western Thunderer
John, nice high-tech stand :) I see you went for the no-ads version.
Actually no, the NoAds icon allows you to either pay, or watch a number of ads for days of being ad free. Not been an issue so far.

The stand is a prototype pending further trials and a better day. Frankly it is all I’ve achieved for days (on this front) but hey ho

John
 

David Waite

Western Thunderer
Its been two weeks since I last posted the weather hasn't been good for painting too windy and dusty so in the meantime I had a brainstorm and have started another project which I will show all about next when this Instrument is finished.
The weather improved enough so I covered the Instrument with Glad Wrap and gave it a sand down with 2000 WD and a little water and it worked all nice and smooth.
The photo is before I started sanding
IMG_0965.jpeg


All finished I sprayed the Red paint including the clear coat finish, and is shown protected under a dust cover drying.
IMG_0839.jpeg


Now the assembly,
In this photo I had scraped off the paint from the pivot spindle
IMG_1070 2.jpeg


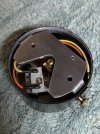
The two dowels were fitted into their holes in the face plate and the Brass front Bearing Bracket carefully pushed on to them
and secured with its screw that threads into the face plate and extends through the rear which has a locknut tightened onto it
to prevent it from coming loose.
IMG_1072.jpeg


Next the two Springs and their screws,
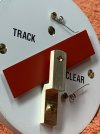
In the Clear position shown the Banner has a fixed stopping position as the Armature rests against its coil so the
top spring is there only for its looks this I gave a little clearance to prevent it from chipping the paint on the Banner, the lower spring
will stop the Banner from going past its Horizontal position however the Banner tends to stop by the Armature exactly Horizontal in its
Fail Safe position every time so I positioned the spring slightly lower to give the same clearance as the top spring

IMG_1077.jpeg


I just noticed all those marks you can see on the White surface of the Face plate rest assured they have already been dusted off.
IMG_1079.jpeg
 

David Waite

Western Thunderer
Brilliant work for sure one thing that would make it outstandingly brilliant would be if the slots on the screws were in line one way or another.
Michael
I tried all different ways with those screw slots but in the end I did as the prototype dose “all over the place“ looks much better this way I think, it could also be me resisting my OCD
David.
 

michael mott

Western Thunderer
You’re quite right David, just my own opinion of course about the screws probably comes from seeing the line of screws all lined up on the mahogany coaming strip on a beautiful sailboat. Aesthetics is a moving target.
I do enjoy seeing your work.
Michael
 

David Waite

Western Thunderer
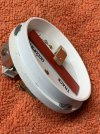
Over yesterday and today I have managed to Finish this Instrument.

The Spacer ring was tacked with Neutral Cure Silicone in three places and left over night to set it was then fitted into the casing
to make sure the ring was in the correct position and it was so a full bead of Silicone was run around.
IMG_1083 2.jpeg


Showing a full bead of Silicone, its never coming off.
IMG_1092 2.jpeg


The Wires were soldered to the terminals of the coil and heat shrink was applied over the joints, a Terminal Block was fitted to the mounting bracket but the wires won't be connected to it until I permanently mount it on the layout.
IMG_1127.jpeg


All snug inside the end of the Brass 1/8 WW screw that can be seen in the mounting bracket
is holding the Terminal Block on, it just fitted in nicely.
IMG_1143.jpeg


ALL DONE
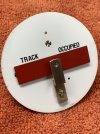
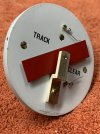
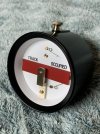
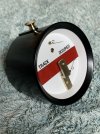
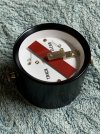
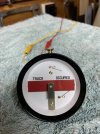
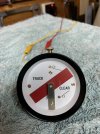
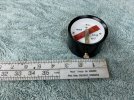
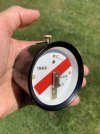
My 2-3/4" diameter working model of a RE THOMPSON Bakelite 4-1/8"diameter Track Circuit Instrument.
IMG_1139.jpeg


IMG_1141.jpeg


IMG_1135.jpeg


To show that it works in the background is the power point on the wall with the power pack in it, it is NOT ON and the Instrument
is in its Fail Safe Position showing OCCUPIED.
IMG_1149.jpeg


The Power is ON and it is showing there is No train in the Track Circuited Section, which will be in the Rear of the
DOWN MAIN OUTER HOME SIGNAL.
IMG_1148.jpeg


IMG_1156.jpeg


IMG_1169.jpeg
To finish off
The making of this Instrument has taught me many things about what I can see and do that is a comfortable limit for my eyes at the present time with the aid of glasses and a magnifying head piece and I'm so pleased I was still able to make something like this. There were many silly mistakes that I did along the way all eye sight related and I have learnt new ways to cope, will I do something like this again? You Betcha while I can.
 
Last edited:
Top