SimonD’s workbench

simond

Western Thunderer
Thanks Tony,

I struggled to find a drawing, and believed the pipe was 2”, perhaps it is, but 2” nominal bore.

2&5/16 will scale to 1.35mm, my pipe is a midge‘s under 1.2, and I made the core of my hose the same.

amendments will be made!

I’ll have a go at the clip too…

cheers
Simon
 

AJC

Western Thunderer
What O.D. did you draw it?

It's pretty chunky stuff.
If it helps here is a sectional drawing of a hose to a BR spec - dimension C fits the steel pipe O.D. of 2 5/16", you should be able to scale off the drawing to get a realistic dimension for the hose O.D.

View attachment 180463

That's interesting, Tony - it shows, for one thing, that 0.7mm wire is pretty much bob on for 4mm vac' runs, but not the bags themselves which should be meatier (which is the comment I came here to make!). I'm not sure I've ever seen a cast example where that's done right. While I think of it, on the few vac' fitted wagons I've been under, the pipe runs below the framing, rather than ducking through it (which concurs with the drawings showing that detail) so the way that tucks under looks very strange, unless Swindon was being Swindon and liked paying its wagon fitters unnecessary overtime?

The follow up is that my experience of printed lever guides was what I suspected might happen: they snapped off the first time I dropped the model onto the bench. Since I have an aversion to making things I know I'm going to have to repair, I'd take that lesson and use brass ones, stayed properly and pinned through the W iron, or model the quite chunky stay the prototype had as part of the print designing in a proper mechanical location - as Airfix did with their 16 tonner and those levers always survive quite well.

Adam
 

Osgood

Western Thunderer
Sorry folks, just treat that drawing with caution - there seems to be some vertical distortion (note hex on clips) and the hose does look thicker than I recall (I obtained and fitted a couple of new hoses for a locomotive a couple of years back).
I won't be able to get to measure one for a while but I'm sure there is someone on here who might be kind enough to measure the O.D. of a hose this weekend?
 

adrian

Flying Squad
So, progress, but still some way to go.
Impressive results but I fear a little bit of a curate's egg if I'm honest.

I think this is a situation where a multi-media model is better. Yes items with 3D volume like the vacuum cylinder, brake blocks and buffer stocks etc are distinctly better with 3D prints, the "2D" items like brake levers, V irons, pushrods etc would be much better as etched items.
 

simond

Western Thunderer
Thanks all.

it is multimedia!

Or at least it will be. Body in L/C MDF, with printed card overlays and 3DP details, wheels, buffers, axles and couplings in steel, chassis details in brass!

etched chassis are available, and it’s certainly arguable that the W irons and brake levers would be better in that material/process. Etched chassis with push out rivets. Solder on brackets, separate buffer stocks, etc.

If, on the other hand, I can make this work satisfactorily, the workload in creating an impressive level of detail (and functional suspension) is one-off, and I can then make as many chassis as I want, pretty much at the prod of a button.

Even if I can make one, or many, chassis that look good and function decently, there are then the questions of longevity and fragility. The brake levers are pretty thin and would possibly look better if thinner, but probably wouldn’t print, and are already fragile: a cosmetic fudge (make them triangular in cross section) suggests itself. I have no idea how the resin behaves over a five-year, or twenty-five year life cycle. Brass obviously scores well in that regard.

3DP is clearly not a panacea, but I think it does offer us something that has been out of reach. And it’s fun :)
 

Richard Gawler

Western Thunderer
Thanks for the suggestions re supports etc.
Simon

Here are two photos of a print I bought a few years ago, to show how the designer arranged the supports. I don't know about 3DP but maybe these are useful. This was a fairly "complete" print e.g. hoses included.

DSCF0238.jpg
DSCF0241.jpg

The print including buffers was about 90 mm long.

Sadly it never made it into a model. I left it in a cupboard above some under-floor pipes for the central heating, and the print softened and distorted into an unuasable form.
 

simond

Western Thunderer
image.jpgimage.jpg

there’s a way to go with this but I think it’s worth pursuing. Need to 3DP & fit the end steps, door stops & door fixing beam, make & add the roof hatches and handrails, fit the brake levers, paint the chassis and give it a blast of track muck from below. Need to modify the printed text a bit for the next one.

and I must take the “return empty to…” off the Parkside ones, I recently learned that it wasn’t used til much later than my layout.

I‘ve not yet worked out the best order in which to assemble it. The inner chassis screws to the underside of the body, the outer chassis needs to be either glued to the inner chassis, or the body. The brake levers need to be glued to both.. Maybe some further modifications to make a complete chassis assy, rather than having sub assemblies. Trouble is, as soon as I do that, the wheels are trapped.

oh yes, the nearer wagon has Haywood wheels, the 4th one has Peco, and the axles are too damn long! I know Slaters will fit. The Peco will be used elsewhere.
 

Richard Gawler

Western Thunderer
The wheels are trapped on most of my wagons with outside bearings, this seems to be a fact of life in 0 gauge. I need to put new wheels under my brake van (the kit wheels wobble) and the only approach I can see is to cut the axle and then slip a length of brass tube across to join it back together.
 

AJC

Western Thunderer
The wheels are trapped on most of my wagons with outside bearings, this seems to be a fact of life in 0 gauge. I need to put new wheels under my brake van (the kit wheels wobble) and the only approach I can see is to cut the axle and then slip a length of brass tube across to join it back together.

Are the axleboxes on yours welded to the W irons? If not, the path of least resistance is to cut the axlebox keeps and to drop the wheels per the real thing. You can then replace them with some plastic strip and a couple of squares (cosmetic nuts of you're feeling posh) Granted this suggestion is on the basis of having built two (2) Parkside wagons in 0 gauge but it was the only obvious way I could see to paint the wheels properly.

Adam
 

Richard Gawler

Western Thunderer
Are the axleboxes on yours welded to the W irons? If not, the path of least resistance is to cut the axlebox keeps and to drop the wheels per the real thing. You can then replace them with some plastic strip and a couple of squares (cosmetic nuts of you're feeling posh) Granted this suggestion is on the basis of having built two (2) Parkside wagons in 0 gauge but it was the only obvious way I could see to paint the wheels properly.

Adam
Well, on my brake van the entire underframe is from pieces of laser-cut MDF all glued very solidly together, so I think cutting the axles is my only hope. I clean and blacken the steel parts of wheels first, and then paint them (usually a spray) after assembly. But I am not skilled at painting and my results won't suit everyone.
 

AJC

Western Thunderer
Well, on my brake van the entire underframe is from pieces of laser-cut MDF all glued very solidly together, so I think cutting the axles is my only hope. I clean and blacken the steel parts of wheels first, and then paint them (usually a spray) after assembly. But I am not skilled at painting and my results won't suit everyone.

Ah, I was thinking of (conventional?) plastic kits. Never mind - you're probably right in this instance.

Adam
 

simond

Western Thunderer
Thanks Adam,

Much of the 3DP chassis was as a result of a discussion regarding springing Parkside wagons - I’d have to go looking, but I recall @adrian was also involved - I suspect it was one of my Parkside Micas That I was doing.

Cutting the keeps off Parkside W irons will certainly weaken them, as it would with my 3DP versions, though I could imagine printing new keeps in the form of an exaggerated “H” to increase the gluing area. If I were to do that, I suspect I might have issues getting the CSB springs in and out, but it should not be impossible.

This could/would/should significantly change the approach that I’ve taken, as the W irons could then be part of the solebars, as the Parkside ones are. I might play with the idea, it’s only time and a couple of quid in resin at the most.
 

simond

Western Thunderer
Found it.


and


and


I feel another version coming on…
 

simond

Western Thunderer
Thanks Phil,

that's exactly where I got the “it’s 2” bore” from, and assumed (dangerous practice, I know) that the steel pipe was thus 2” externally.

I’ve beefed it up a bit based on Tony’s drawing. It’s on my list to measure when I go to Didcot, when the weather’s a little better.

cheers
Simon
 
Decorating - and baseboards out from the corner

simond

Western Thunderer
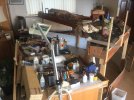
Not so much “what’s on my workbench?” As “what’s not….?”

a decorating project has required the removal of PD Loco from its normal place at one end of the lounge, and with it, just about everything else.

image.jpg

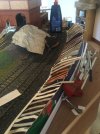
the chaos does give a couple of opportunities; With the backscene removed, I can access the rear of the coal stage, so the missing scenery can be attacked. More later, current state of play;

image.jpg

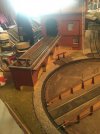
and the ground cover between the tt and coal stage is more accessible too - masking tape in place already!

image.jpg

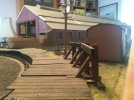
there are some photo opportunities which are not normally accessible too

image.jpg

image.jpg

image.jpg

image.jpg
 

Allen M

Western Thunderer
Looking at the photos with benches they look rather like mine.
Funny thing is when I started my electrical apprenticeship I worked with a couple of tradesmen who had the dictate "a place for everything and everything in its place". Looking in their tool boxes it looked like a mess but everything was in its place but the mess made it very difficult for any light fingered onlooker to see what they may be looking for.

My bench and garage look very similar but I can normally find what I need (except the small item that jumps onto the floor, that turns up next time.)

Regards
Allen
 
Top