Mike G's Workspace.

Mike Garwood

Western Thunderer
For my own thoughts…

My Brit has a sound chip. It’s been modified so that the cylinders are in sync.
I love it. The whistle is just about spot on. I don’t tend to use the other sounds. As has been said some are a waste of space on the chip. Shovelling noises being top of that list.
For me it adds to the illusion of a model railway…being a railway.

Mike
 

Oban27

Active Member
Hi,

I agree with what you've done with your Brit! After all, aren't we all trying to recreate our own little piece of, for want of a better word, railwayana, be it a model of an actual time and place or a figment of our imgination?

Roja
 

Yorkshire Dave

Western Thunderer
I would generally concur that sound in locomotives can enhance a model and as alluded to by the previous correspondents @Oban27 @oldravendale @LarryG @simond and @Suffolk Dave there are a number of gimmicky sounds which are a waste of time.

In my steam, diesel and electric locos - both O and HO scale - I spend alot of time tinkering with the sound levels in the CVs to 'tune' them to my satisfaction.

My bête noire in steam locomotives is the the primary drive sound or exhaust beats as they do not sound right with them all being at the same volume. Rather than buy a sound profile for any given locomotive, and having an ESU Lokprogrammer, I download the closest sound from the ESU sound file bank and create my own as being free they are not locked.

With the downloaded sound files being unlocked I then dive into the individual sounds and alter the volumes. As I mentioned above it is the drive sound which requires the most attention and I alter the 2 cylinder CHUFF, CHUFF, CHUFF, CHUFF volumes to create them as I hear them to CHUFF, CHUFF, CHUFF, CHUFF - with the emphasis on the first beat as this appears the loudest. Unfortunately many steam sound profiles keep these at the same volume and it is only when the speed increases the volumes become similar.

In addition, depending on the loco I may also include a 'rod clank' which can be heard when the loco is drifting and/or slowing down at which point the chuf, chuff sound cuts out - only to reappear when accelerating.

Also the speaker installation can play a significant role and in the larger scales I make it a point of being able to fit the largest possible and design this into the build rather the retro-fit when building kits. In my dealings with sound I have also noticed quite a number of speakers have a limited frequency range and I have spent time checking these to find out whether they can drop down to the lower Hz levels to improve the bass and get away from the tinny sound.

Again, as noted by prevoius correspondents diesels and electrics are easier but you still have to pay attention to the volume levels of certain sounds and the diesel type - mechanical, electric, hydraulic and with electric traction AC or DC.

At the end of the day I end up with what I want and all is fine.

And finally, overall sound volume - I have this programmed as a function so I can turn it down to barely audible at home where background noises are lower and increase at exhibitions so it can just be heard at 1m distance.

And apologies for the long diversion. :)
 
Last edited:

Oban27

Active Member
I would generally concur that sound in locomotives can enhance a model and as alluded to by the previous correspondents @Oban27 @oldravendale @LarryG @simond and @Suffolk Dave there are a number of gimmicky sounds which are a waste of time.

In my steam, diesel and electric locos - both O and HO scale - I spend alot of time tinkering with the sound levels in the CVs to 'tune' them to my satisfaction.

My bête noire in steam locomotives is the the primary drive sound or exhaust beats as they do not sound right with them all being at the same volume. Rather than buy a sound profile for any given locomotive, and having an ESU Lokprogrammer, I download the closest sound from the ESU sound file bank and create my own as being free they are not locked.

With the downloaded sound files being unlocked I then dive into the individual sounds and alter the volumes. As I mentioned above it is the drive sound which requires the most attention and I alter the 2 cylinder CHUFF, CHUFF, CHUFF, CHUFF volumes to create them as I hear them to CHUFF, CHUFF, CHUFF, CHUFF - with the emphasis on the first beat as this appears the loudest. Unfortunately many steam sound profiles keep these at the same volume and it is only when the speed increases the volumes become similar.

In addition, depending on the loco I may also include a 'rod clank' which can be heard when the loco is drifting and/or slowing down at which point the chuf, chuff sound cuts out - only to reappear when accelerating.

Also the speaker installation can play a significant role and in the larger scales I make it a point of being able to fit the largest possible and design this into the build rather the retro-fit when building kits. In my dealings with sound I have also noticed quite a number of speakers have a limited frequency range and I have spent time checking these to find out whether they can drop down to the lower Hz levels to improve the bass and get away from the tinny sound.

Again, as noted by prevoius correspondents diesels and electrics are easier but you still have to pay attention to the volume levels of certain sounds and the diesel type - mechanical, electric, hydraulic and with electric traction AC or DC.

At the end of the day I end up with what I want and all is fine.

And finally, overall sound volume - I have this programmed as a function so I can turn it down to barely audible at home where background noises are lower and increase at exhibitions so it can just be heard at 1m distance.

And apologies for the long diversion. :)
Hi,

at last, some-one taking the time and effort to make dcc sound work as it should! Excellent work!

Roja
 

Captain Kernow

Western Thunderer
I appreciate that DCC enhances 'the model experience' to levels that DC simply cannot achieve, but for me, personally, I can do without the complication!

Glad you've got the chassis running nicely, Mike!
 

76043

Western Thunderer
I've seen those amazing German locos with smoke synchronised, cylinder cocks etc. I feel that sound is only half the job, may as well go the whole hog? Admittedly it's probably not possible in 4mm, but then Hornby did make a live steam A4...

I am looking forward to diesel depot noise cancelling headphones becoming available to two day show exhibitors soon... ;)

Tony
 

PeteT

Member
For me the issue with sound is the 'loco centric' nature of it. Listening to a train passing and you then get the stock sound more, then once it moves into the mid distance the loco sound dominates again. Not all the sounds appear to come direct either - such as in a valley where they reflect around.

That isn't to say that some can't/don't sound superb, but overall for me it doesn't add much in a layout scenario. Each to their own though of course!
 

LarryG

Western Thunderer
After initially arguing in favour of DCC-Sound a few years ago, I found that sound took over my life at every operating session. I'd end up messing with CV's and I never got around to actually enjoying the layout.

I am big on DCC non-sound chips though. A much calmer (and smoother) operating experience ensues by imagining all the sounds and imagining all the tiny 'humans' going about their daily lives.
 

Mike Garwood

Western Thunderer
Post 467...more kits found...

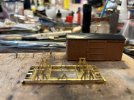
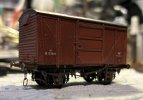
A few days before I went to Barrow Road, I started a new wagon chassis. Rumney models, of course, another van. This time a BR 12t Fruit van diag1/230, which has an LMS clasp brake chassis.

This follows Justin's usual design.

BR 12t van d230.jpg

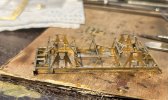
The really fiddly bits are the brake rodding, once that's been built your half way home. Not that it's difficult it's just fiddly and delicate.

BR 12t van d230 brakes added.jpg

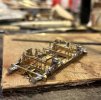
I cheated with the brake actuators, rather than try and thread these into the brakes themselves, I threaded some 0.4mm wire into the brakes and then soldered the actuating rods to this.
Then I made a jig for the safety loops to bend the wire around and to make them as identical as I could.

BR 12t van d230 brake loops added.jpg

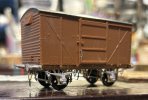
And so to the completed van...

BR 12t van d230 completed.jpg

A little more to add to the van body and then a return back to the 51xx. I needed a win to restore my flagging mojo, which I've got back and can now plough back on with my least favorite project. Yes, I've fixed the buffer. Isn't it strange that you only notice this sort of thing when you take a photo.

Thanks for all your comments on sound chips.

Stay safe

Mike
 

Mike Garwood

Western Thunderer
It looks great. I'm very tempted to dip my toe in Rumney Models pool but I get the feeling that once in I'll never want to come out!
Very true. But the results speak for themselves. I don’t think I’d have as many running wagons if it weren’t for Justin’s designs! And I still have half a dozen or so chassis to build…including 2 gun powder wagons, which I’m really looking forward to.

Mike
 

WM183

Western Thunderer
It looks great. I'm very tempted to dip my toe in Rumney Models pool but I get the feeling that once in I'll never want to come out!

Justin's phenomenal products and service are second to none. The kits are a joy to build, and for a tenner or so each, what's not to love? Buy a couple and have a go. I have a dozen or so in the "to do" box myself, and have a rake of built wagons with them in P4 that remind me how lovely P4 is every time I roll one along the test track.

Amanda
 

Mike Garwood

Western Thunderer
Having been struck down with the man flu...I decided to complete the van. I'm rather pleased with the outcome and as with all of Justin's models, this one also rolls off the edge of the desk.

BR 12t van d230 weathered.jpg

The 51xx came in for some more work. First job was to re-glue the crank pins, without disturbing the quartering, a game best played slowly. The problem I have now, is that the chassis springs - which act as the retainers for the bearings - have to be re-soldered into place.

IMG_3752a.JPEG

The problem being that there are now plastic wheels in the bearings and I'm fearful that soldering these back in place I shall damage the wheels. Also, I'm not keen on putting flux anywhere near wheel rims. The alternative is that I solder a small keeper plate across the back of the sub horn block, I will obviously have to mask off the wheels when I do this. SO the question is, will anyone miss the spring detail behind the wheels? So much for a highly detailed chassis :) .
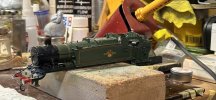
I also took the opportunity to number the engine. I shall varnish the lining tomorrow and then start thinking about weathering.

GWR 51xx numbered.jpg

Another battle over, but still more to come.

It was my Grand daughters fifth birthday today, a very happy birthday to our amazing Claudia! A very beautiful and clever girl!!

Stay safe

Mike
 

Mike Garwood

Western Thunderer
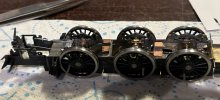
Today saw battle commence with putting the cosmetic springs back into the chassis.

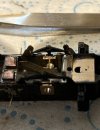
I fabricated a card protector - just in case I got a little too enthusiastic with the soldering iron - for the wheels. Rather than use a liquid flux, I used Powerflow...it doesn't hiss or spit. There was a bit of work to do before I started. First to clean up the springs and then re-coat them with a little solder. I wasn't going to add more solder the joint, just sweat them together. Next job was to prepare the spring hangers on the chassis, so that these were clean.
It didn't take long to do, but in my head I foresaw all sorts of issues, non of which happened! And I suppose that has been the problem, thinking too much and doing too little.

GWR 51xx springs in.jpg

I also took the time to put the brace in for the gearbox, remembering, that this needed to go up and down. The really pleasing thing was that everything still moved up and down smoothly after I'd completed the job.

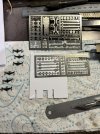
If you remember sometime back, I threatened to sort out my errant GWR County. As the soldering iron was on I made a start on the coupling rods. All the bits in the next photo came from Brassmasters. And talking of suppliers - the engine numbers for the 51 came from 247 Developments. So what I hear you say...well not all the engine numbers that they have, are on their website. I had 2867 and 6361, both of which are not on their site. So if in doubt ask, these arrived the following day, awesome service.

GWR 51xx springs 1.jpg

The top etch is designed for a 63xx, but (if you're not too fussy) it can be used to get rid of the awful Comet cast crossheads and give a realistic version of GWR slide bars, which I'm going to use not only on the County but also the 52xx, which you'll remember were something that I cobbled together and again threatened to draw a replacement etch in CAD - no need to know :) .

Stay safe

Mike
 

AJC

Western Thunderer
View attachment 210846

The top etch is designed for a 63xx, but (if you're not too fussy) it can be used to get rid of the awful Comet cast crossheads and give a realistic version of GWR slide bars, which I'm going to use not only on the County but also the 52xx, which you'll remember were something that I cobbled together and again threatened to draw a replacement etch in CAD - no need to know :) .

Stay safe

Mike

Ah, interesting - I need a suitable solution for a reworked Bachmann Modified Hall and reckon this ought to do the job. Granted, there are enough other things that need going to that particular engine… I look forward to seeing how you get on with it.

Adam
 

Mike Garwood

Western Thunderer
Ah, interesting - I need a suitable solution for a reworked Bachmann Modified Hall and reckon this ought to do the job. Granted, there are enough other things that need going to that particular engine… I look forward to seeing how you get on with it.

Adam
Adam

Brassmasters do an up grade kit for the modified Hall.
Might be worth looking at.

Mike
 
Top