Mike G's Workspace.

Mike Garwood

Western Thunderer
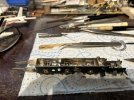
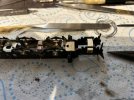
As usual the grey cells weren't working properly when I rebuilt the chassis. I had forgotten to add the compensating beams over the rear drivers. What a prat!

First, I tried to slide the whole compensating unit into the chassis, what a waste of time that was! Next I tried measuring where the retaining holes where - that also proved to be a bust. Then a grey cell sparked (just the one)...I have a double ended scriber - one end is bent at 90 degrees. Inserted into the retaining holes and given a bit of a shove. This made a small mark on the overlay. Out with the Dremmel and a 0.5mm drill, just a case of drilling out a hole and then open out carefully. Mission accomplished.

GWR 51xx chassis update1.jpg

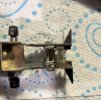
Time to put my plan into action for the dreaded radial truck. Double springing. Why double springing? The radial truck, as built, has the capacity for a single spring that been designed in. To my mind this will act as more of a pivot than spring. But a double spring secured over the ears that I had bent over will allow better adhesion and a greater capacity for the truck to remain on the rails due to the amount of down force that will be generated. The idea for this came from Adrian's thread 'LNWR Precursor Tank' post 49, the photo to the right.

The other problem with the single arm approach - as I see it - is that it doesn't have a long distance to act as a spring, making it very stiff - I suspect. To remedy this I've placed another spacer behind the last spacer and butted against the sub-hornblock. This spacer drops below the last designed chassis spacer This is what will act as my anchor for the 2 springs and gives me another 7mm of travel for the spring. I'll draw this up in CAD and you'll have a better idea of what I'm trying to achieve and the clearances involved.

GWR 51xx chassis update2.jpg

This is the state of play. And I've also put the brake hangers back in as well. Now for another wash and then slap some paint on. This weekend sees Harry's birthday party and my daughters birthday (30) - never thought I'd ever type that! So a HAPPY BIRTHDAY to my beautiful daughter, Sarah. And yes, it's been one hell of an expensive month! Nearly forgot...she got engaged last weekend. Wishing Mike and Sarah a very happy & long life together.

Stay safe

Mike
 

Mike Garwood

Western Thunderer
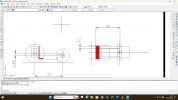
As promised the layout of the springing and where the additional spacer has gone.

1708272216078.png

The increased length of the spring should give a softer action to the radial truck. There is a minimal sideplay of 1.7mm but given that there is also some travel within the bearings, for the wheels to move, this should be ample to get round 1400mm curves.

Any questions - fire away.

Stay safe

Mike
 

Attachments

  • GWR 51xx double springing.docx
    225.3 KB · Views: 1
Last edited:

Dave Holt

Western Thunderer
Neat solution, Mike. Glad to see you used two springs. In my early attempts, I mistakenly just fitted a single, central spring wire, which often allowed derailment when the axle could twist to follow the track but didn't load the spring properly. Experience has shown that two springs all always better.
After some fairly drastic surgery, your chassis seem to be coming back together nicely.
Dave.
 

Mike Garwood

Western Thunderer
Bit more progress today. Repainted the frames, added the sprung buffers and the couplings - my last pair of Exactoscale working ones, and looking at the cost of new, there won't be others going onto the shelf of shame!

On Saturday, I visited Perrygrove, or perhaps I should say Harry had me drive him to Perrygrove! And I'm really happy he did. Perrygrove have a new steam engine - Mr Hallworth - lovely. Built last year for them.


Tomorrow will see the lining going onto the engine...I think I've calmed down enough to do this. :)

Stay safe

Mike
 

Mike Garwood

Western Thunderer
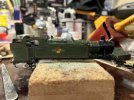
The 51xx is now lined and had it's BR emblem attached - the smoke box and cab side numbers are coming from Railtec...which were despatched today. I used a mixture of Fox and Pressfix transfers.
I really don't like waterslide transfers, despite having overcome my fear of using them. On a couple of occasions whilst putting these Fox transfers on I found that the transfer split into parts once they'd been moved off the backing paper. If I could have made the shapes - or found them on the pressfix sheets that I have - I would have been much happier.

GWR 51xx lined.jpg


The bunker is not my best effort....

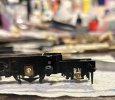
I thought I'd post a couple of pictures of my springing arrangement for the radial truck. Remembering that there is a nearly a 3mm difference in axle centres between the driver and the radial truck axle centre means that a thinner type of guitar string is needed. I think the thickness is a 10 gauge.

View from the top.

GWR 51xx top springs.jpg


Dreadful picture - but you get the idea...and from the side..

GWR 51xx springs side.jpg

I don't think these are going to be too obtrusive. Time will tell if the spring strength is right or will need adjustment. Quite pleased with this result, whether it works or not will have wait until the wheels go on - the next job. The finishing line is in sight!
The wars with this engine aren't over yet, but there are starting to be fewer battles.

I have fired up the soldering iron to continue my obsession with wagon underframes. Another LMS clasp brake chassis for a van, more of which on another post.

Stay safe

Mike
 

Nick Rogers

Western Thunderer
Evening Mike,

It’s really good to see the 51xx progress. I also have a Finney kit to build and have found your trials and tribulations very useful!

All the best,

Nick.
 

Mike Garwood

Western Thunderer
The chassis is now wheeled. This is a clip of how it was achieved and the process that was used. Having buggered up 2 sets of wheels, I reached out for help. I was not disappointed.


And this is what you get....


Like a dog with 2 tails! Thank you Morgan.

I'm not suggesting that this should be a norm to mount plastic centered wheels, it's just another method to be considered. Up until this particular project I've always used the GW wheel press and had good results. Now if we could shrink the apparatus used to the size of a red box, then we may be onto something.

Stay safe

Mike
(Tails wagging)
 

Dave Holt

Western Thunderer
Mike.
Nice way to put the wheels on square to the axle, if you have that sort of equipment. The wheels sets look to run very true, although quartering becomes a bit trial and error.
As a matter of interest, how did you fit the crank pin screws after the wheels were already on the axles?
By adequately preparing the wheel bore and axle end and using my GW wheel press between fingers, with the press ends resting on a truly flat surface, I find that most Gibson wheels go on with little wobble.
Nice to see it being pushed round Barrow Road as an 0-6-0.
Dave.
 

Mike Garwood

Western Thunderer
Hi Dave

I'd already put the crank pins in before this process started. Obviously withdrawn before starting and then re-instated after the bearings and gearbox had been added. I had to unsolder the springing detail to drop the bearings out...and now I nave to put them back with the wheels in place.

I've used the GW wheel press on all my P4 engines for years with very few problems. In-fact, this is the only engine where I've had to order 2 sets of wheels!
On my press, I've got some flat card glued to the inner sides which take out the difference in height between the rim of the wheels and the outer boss of the wheel (only used on GW wheels).

How far off are you on road trials for the C13? Really enjoying your progress.

Take care

Mike
 

Mike Garwood

Western Thunderer
I didn't have time to put this on Youtube yesterday.

As many of you know, I have been planning my own layout for some years now. 2 engines that I've already built, both GWR 56xx will be the real work horses. Consequently, these need to run really well. 6622 has had it's share of running issues, but after a little tinkering...


Stay safe

Mike
 

Dave Holt

Western Thunderer
You've obviously tinkered to good effect. Lovely.
Dave.
PS. The C13 would only require a chip to run on BR but would also need couplings for a load test, and they're dependant on the new buffer beams being received and fitted.
 

45609

Member
Hi Dave,

A bit of elaboration from me.
Nice way to put the wheels on square to the axle, if you have that sort of equipment. The wheels sets look to run very true, although quartering becomes a bit trial and error
I've always found that sighting through the spokes to be very reliable. Seems strange, I'll admit, but sometimes there is no substitute for the Mk1 eyeball.
As a matter of interest, how did you fit the crank pin screws after the wheels were already on the axles?
As Mike said he had already fitted the crank pins but I screwed them back out to fit the wheels using the watchmakers lathe. They were screwed back in using a jewellers screw driver poked through the spokes on the opposite side. These wheels (GW 5'8" dia.) are at the upper limit of the step collets that normally come as standard equipment with this type of lathe. If doing anything bigger then I'd have to make a step collet in situ on the lathe. If doing so I might drill an offset hole in the bar stock to accommodate the crankpin and fit it first.
By adequately preparing the wheel bore and axle end and using my GW wheel press between fingers, with the press ends resting on a truly flat surface, I find that most Gibson wheels go on with little wobble.
I don't disagree and I've used a GW press for many years. Adapted in the same way that Mike mentioned by gluing some plasticard shims to the faces to support the wheel rims.

Cheers...Morgan
 

Suffolk Dave

Western Thunderer
I didn't have time to put this on Youtube yesterday.

As many of you know, I have been planning my own layout for some years now. 2 engines that I've already built, both GWR 56xx will be the real work horses. Consequently, these need to run really well. 6622 has had it's share of running issues, but after a little tinkering...


Stay safe

Mike
It runs well and looks great. I'm not too sure, I was only listening via one headphone at the time, but is it sound fitted? There was something chuffing away on the clip.
 

Mike Garwood

Western Thunderer
It runs well and looks great. I'm not too sure, I was only listening via one headphone at the time, but is it sound fitted? There was something chuffing away on the clip.
Hi
No there’s no sound chip in it. I think Robins Patriot was running in the background - that does have a sound chip.

What’s your opinion of adding these sorts of chips to model engines?

Mike
 

Oban27

Member
Hi, imho that sound can enhance models, however...

Firstly, with steam locomotives, it takes time and effort to synchronise the chuffs to the wheel rotations, especially bearing in mind 2, 3 and 4 cylinder locomotives. Nothing more annying than listening to the chuffs with the wheels totally out of synch!

Secondly, don't make the sounsds too loud! Safety valves blowing off, steam cocks, blowers are fine, even shovelling noises, but not so they can be heard a scale mile away! Come to think of it, shovelling noises are a bit pointless unless you're stood in the cab! I also get annoyed by flange squeal and coupling noise! Unless the loco is running light engine most, if not all, the vehicles in the train will squeal at one, or more points, in the track. Same with coupling noises, should be at different parts of the train, not just behind the tender or diesel cab. At least diesls and electrics don't need the chuff synchronisation! And don't get me started about guards' whistles, door slams, station announcemnts etc!

There is nothing worse than enjoying a layout, complete with decent, and not too loud, sounds at an exbition then you hear another layout maybe a dozen or more metres away! At least you can control the sound on Youtube! So, if you're prepared to make the effort, especially regarding any kitbuilt or earlier models that were not initially intended for simple dcc, let alone sound, then go for it! If not, just keep to basic dcc.

Roja
 

oldravendale

Western Thunderer
Agreed with all that, Roja. May I also suggest that, if you are to use sound it needs "driving" just as much as the locos. By that I mean that there should be no sound from the fiddle yard - think how a real loco sounds as it comes out of a tunnel and switch it on then. Also locos should drift down hill and work hard on the way up. You can think of any number of scenarios and try to cater the sound to them.

I introduced my club to DCC and then sound but we've ended up with locos going round and round at tea time with sound operating but not varying at all and that gets very irritating. However, sound used properly can be really effective.

Brian
 

LarryG

Western Thunderer
I spent hours adjusting CV's trying to eliminate sounds that were plain daft. Not all of them could be calmed down and I concluded that DCC sound could not be taken seriously in its current "build" althought I did like the sound in a Dapol sound-fitted 0 gauge 45xx I heard recently.

I spent time filming steam at Llangollen some years ago. It was worthwhile because the GWR Panniers and 14xx were very quiet locos when pottering around and sounded nothing like that on sound decoders.
 

Suffolk Dave

Western Thunderer
I'm broadly in favour of sound but agree with many of the caveats mentioned above. I'd like to think the technology and recording techniques would continue to improve moving towards a more realistic sound scape.

In general, from what I've heard at exhibitions, I feel diesel sound seems more akin to the real thing than the sound from steam locos.
 
Top