Mike G's Workspace.

Mike Garwood

Western Thunderer
Thanks Nick, appreciated.

These 12 coaches were converted from diagram D117 and when the conversion took place this is when the bogie centres were brought in board to 38 ft. The GWR assigned these as A44 and were a push/pull type of auto coach...the drivers compartment at the end of the guards compartment being 3 ft wide!
Happily, I have a photo of one of these pulled up at Pontllanfraith Low Level. It could have gone right at Maesycwmmer junction and ended up in Blackwood, but in my model world in went onto Hengoed.

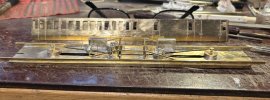
So today's progress...the remaining hinges went in and I also had to do a bit of re-soldering. Some of the door stops had come loose - first time that's ever happened! Cleaned up and onto the chassis.

GWR A44 under frame.jpg

Left to do : backs onto the battery boxes, clip the sole bars to the right length and add the footboards - which run the full length of the coach.

I'm going to use the Bill Bedford 9ft sprung bogies from my stock, I sincerely hope a stock of these are made available soon from the Scale4 soc as I'm down to my last but one 9 foot pair. The reason I like them is that they work well and they are dead easy to build. I still have my M set to build and all the coaches in that set, need 9ft bogies.
So a good building session, next 3 days will see Grand parenting duties, so the next time at the desk will be Friday.

Stay safe

Mike
 

Yorkshire Dave

Western Thunderer
These 12 coaches were converted from diagram D117 and when the conversion took place this is when the bogie centres were brought in board to 38 ft. The GWR assigned these as A44 and were a push/pull type of auto coach...the drivers compartment at the end of the guards compartment being 3 ft wide!

It did cross my mind as to whether this was a push-pull driving trailer. Driver's compartment 3' wide - not quite as lavish as the Southern Railway push-pull driving trailers - albeit theirs were built for that purpose.
 

Mike Garwood

Western Thunderer
Having been to the physio terrorist this morning I had a few hours to spare...

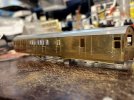
First thing was to clip the sole bars to the correct length, so I had to form the box of sides and ends before I could do this. If you do buy this kit be aware that the lengths of the sides of the coach do not match the depth of the ends. They are short by at least a mm. This means you have to lower the body retainers by another half mm in order for the sides to cover the bends on the chassis. This also means that the ends will be lower and so the buffer beam will not be at the correct heights. This either means altering the ends or the buffer beam. Thinking about it now, I suppose the correct thing to do would be to alter the depth of the ends.

GWR A44 body1.jpg

The instructions advise that the stantions from the queen posts must be shortened by 20mm, which makes sense given that the bogies have been moved in board.
I've added the guards steps, which are not included in the kit but are on the accessory etch C26. In fairness they aren't in the instructions either, but I have a good photo of this coach and they are clearly visible. Or maybe it's another trip to specsavers!
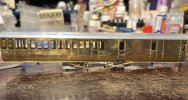
So having got the body and chassis together I could now cut the roof roughly to length. It's worth noting that this coach had flush ends...exactly the same as the S Wales B sets E147. The roof in these pictures is just resting in place and not fixed. Also to note: that the roof does not meet the outline of the ends, with a flush faced roof this may seem a problem - it isn't. Once the sides of the roof are glued and dried. I add more epoxy resin in the gap between the roof and the end, let that dry and the file the ends flush with the coach end. It really isn't as bad as it sounds.

GWR A44 body2.jpg

I've also added the cross bracing on the queen posts, I'd almost run out of 1mm square L angle, last time I bought a load when it was £3 a ten inch length. Not anymore, £7.99 from Squires (I went to the Bristol show for a bit of shopping a couple of weeks ago). Needless to say I didn't buy 10 lengths!! As I've said before I have 4 more coaches to build (M set) and I now have more than enough to do all 4.

Tomorrows jobs include adding the footboards, cutting the interior, making all the hand rails - there's quite a few - and building the bogies. Should keep me out of mischief...

Stay safe

Mike
 

adrian

Flying Squad
I've also added the cross bracing on the queen posts, I'd almost run out of 1mm square L angle, last time I bought a load when it was £3 a ten inch length. Not anymore, £7.99 from Squires
Ahem - still is from MetalSmiths 500mm length @ £3.10
 

Mike Garwood

Western Thunderer
Isn't it incredible what errors your own photos throw up...missing hinges and a split in the sole bar - all fixed now.

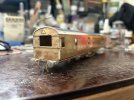
Today's progress includes the buffer beam and buffers being installed and the foot boards. I've also installed working couplings, I've now run out of my pile of Masokit couplings and have used some from Rumney models. Justins' are a lot more robust. So not as much progress as I'd have liked, but then this isn't a timed competition.

Have a good weekend all.

Mike
 

Yorkshire Dave

Western Thunderer
Isn't it incredible what errors your own photos throw up...missing hinges and a split in the sole bar - all fixed now.
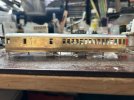
It's always the way...:)

I use the camera as another tool/weapon in the toolbox armoury. It is very good for picking up things we either overlook or just plainly don't see during the construction of our models - including the blindingly obvious.

Naturally some errors and ommissions don't reveal themselves until the first coat of primer.

In my case I often sit and stare at the part built model next a photograph of the prototype and play 'spot the difference'. Any differences and/or ommissions are noted for corrective action on the model.
 

Mike Garwood

Western Thunderer
The following pictures were taken yesterday, since then a lot more detailing has taken place.

GWR A44 addtions1.jpg

Grandparenting duties tomorrow with my fabulous Grandson Harry. Harry spent the weekend at Perrygrove for their gala day. Unfortunately this nerve problem has not gone away so Granny and Grandpa couldn't come. But judging by the photos I've seen he had a fabulous time and in great weather.

GWR A44 addtions2.jpg

No the roof isn't glued on.

So the next job will be to build the bogies and finish the guards end (there's still more handrails to fit) and fit the train gear at the other. If I can time my meds properly there's a trip to Tewkesbury on the cards. Where I'm hoping to complete the work on the 51xx and get it running (at last).
It's been really satisfying to build this coach, and it's another train for Hengoed...big plus! My wife is going to need to take another holiday before long. :)

Stay safe

Mike
 

Mike Garwood

Western Thunderer
Just a quick update on progress with the driving trailer.

The bogies are built, Bill Bedford sprung bogies. I see that Bill has shut his website down for the time being, due to ill health. Get better soon Bill!

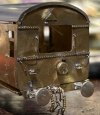
As usual, once completed, they decided to roll off the edge of the desk - always a good sign. The driving end is almost complete, there are some detail parts that can only be glued on. All the soldering is completed.

GWR A44 driving end.jpg

My camera has failed to pick up the lamp bracket above the left hand buffer. These were from Mike Clarke's Masokit range and again something I need to get more of. It's little things like this that really lift a model.
I took this to Tewkesbury today to sling it around the corners and point work of Barrow Road at very unrealistic speeds and it was all good.

I also took my newly converted BR brake van and that needs a good talking to! Very disappointing... :rant: It ran like a sledge - as it's supposed to, keeping the couplings tight. But it kept falling in the water. I think I may have to install some bearings and sort out the clearances between the oil boxes and if I'm going to do that then I may as well go the whole hog and do a proper detail job on the body...which desperately needs weight.
Morgan Gilbert also brought his latest completed engine - a Jubilee - Hood 45654. I'll put a short video of this performing on my Youtube channel. It's been weathered by Gerry Beale and it looks fantastic.
@MikeGarwood2498

Stay safe

Mike

Edited: coz I'm an idiot!
 
Last edited:

LarryG

Western Thunderer
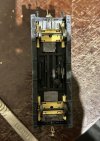
Neat coach. There is a lot more detail on the driving end than I realised. I presume the bogie wheelbase was reduced to clear the mechanical push pull linkage. I retained all my brass non-corridors for the layout but sold off the rest.
 

Mike Garwood

Western Thunderer
Neat coach. There is a lot more detail on the driving end than I realised. I presume the bogie wheelbase was reduced to clear the mechanical push pull linkage. I retained all my brass non-corridors for the layout but sold off the rest.
Yes Larry. The bogies were moved from 41”6’ to 38”. Also the supports to the queen posts were shortened.
Hope you’re keeping well.

Regards

Mike
 

Mike Garwood

Western Thunderer
I decided to tackle my brake van. Hooked out my existing wheels, removed the brakes and I thought the oil boxes would come away as well - but they didn't. Instead a sub frame came away which consisted of the finer underframe details. I discovered that the oil boxes had been recessed, which made my job a lot easier.
A few weeks ago I'd bought some Bill Bedford sprung RCH wagon W iron etches. Folded them up and they were a very tight fit between the steps. A little persuasion from the dremmel with a suitable scary grinding bit (plastic flying everywhere) and I'd taken between 0.5 and 0.75 mm out of the back of the steps and oil boxes. The etches were now snug, but not tight and the springing really works. I file the bearings down once they are in the spring holders. Glued these W irons in once I'd added the sprung wire (gauge 11) and got the pesky spring carriers in. Getting these in without losing my temper was...trying. Once in, I lined everything up with the Brassmasters jig. Basically a piece of brass with cut outs in them that take the axles that keep them parallel while the glue sets. Added some more lead and I now have a very sweet running brake van...which brings it's own set of peculiar problems. Nothing's easy! I suspect some blue tack will be used to stop a set of wheels being too free.

BR standrad brake van 1.jpg

In the mean time the glue is drying on the roof of the GWR A44 coach and I'd converted one of the Rapido AA20 toads (that took all of 5 minutes) - really impressed with the quality of the Rapido model. Not cheap by any means but light years ahead of anything else that's available. I need to put a couple of transfers on this to tell which district it's from. I'm sure I've seen some correctly sized on the transfer sheets from HMRS.
Absolutely no need for spring units as this model already has waisted bearings in the oil boxes. It may need some more lead but I won't be able to tell that till next time I'm in Tewkesbury...which is next week :).

Stay safe

Mike
 
Top