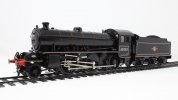
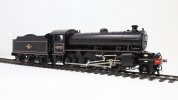
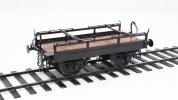
Genghis's 7mm Workbench

adrian

Flying Squad
Still having some problems uploading, so again have reverted to the old phone.
My apologies - not having replied sooner. I suspect it's a problem in that the new phone camera is too high a resolution (~25megapixels)

Whilst responding to another query #2 I spotted the following posting regarding image uploading and it being limited to 20 megapixels.

The photo you emailed me stood at 24.5 mega pixels (5712x4284) hence the error message about the size of the photo being uploaded. When Xenforo release V2.3 this will be upgraded to 48 megapixels so hopefully the problem will go away when that is released.

In the meantime with the new phone perhaps rescaling the image quality is not obvious or intuitive. My suggestion would be that cropping an image is usually a simple option on a phone. The photo you sent to me was 24.5 mega pixels, however a little judicious cropping of the image reduced it to 11.5 megapixels which the system can cope with. It doesn't take a lot to reduce the number of pixels and is probably the easiest solution with the new phone. Take the picture a little further away and then a little cropping of the image I believe should work. As demonstrated below.
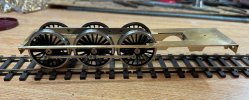
image0 copy.jpeg
 

Dave Holt

Western Thunderer
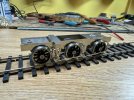
Can't comment on the accuracy of the kit or camera resolution limits, but aren't the rear coupled wheels close to the rear drag beam? Most 4-6-0s have a much greater overhang. Wonder why the locos were designed that way.
Dave.
 

Genghis

Western Thunderer
Can't comment on the accuracy of the kit or camera resolution limits, but aren't the rear coupled wheels close to the rear drag beam? Most 4-6-0s have a much greater overhang. Wonder why the locos were designed that way.
Dave.
Pretty close to prototype I think.
Dave
 

Dave Holt

Western Thunderer
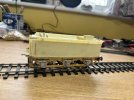
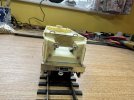
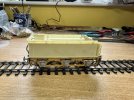
Printing certainly looks to save a lot of work on tenders with rounded corners and flared tops.
What's so fearsome about the loco handrails? I suppose we'll find out when we see them.
Dave.
 

Genghis

Western Thunderer
Printing certainly looks to save a lot of work on tenders with rounded corners and flared tops.
What's so fearsome about the loco handrails? I suppose we'll find out when we see them.
Dave.
The handrails sit on top of pipes that run the length of the boiler. So I have to drill through the pipes to take the collarless handrail knobs. The handrails are nominally continuous and pass through the smokebox mounted lamp socket. The whole assembly needs to be demountable for painting. It may turn out to be not so bad when I start.

And I've just realised that I have forgotten the lifting rings and fireiron guard from the tender............

Agree about the ease of using the resin casting!

Dave
 

LarryG

Western Thunderer
Prince of Wales looking good. Would have loved to see a real one in action.

Friend Geoff Holt used to play heck when his handrails were cut off by a certain painter. I saw no reason to remove them prior to painting.
 

Genghis

Western Thunderer
I have been asked to provide a few more details on the handrail assembly.

The starting point was the boiler band positions as the supports pass through the centre of the bands. So I put some masking tape on the boiler and then marked the position of the handrail knobs on this. Then I drilled through 0.8mm for the shanks of the collarless handrail knobs.

I then carefully marked up the same positions on the tubing using a 'mark on anything' pen. Then I took a slitting saw and cut a flat on the tube at the locations where the knobs fit. Obviously you need to get these flats in the same plain! Then I drilled through 0.9mm at these locations, the larger diameter to account for tolerances.

Then I added the pipe elbows to the tubing and fitted to the boiler.

Next up was a long length of 0.7mm straight wire. I formed the shape for the curve above the smokebox door, drilled through the lamp socket casting and threaded the wire through, adding two handrail knobs and then forming the bend to the straight section. Thread the handrail through the knobs and cut to length each side.

If I did this again I would be tempted to form the holes in the tubing first and then use that as a jig for drilling into the boiler.

Dave
 

Genghis

Western Thunderer
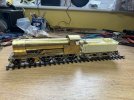
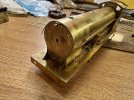
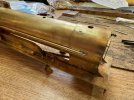
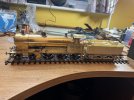
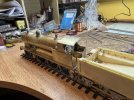
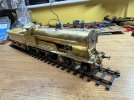
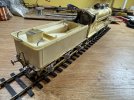
Now ready for the paint shop I think.
IMG_5617.jpg

IMG_5618.jpg


IMG_5619.jpg


IMG_5620.jpg

Handrails and backhead still not fixed.

I think I may do an out of the box Precursor tank build next: it will be an interesting comparison with the upgraded models that Nick and Mick are building.

Then again I might do one of Adrian Rowland's 6 wheel LNWR coaches.
 

Genghis

Western Thunderer
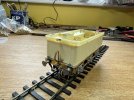
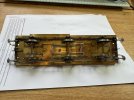
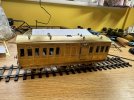
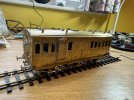
The 6 wheel coach won the race. I went slightly off-piste and fitted some brackets to the ends so that the floor is removable. The gas tanks are fixed in one carrier and slide in the other.
IMG_5621.jpg

IMG_5622.jpg

IMG_5623.jpg

Now on its way to Warren for painting in LMS Period 1 livery. He'll add the commode handles after lining.

Workbench now going to be subdued for a while. The etches for the new crab kit have arrived so I need to break these down and start packing. There is another batch of etches coming next week (crab tenders plus Princess and Duchess kits) and I need to get the melting pot on and start casting some whitemetal. Before all that it's a significant birthday for Trisha on Friday so we are off to the seaside for a couple of days, leaving Alex at home.

Dave
 

LarryG

Western Thunderer
I always preferred LMS fittings and LMS livery on LNWR locos and so when George Mellor (GEM Model Railways) asked me to build & paint one of his new kits, I returned to the factory with a loco in LMS crimson lake. He didn't just dislike it, he went annoyed haha.

Regarding Adrian Rowland's LNWR coaches, I talked him out of etching the door groove so I could more easily paint the white line around the doors. (Ever tried lining in a groove....?) :D
 
Top