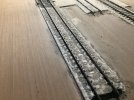
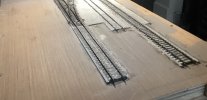
G.W.R. BLT: Almost there.

jonte

Western Thunderer
7 plots is about right Jon, I always liked the Douglas Adams variation: Boy meets girl under a romantic moon which promptly explodes!

In our case there’s a similar number, start a layout, change scale, change country, revert to previous, go P4, build a garden railway and so on….

Yes Canada St is an amalgam of locations, but very similar to Merseyside and most atmospheric.

Im currently mulling over how to proceed with my 2mm ballasting… I’m worried that I didn’t take 8f to account the high water content of this when building the baseboard in card

keep on keeping on

John

:)):))

That irony of rinse repeat occurred to me just after I’d written my earlier post. Certainly is in my case too. Life imitating what-not?

I think the solution to your predicament, John, is to apply neat Pva to the card base (and underneath/inside if you) can to ‘proof’ it. I’ve found that Pva will stick to an already pva’d coat, whatever the concentration of the original application.

Hope that helps.

Jon
 

Brian T

Western Thunderer
Fulton County, from memory, Brian.

I did a search recently which wasn’t particularly successful; not for these images anyway.

From memory, I think it was a short line in the proximity of Rochester; I even recall a YouTube video of this very loco and it’s train of hoppers being filled, but for some reason recent searches are proving fruitless.

Hey, Ho.

Jon
A bit late, but thanks for the info and love the C420 video too :thumbs:

I did have thoughts of something simillar in O gauge but have decided to stick with the early 1950's though. (Minieapolis & St Louis railroad)

But no harm in adding that one to the "might do one day" list also ..!!
Now how much are them Lionel C420's :rolleyes:

Cheers Jon,
Brian.
 

jonte

Western Thunderer
A bit late, but thanks for the info and love the C420 video too :thumbs:

I did have thoughts of something simillar in O gauge but have decided to stick with the early 1950's though. (Minieapolis & St Louis railroad)

But no harm in adding that one to the "might do one day" list also ..!!
Now how much are them Lionel C420's :rolleyes:

Cheers Jon,
Brian.

No problem, Brian. My pleasure :thumbs:

So then, they are available commercially, but from memory isn’t Lionel ‘O’ Gauge?

Most definitely out of my league :eek:

Jon
 

John57sharp

Western Thunderer
the solution to your predicament, John, is to apply neat Pva to the card base (and underneath/inside if you) can to ‘proof’ it. I’ve found that Pva will stick to an already pva’d coat, whatever the concentration of the original application.
Aha! Well that’s a dose of good fortune, the track is glued down with PVA so there is already some there….I’ll just dd more and be careful with the water.

Thanks again Jon
John
 

jonte

Western Thunderer
Aha! Well that’s a dose of good fortune, the track is glued down with PVA so there is already some there….I’ll just dd more and be careful with the water.

Thanks again Jon
John

Morning, John

I’m glad you found it of use; now I just hope it works out :oops:

Seriously though, John, if you coat both sides (top and bottom say of the base) then it will help to avoid warping.

Good luck :thumbs:

Jon
 

jonte

Western Thunderer
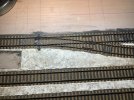
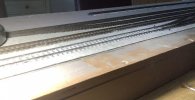
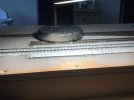
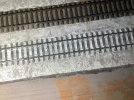
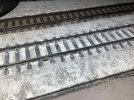
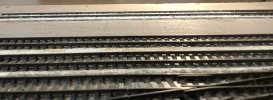
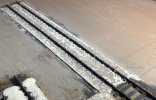
I made mention in my last about mixing up the style of ballasting to give a nod to that of old Western branchlines in latter years, and having attempted this on the area of the main running line in part, I thought I’d show you what I mean, the glue now having dried since completing the job last night.

This is the headshunt of the run round loop:

DF40236F-2D62-45CE-9E43-12BF0DD13260.jpeg

And here it is side on (it’s the greyed looking track in the background - a trick of the light):

85DE453F-E7E8-4BF9-80A0-3D8A11434B8C.jpeg

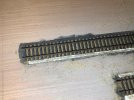
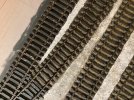
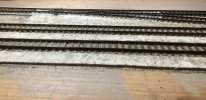
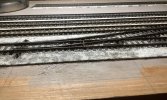
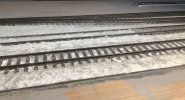
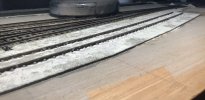
Hopefully you can see that by ensuring the ballast reaches no higher than the spines that run the length of the flexi track, immediately below each running rail, it gives that ‘exposed sleeper’ look of ballast well past its sell by date, which also helps to make the rail look finer when the gap can be seen between it and the sleepers/ballast, and can best be seen when contrasted with the sunken look of the track in the foreground (which will need enhancing with an ash ballast covering such that only chairs and rail - and perhaps the odd sleeper or two - are exposed):

The loop (middle of the three tracks shown):

9406884F-18AA-4E6E-A4D7-8A6B067DA234.jpeg

And side on (third in from front):

9854AAFE-D04B-4AA1-B8E9-E30E3A12DC00.jpeg

Apologies for the poor light but my lamp can’t extend fully as I’ve left my extension lead at my daughter’s after spending the day doing a job for her. Still, I hope you can make out what I’m referring to.

Hopefully this will make clear what my intentions are for those members who might be thinking of following suit, and of course, this would probably look a little more appealing with track scale track.

jonte
 

Joe's Garage

Western Thunderer
A nice little distraction to the "dark side" Jon, I certainly like the back street scenes of the US lines.
But then you go and mention Abbotsbury.....my favourite railway station even though it was only ever one engine in steam operation.
As I said before Dave that is a lovely photo of a station no more...alas!
Oh by the way Jon like the ballasting!!
Cheers
Julian
 

jonte

Western Thunderer
A nice little distraction to the "dark side" Jon, I certainly like the back street scenes of the US lines.
But then you go and mention Abbotsbury.....my favourite railway station even though it was only ever one engine in steam operation.
As I said before Dave that is a lovely photo of a station no more...alas!
Oh by the way Jon like the ballasting!!
Cheers
Julian

Hello, Julian, and thank you for the compliment :thumbs:

Still taking things steadily as it’s new ground.

Re the Dark side: I’m beginning to worry it’s becoming TOO much of a distraction to be honest. Spent the Lion’s share of spare time today poring over ‘rails in the road/dirt’ over in LA, and reacquainting myself with the art forms of Lance Mindheim.

I’ve even dug out an unused Peco Code 100 3-way which has been in my possession for donkeys and never been raced or rallied! Imagine my excitement when I discovered that it’s also electrofrog: I thought all Steamline three ways were Insulfrog :eek:

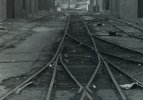
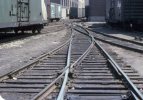
With a 3 feet board already formed and going spare, umpteen point motors and left over flexitrack littering my garage and den, I’ve a mind to creating a small 3-2-2 Inglenook to challenge the family when they pop round for Sunday dinners etc instead of the other table games we play, and based on the team track seen in one of the earlier piccies secreted between Mill Street E 7th and Industrial Street, LA.

Here it is again (unknown photographer):

11E51F0B-956E-4D73-A9D5-0F7476684761.jpeg

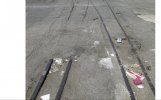
…….and one round the corner from where the lines squeezed between the Santa Fe suppository (?) and an immediately adjacent building, taken many years after the lines were abandoned:

5A91FAE6-5836-4C6C-B942-D16DE285204B.jpeg

Here’s another from elsewhere, but the colour of those ties and backstreet type industry…..:

6418B486-FD03-4D66-8E48-21CE882C0CC7.jpeg


Lord help me!

Jon
 

Roger Pound

Western Thunderer
Love those back street scenes that were so popular in the US. I must confess if I ever get round to making something of Frenchman's Creek, that sort of prototype will have more than a little influence. If I might, Jon, may I suggest using inset track would:-
(a) nicely hide the fact you are using code 100 as opposed to the more accurate US pattern track now available, and
(b) obviate the worry of sleeper colouring and ballast texture completely - assuming you didn't have to incorporate an accessing track, not inset in to tarmac........:confused:! Finally
(c) Just think of the fun messing about with an infill mixture :)!

Cheers,

Roger ;).
 

jonte

Western Thunderer
Love those back street scenes that were so popular in the US. I must confess if I ever get round to making something of Frenchman's Creek, that sort of prototype will have more than a little influence. If I might, Jon, may I suggest using inset track would:-
‘A’:
(a) nicely hide the fact you are using code 100 as opposed to the more accurate US pattern track now available, and
(b) obviate the worry of sleeper colouring and ballast texture completely - assuming you didn't have to incorporate an accessing track, not inset in to tarmac........:confused:! Finally
(c) Just think of the fun messing about with an infill mixture
:)!

Cheers,

Roger ;).

I agree at ‘A’, Roger :thumbs:

Jon
 

jonte

Western Thunderer
I have a confession to make:

I committed the mortal sin of jamming up the tie bars with glue :( :(

For the first stage of ballasting, this wasn’t a problem as I could control the location of the neat glue, applied with a paint brush. However, in my naivety, when it came to the second stage where the Pva solution was applied to wet ballast with a dropper, I didn’t anticipate just how much the capillary action would ensue.

I therefore submit the following for the info of those who might unwisely be considering following this fledgling ballaster.

How to get out of a sticky situation?

In the unlikely event that you are as daft as me and manage to carelessly jam up the works, a dropper of scalding water from a kettle (or as hot as you dare) applied in copious (soak it) amounts to the length and breadth of the tie bar will dissolve the glue. Allow it to soak, and very gradually increase the pressure on the blades until it breaks free, which shouldn’t be much once it’s had an opportunity to soak in. Over the next couple of hours or so, make several visits to flick the bar back and forth. You might find that it’s still a little stuck the following day, however, repeating the exercise (just flicking back and forth a few times) will ensure the problem is fixed for good.

So, how to ensure this doesn’t happen in the first place?

I reckoned that some sort of barrier would be required ( research suggested the use of Vaseline for the purpose, however, the thought of gooey stuff near to sand gave me the shivers!).

My solution was to decant some WD40 into a tub/tray/container of some sort, and then apply right around the full length of the base of the tiebar with a well saturated cocktail stick. Here’s a piccie:
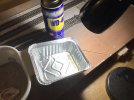
C7AE0DF4-70C0-497A-AD57-C2B567C398DA.jpeg

The fluid can just be seen pooled to the right of the tray.

Thus far it has worked quite well; I’m hoping my luck continues as I’ve started ballasting the points, but as recent sections of track adjacent to the points were ‘flooded’ with glue, I’m as sure as I can be that it works.

Hope that helps.

jonte

Edit:

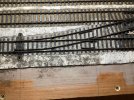
This is a photo which shows a point after Pva mixture applied:
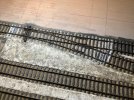
E0C720CA-6527-4177-8797-23362CF97E38.jpeg

If you look closely at the tie bar, you can see the water droplets, applied via an atomiser prior to applying the glue, sitting on and around the bar. I suppose it’s because oil and water don’t mix?
 
Last edited:

Roger Pound

Western Thunderer
A piece of bog-standard masking tape can make a useful baffle for this job - it is what I use because it is easy to both apply, remove and is extremely efficient. Easily obtained from your local Auto-spares shop and cheaper than WD40 (good as that is :) .)
It may help........?

Roger.
 

jonte

Western Thunderer
A piece of bog-standard masking tape can make a useful baffle for this job - it is what I use because it is easy to both apply, remove and is extremely efficient. Easily obtained from your local Auto-spares shop and cheaper than WD40 (good as that is :) .)
It may help........?

Roger.

I concede, Roger, that yours is a far cheaper and easier solution than mine, my friend. Never thought of that :oops:

At least I can successfully report that my convoluted idea worked in principle; no gumming up the works in the two I’ve done so far:

6D35BB54-E619-44F0-9BC8-CEBC30426E0A.jpegE15806A1-D818-4A04-A3B4-60F5DF0BF1E5.jpeg6D3797E2-8010-4797-900B-3E90CC53922E.jpegF5AF749E-66AA-4BE7-AA6D-3E66969772B0.jpeg

Thanks for sharing :thumbs:

Best,

Jon
 

Joe's Garage

Western Thunderer
Lovely photos of industrial LA Jon, definitely addictive!
Just be a bit careful with WD40 as some plastics don't like it, but it is magic stuff. Now so expensive in some places.
All the best
Julian
 

jonte

Western Thunderer
Lovely photos of industrial LA Jon, definitely addictive!
Just be a bit careful with WD40 as some plastics don't like it, but it is magic stuff. Now so expensive in some places.
All the best
Julian
Thanks for the heads-up, Julian.

Fortunately, by using the end of a cocktail stick I was able to control the application and keep it to a minimum, but I shall bear this in mind for next time.

Cheers.

Jon
 

jonte

Western Thunderer
Taking five to finish the ballasting process, thoughts turned once more to signalling the layout.

I’ve decided there will be three only; more about that another time.

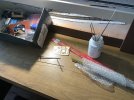
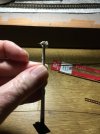
Whilst waiting for the last of the glue to go off on the ballast, I gathered together the odds n sods from which I hope to fabricate something resembling a GWR semaphore signal:

3FA8B6E6-889F-4CB2-BB9D-4A83148887D0.jpeg

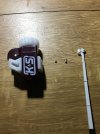
Then I started fiddling with the broken former Ratio semaphore using a small pair of fine nosed pliers and my nails, to remove the rivet provided. I had hoped to insert a piece of brass tubing to hold the arm axle. Sadly, nothing in the spares box would fit, so it was gingerly removed so’s not to enlarge the cavity, as it appeared that the slimmest tubing available would be a suitable fit. A piece of suitable length was cut with K&S cutter which can be seen below (the removed rivet is to the right):

0D99760B-6074-40B3-B5A6-A3D756FA5331.jpeg

The cut piece of tube was a tight enough fit, but a smidgeon of two-part epoxy was applied, as belt n braces, to the front and rear with a fine piece of brass wire so as not to bung up the hole:

51BA7CBD-6FE6-4C73-B95A-54050D016E7E.jpeg


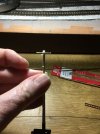
A straight enough orientation:

D0321F05-4469-4224-906D-ADE95F003991.jpeg5E4C4319-F427-4009-A8A9-5610E77120B1.jpeg

Incidentally, the brass pin will act as a suitable axle for the arm, this providing the least slop of the material available.

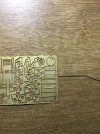
I’ve decided that it will replace a ground signal (too fiddly) and control the exit from the outer head-shunt and sidings. I’ve chosen to represent this using the steel (short) arm shown at no.4 on the fret (with the brass wire adjacent), displaying the ‘O’ ring top right of fret (no.8) on the arm:

288E61BF-8D0F-4C4E-8A95-CE96EC307812.jpeg

I’ve really no idea if this will work, mainly because I’ll have to solder with a very hot iron and be quick about it if I’m to prevent the whole lot melting, so we’ll just have to see.

Once the epoxy has gone off (this was chosen over superglue as I’ll be soldering), I’ll remove the moulded lamp, lamp bracket and horizontal stanchion supports, as I’ll be using MSE brass brackets and replacement Modelu lamps, the supports serving no purpose.

jonte
 

jonte

Western Thunderer
Whilst attempts to address the signalling aspect of the model have commenced, ballasting hasn’t completely been forgotten.

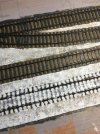
On the contrary, I’m pleased to report that the laying down of ballast is complete and attention has turned to dressing the lesser used areas of track I.E. headshunts and sidings. To that end, I’ve been covering the ballast with more plaster in an attempt to replicate the ash type found in these areas.

Rather than splodge it on, I chose to apply the slurry as carefully as possible with different size paint brushes as not having attempted this before, I didn’t wish to risk having to clean the stuff from the umpteen chairs to each side of the rails….:

868DC25B-9A98-4E08-9791-A280567AFEBA.jpegFD066793-2255-4EA5-B9EE-768FB114CEBD.jpeg

It took absolutely yonx to do, but I was grateful for the care taken when cleaning up later:

EC48F7BA-E4C8-456F-BCFD-E9E5298CC350.jpeg0C7460E1-945E-4E09-8D7F-C9B432BC9DD2.jpeg985E1AB5-EDA8-471B-97ED-A7808B48BEEE.jpegF86B4E61-545A-4851-BBF9-47CA0940211A.jpegF8868280-38F5-4AA6-A7CA-E248E77501F7.jpeg

I don’t think it looks too bad, even if I say so myself, and blends quite seamlessly with the ash surface already laid.

I’ll continue with the others, perhaps raising the stoney/dusty deposits above the sleepers in one or two places as per the likes of the Fairford branch, before taking the airbrush and an array of enamel washes to it.

Fingers crossed.

jonte
 

jonte

Western Thunderer
Time has been at a premium of late so fits and starts have seen me, at long last, finish the ballasting (apart from the odd touch up here n there). As usual, reference has been made to the three volumes produced by Stephen Williams for GWR modellers, to try and keep a handle on what yards looked like in this late era. Usual disclaimer applies regarding the true accuracy of the ballasting represented, as the methods devised have had to take account of the far from scale track.

Hopefully, you will recognise expired ballast on the running lines, and a mixture of ash laid lines in the sidings.

The long (back siding):

DEEC38D0-03D1-4B34-BBCD-D17D0CC25621.jpeg8F62888E-BFE6-436D-8056-C446BB43BA88.jpeg

Looks far grainier here than in reality:


4D11EA21-8311-456F-A803-3008E6136C9A.jpeg

The headshunt:

775E2075-4633-4C32-86D5-05C8F8420A5B.jpeg

Middle siding:

F9843079-805C-494E-B2BA-14967FB7C2E7.jpeg0A45293F-0C8A-4F7C-B8C5-264549B882CD.jpeg

Far right siding:

80B1869D-487F-498C-909B-EA8D461817AE.jpeg

From the end of the headshunt:

E91BBFA1-68B4-4703-9E08-3A5772781A32.jpeg109BCC24-8312-4B31-ABA6-0717E79688CF.jpegD1C8B316-D1CE-4AA8-8F6F-C4D767F8CDA5.jpeg6B4D9487-3E0E-40E8-BC20-310BAAD8D224.jpeg

I think you get the idea.

These have been ballasted with PVA meant for building purposes (forgive my ignorance) which I found in the garage after running short of the ordinary stuff.

I should have gone and bought some more as this variety made working with the plaster more difficult and left bubble holes and a plasticky film in places, but we live n learn.

Once painted, it should look okay.

jonte
 

Attachments

  • 05C74025-DF67-4DBA-9BAB-FCE0FCBA0A55.jpeg
    05C74025-DF67-4DBA-9BAB-FCE0FCBA0A55.jpeg
    112.4 KB · Views: 3

jonte

Western Thunderer
Definitely the continuation of a gritty saga, Jon............... :D !

Roger ;)

;)

I sincerely hope so, Roger.

Reference to the tome previously mentioned revealed that plaster alone was too smooth for the job; it could be improved I suppose, but it’s time to move things along (when I’ve got the time, which is in very short supply these days; just had to chase after my granddaughter in between writing this as she’s taken to operating my tablet - and doing a better job of it too! - while wearing my glasses :))).

Write soon.

Jon
 
Top