You are using an out of date browser. It may not display this or other websites correctly.
You should upgrade or use an alternative browser.
You should upgrade or use an alternative browser.
Beginners OO 1950's Banff
- Thread starter aardvark
- Start date
I agree. It's nice occasionally to work on something relatively simple and quick to finish, and there will be times in the future when you take photos from the non-viewing area when the lens can see into the signal box,As all the pictures you have posted have been interesting, and the modelling is exquisite, I for one would vote for more…
But as to not putting an interior in your signal box…. Well, dreadful, just not cricket!

Of course, there's no "o" in GNSR!Banff is an extremely attractive location. Both compact, and busy.
Plus the possibility of using the handsome GNoSR 4-4-0s.
Looking forward to this!
Peter
Martin Shaw
Western Thunderer
It depends on context of usage. When painted on the side of a vehicle I would agree that the "of" was absent, as was the "R" on goods vehicles, however formally as reference to the company and most certainly legally, and I include the various acts of parliament enabling the railway in the first place, it is present and somewhat necessary for language purposes.Of course, there's no "o" in GNSR!
Martin
Last edited:
Ian@StEnochs
Western Thunderer
Equally the Glasgow and South Western Railway is correctly shortened to G&SWR except by sloppy enthusiasts who miss out the apmpersand and cause confusion with the Great Southern and Western Railway!It depends on context of usage. When painted on the side of a vehicle I would agree that the "of" was absent, as was the "R" on goods vehicles, however formally as reference to the company and most certainly legally and I include the various acts of parliament enabling the railway in the first place, it is present and somewhat necessary for language purposes.
Martin
Ian
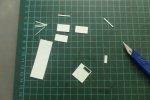
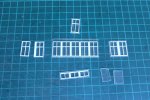
The main signalbox windows cut out, assembled, painted and glazed.


This is pretty much the same as previously, except this time I cut the window frames from 0.5mm plasticard. The two spare bits of glazing are for the windows on the enclosure at the top of the stairs, which will be cut later from 0.25mm as befits the flimsier construction.


This is pretty much the same as previously, except this time I cut the window frames from 0.5mm plasticard. The two spare bits of glazing are for the windows on the enclosure at the top of the stairs, which will be cut later from 0.25mm as befits the flimsier construction.
michael mott
Western Thunderer
Oh that brings back so many memories. I filled my parents mantle piece with those first edition airfix planes, all done by tea time on a Saturday afternoon after purchasing them at Woolworths on Acton high street in the morning with my pocket money.The original Airfix series 1 Spitfire kit from @50+ years ago with 20 or so parts, built with the impatient of a pre-teenager!
But that'll go far, too far, off topic!
cheers
Michael
simond
Western Thunderer
Mine were typically purchased en route to my mum’s friends‘ place for Saturday dinner.
I was a polite, slightly shy child (things have changed, I now have more in common with Victor Meldrew) and was delighted to sit at table with the grown ups, knowing that I would then be left with my Airfix kit, and a tube of cement, on a lot of newspaper, after the dining table had been cleared, untli it was time to go home.
no paint…
probably just as well.
The west and south walls have been silled and fenestrated: west wall only partially so, as I suspect that the sticky-outed-ness of the open window will lead to a degree of knocked-offed-ness as construction continues.

And with that, the construction begins to actually look like a signal box.
The east wall joins the party.

As previously shown in CAD drawings, the Banff signal box had an enclosure at the top of the stairs - I'm presuming that the landing was enclosed at some point to provide the typical British "air lock" entry to the 'box. I'll have to make a door for the upper floor which I hadn't previously thought about. Not that you'll be able to see it.

And with that, the construction begins to actually look like a signal box.
The east wall joins the party.

As previously shown in CAD drawings, the Banff signal box had an enclosure at the top of the stairs - I'm presuming that the landing was enclosed at some point to provide the typical British "air lock" entry to the 'box. I'll have to make a door for the upper floor which I hadn't previously thought about. Not that you'll be able to see it.
The east wall is fenestrated, but awaits its door. The north wall and a floor join in, although temporarily at this stage while I think about how the air-lock might be best aligned and attached.

The following shows the east wall door (left) in company with the air lock door.

My normal practice is to cut separate pieces for separate colours, and to paint them prior to assembled, which gives better edges than I would otherwise achieve. However, the east wall door is just a single piece of plasticard, roughly painted without the benefit of undercoat, just enough to give a good impression. The white window frame here is just raw plasticard.
The air lock door is assembled from 5 pieces. The gap below the door is where the floor will poke through to provide the doorstep.

The following shows the east wall door (left) in company with the air lock door.

My normal practice is to cut separate pieces for separate colours, and to paint them prior to assembled, which gives better edges than I would otherwise achieve. However, the east wall door is just a single piece of plasticard, roughly painted without the benefit of undercoat, just enough to give a good impression. The white window frame here is just raw plasticard.
The air lock door is assembled from 5 pieces. The gap below the door is where the floor will poke through to provide the doorstep.
To re-enforce my status as a beginner, after posting the last pictures, I realised that I'd skipped a couple of steps in installing the window in the east wall, so out it came, the sill added, window re-installed, along with its next door neighbour.

There, that's better.
The air-lock door gained its floor and a couple more walls to fulfill its destiny.


There, that's better.
The air-lock door gained its floor and a couple more walls to fulfill its destiny.

The sub-roof structure and chimney are constructed from 1mm card, ...

... and trial fitted with the roof halves onto the signal box.

I'm still undecided about the interior. This 'box would have cost less than A$10, so I really can't countenance spending A$30 on a Peco interior which you probably won't see anyway*. I am considering making something myself - it wouldn't have to be much, but for now the roof is removable.
* recall that the "front" of the 'box faces south on the prototype and away from the model viewer, should one ever come along.

... and trial fitted with the roof halves onto the signal box.

I'm still undecided about the interior. This 'box would have cost less than A$10, so I really can't countenance spending A$30 on a Peco interior which you probably won't see anyway*. I am considering making something myself - it wouldn't have to be much, but for now the roof is removable.
* recall that the "front" of the 'box faces south on the prototype and away from the model viewer, should one ever come along.
The rooves are on ...

... with fascia boards to come.
Parts for the stairs and associated jig have been cut from 0.25, 0.5 and 1.0mm plasticard, plus a few other bits.

In the bottom right corner you'll see a crate assembled from plasticard. This was a project that hung over from the goods shed, and in the interim, I managed to misplace one of the tiny pieces, so I had to re-cut a replacement.

... with fascia boards to come.
Parts for the stairs and associated jig have been cut from 0.25, 0.5 and 1.0mm plasticard, plus a few other bits.

In the bottom right corner you'll see a crate assembled from plasticard. This was a project that hung over from the goods shed, and in the interim, I managed to misplace one of the tiny pieces, so I had to re-cut a replacement.
After a busy week (or two) legs are made, painted, and attached to the airlock. To assuage any fears, they will sit on raised ground around the 'box, as per the prototype. One day.

Also shown is the stair hand rail, which has been assembled and attached, and the stairs painted. While I'm sure others could do better, I'm happy with the result as judging colour is one of my weaknesses.
The stairs are shown here temporarily positioned, as it occurred to me that permanent attachment would limit my ability to tone down the over-bright paintwork of the 'box. Weathering powders have been ordered. I will paint up some clapboard off-cuts to experiment on.
In the meantime, I probably need to start thinking about a new project. Perhaps I should consider the Scotstown cottages before I forget how I build buildings.


