3D Printing - whether to buy, what to buy and how to use it?

King Crab

Western Thunderer
Peter,
Unless your budget is extremely tight, I would choose one of the Mars 3 versions over the Mars 2 every time. The specs are just better in every way really. The reality is that even a new Mars 3 is ridiculously cheap at the moment, with the Pro at $285 to the UK and the Ultra at only $220 (sadly sold out here in the US but still available in the UK).

I second most of what Simon has mentioned, except that I wouldn't worry about the FEP sheet. It's a consumerable, relatively inexpensive, and relatively easy to change. The other line items are more critical, certainly you want all the hardware to be in good form.

I also wouldn't necessarily expect a wash & cure station to be included, unless the sale price was unusually high. If getting both, I would expect the total cost to be about 1½ times as much as the printer alone.

Last note, there are effectively 3 "phases" of Mars 3 printers. The Ultra is the first iteration of Mars 3, and there are an early and late version of those. The earlier version can be identified by a square cap on the top of the Z axis column.
View attachment 185599

The late Mars 3 Ultra has a beefed up Z axis column, I presume it was modified to deal with the "Z axis wobble" issue that was common with the early units. The late version can be identified by a "D" shaped column cap, and flanges seem deeper in the Y direction.
View attachment 185601

The later version also featured an "improved" vat design with a pouring spout on one corner. I don't think much of it though, I find pouring resin out of the vat with or without the spout makes a mess either way.

The last version is the Mars 3 Pro. It has some upgraded features, slightly bigger screen, better glass protecting the screen. I think it's supposed to have a better light array as well, and lastly include some charcoal filters for odor. I don't think the Pro looks much different from the later Ultra models, but apparently it says "Pro" on the front, so I would look for that to identify the latest version.

The point of all of the above is to help you know what you are getting, and maybe which one to choose if multiples are on offer. Setting aside price, I would first choose the Pro, than the late Ultra, then the early Ultra last. Of course price will play a factor though, but only you can balance that versus which unit you choose. I will say that I have both early and late Ultra's, and I am more than happy with the results from both machines. Often the prints are stunningly good. I can't say whether the upgraded specs on the Pro make any sort of difference, I've not used one nor heard feedback from somebody that has.

I guess the bottom line is I don't think you can go wrong with any of the Mars 3 printers. But if there is a big price difference between an available Pro versus Ultra, I would be strongly tempted to choose the Ultra. Put the extra cash toward a curing station or supplies like film or resin.

One other thing I forgot above, both of my Ultra's came with a free one year subscription to Chitubox Pro. You may or may not get that buying a unit second hand. It's not really a deal breaker, the regular Chitubox is certainly servicable, and other slicing options exist as well.

Hope that helps,
Jim

Thanks Jim for the further info.
I'll add it to my list of queries,
and thoughts to be taken into consideration...

Peter
 

Dog Star

Western Thunderer
Previously... when wanting to convert a 3D CAD dwg to (real world) lost wax castings I have provided Slater's Plastikard with a 3DP from Shapeways ( done in FUD). Slaters has converted the 3DP into a mould for a brass master and then used the master to produce repeat copies of my original print.

Now that my Son is doing 3DP in-house we have come to the point where we are ready to send one of our 3DP for mould making and casting. At this t ime we use an Anycubic Photon Mono X with Sariya Tech Fast Navy Grey resin.

Anyone have experience of the route that we intend to take for production of the brass castings?

Anyone have of Sariya Tech FNG as a suitable resin patterns to be used for mould making?

thank you, Graham
 

GrahamMc

Western Thunderer
Anyone have experience of the route that we intend to take for production of the brass castings?
There was some discussion of this in a few threads, one example of this being here. That was about the casting process, there's another one here that covers a couple of other points, shrinkage etc. No doubt there are several others. Hope that helps.
 

Big Train James

Western Thunderer
Hi Graham,
I have recently been part of an endeavor to produce brass parts via lost wax casting, using 3d printed parts for the mold patterns.

I'm using Siraya Tech FNG for the patterns, printed on an Elegoo Mars 3 Ultra. The parts in question were driver center castings for a PRR locomotive, so some areas of detail but more critically nearly 100% non-planar surfaces in an infinite number of orientations. I ultimately printed them at 10 micron slicing thickness, in order to achieve a surface quality that was acceptable without requiring post processing. The patterns were then sent to the caster for use in making RTV molds. The molds were in turn used to shoot waxes for burnout.

I don't think there were any issues at all with using the FNG prints as patterns to create the molds. One caveat to note is that the driver centers are fairly robust, so no thin sections or fine details to worry about. Finer parts might present more issues in the mold creation process, although I'm not sure how as long as they don't fail before the mold material sets. Anyway, no issues to report with the FNG in my particular application.

Another caveat to consider would be if you want to create vulcanized molds. The additional heat required in that process would likely exceed the the capabilities of the FNG. However, Siraya Tech does make Sculpt, which has a heat tolerance that is suitable for use in vulcanized mold making. According to the marketing, Sculpt should be able to render prints with an equivalent level of surface quality and precision as FNG allows. So that may be a viable alternative if you want to pursue vulcanized molds.

After the molds are made, the rest of the process is the same as with any other pattern. You will need to account for shrinkage in the mold and the brass. You will need to consider whether the wax shots can be safely de-molded. You will need to properly sprue the parts for material flow, and consider the size and mass of parts and their effect on casting temperatures. The shrink factor should be discussed with your caster, they should be able to give you a figure based on all relevant criteria.

I'll have to have a look around and see if I have photos of the prints. If so I will post them. No photos of the resulting brass parts, but I can say that the end user was very satisfied with them. He's as particular as I am, so they must have been good.

Now we are moving toward using a castable resin for 3d printed parts that will burned out directly, with no molds made. This is the same process outlined in John Baker's thread. The castable resins are quite a bit more expensive than standard ABS-like types. However, their use is economical compared to the cost of producing molds, if a short run is all that is required, and we fit that description. More on that when it happens, which will likely happen mid-summer.

Jim
 

76043

Western Thunderer
Quick question about shapeways.

I'd like to purchase just some 4mm RCH buffer bodies, can't see any anywhere else except Shapeways. I have lots of buffer heads in stock.


I assume the best quality is the most expensive and is the price quoted the total price plus shipping? There's no other handling fees?

I've no experience of Shapeways.

Cheers
Tony
 

76043

Western Thunderer
Thanks Mike, I did see the postage, which is a bit high, but in the absence of any other options is ok.
Cheers
Tony
 

simond

Western Thunderer
Modelu have a Patreon project - some details here


and my foray...


Dog Star

Western Thunderer
My Son Peter has been expanding the range of what he prints... we started with parts that can be described as detailed lumps and we have moved on towards underframe details such as buffer guides. Other rolling stock details are in our sights and before we go there I am inclined to ask for the wisdom of the WT-clan.

Siraya Tech FNG has some flexibility and that is ok if we are printing solids such as buffer guides. What is the long term behaviour of this resin if we print parts that could benefit from a degree of flexibility, such as bearing springs? Does FNG suffer from stress failure induced by cyclic loading?

regards, Graham
 

simond

Western Thunderer
Graham,

I do not think I’d use the inherent flexibility of the material to make visually accurate, working springs. The details that you’d want to include will inevitably cause stress raisers which I’d expect to lead to cracking & failure sooner or later. Near-enough all materials will fatigue, eventually - that’s an exaggeration, but not a huge one.

Also, whilst FNG is flexible, it exhibits brittle failure in some circumstances - to an extent that surprised me. I’m guessing this implies a crystalline nature, if so, the stress raisers will be all the more critical in a fatigue loading situation.

That said, it’s not like it’s expensive or difficult to try, Peter could print a few chassis with working springs and you could see a) if they work acceptably, and b) how long they last. Would be good data!

some drawings here…. https://www.westernthunder.co.uk/resources/rch-wagon-drawings.4/

Sorry, one last thought. Springs have shackles, or sliding shoes, in order to allow the ends to move outwards as the arc flattens. Whilst sliding shoes are feasible in 7mm, I suspect shackles are going to require some watchmaking skills!

atb
Simon
 
Last edited:

simond

Western Thunderer
As those of you who follow my workbench will be aware, I am in the final stages of the CAD for a GW match truck, all curved iron plates and rivets.

SimonD’s workbench and a couple of preceding posts

there are a further 14 rivets to add to this (unless I spot any more that are missing) and I am intending to print over the weekend. I would be very grateful for any thoughts as to the best way to support it on the build plate.

1690460306673.png
pretty much as it sits on the wagon.

My thought to support it is to angle it backwards so the resin can easily drip off both the top, and from the inside.

Something like this (these being during the actual printing, so build plate above)

1690460459283.png

1690460506530.png
I might kick one end up a few degrees as well.

thoughts, comments and suggestions are most welcome!

thx
Simon
 

Andy Ross

Western Thunderer
I was at an event and a 3d parts trader told me that the magic angle to use is 18 degrees. I have tried it and although it is not always perfect it was a lot better than 45 degrees.

Andy
 

simond

Western Thunderer
Thanks Andy,

The challenge with this particular part is that it has traps. I have angled it so that, as far as I can tell, the resin can run out, and that it won’t trap air when the plate goes down into the resin. Actually, it will a bit, but hopefully not so it’ll cause an issue.

45 degrees is easy, because there is an increment in Chitubox, I’ve just kicked off the print, and the angle I had gone for was 21 degrees, not hugely different, let’s keep our fingers crossed!

the springs and a couple of other bits were kicked over at 10 degrees to try to not have a horizontal face as the meniscus seems to keep some resin on such surfaces. I might well try increasing that based on your “trade secret” :)

cheers
Simon
 

garethashenden

Western Thunderer
Quick question about shapeways.

I'd like to purchase just some 4mm RCH buffer bodies, can't see any anywhere else except Shapeways. I have lots of buffer heads in stock.


I assume the best quality is the most expensive and is the price quoted the total price plus shipping? There's no other handling fees?

I've no experience of Shapeways.

Cheers
Tony
Aren't these what you want? Available with or without heads: B003
 

SimonT

Western Thunderer
I have found about 11degrees in one plane and 7 in the other to work well on both the Form and Saturn. If there is a void which can trap resin I place a drain hole to get rid of the trapped resin. Formlabs will not let a print start if there is a trap. I've also kicked Chitubox into the long grass and started using Lychee, a vast improvement to my mind.
 

mickoo

Western Thunderer
Interesting about angles, I've found anywhere between 32° - 36° works best or if twin axis then 32° and 14.4°.

All of which kind of confirms what I've been banging on about for ages, all machines are different and the one thing that does not transpose, even when using identical machines and resin, is angles and exposure, it's all bunkum.

You have to find whats best for you locally and use that. So beware when someone tells you their magic numbers, there's a high chance they won't work for you.

It's also dependent on layer thickness as well, what works for 50 microns rarely works for 30 or 20.
 

SimonT

Western Thunderer
And to push home Mick's point about different machines, I have been printing at 50 microns on the Saturn and decided to print one of these files at 20 micron. I expected to get a problem to sort out but the file printed perfectly with no changes to the settings other than the layer thickness. No, I don't understand either.
 

simond

Western Thunderer
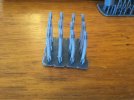
Well, as a first attempt, I’m quite pleased. It needs more prominent rivets, but the panels seem to be pretty much square and flat where they should be. A good start.

image.jpg

A little more thickness in the plate that supports the beam might be wise.

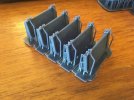
The T straps, otoh, we’re not so successful.

image.jpg

Nice& crisp, but probably a bit too thin. Still, I can check the fit, I hope.

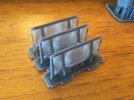
Side doors, not bad, more definition on the rivets, but we’re in the ball park

image.jpg

End doors, what was I thinking…?

image.jpg

yes, you can see through them!

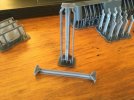
and the cross beam, a bit thin, rivets a bit faint, but we’re nearly there.

image.jpg

And I’ve done some more bits of the holster wagon. Back to the workbench thread.

Thanks to all who made suggestions, WT is a great resource.

Simon
 
Top