3D Printing Waste Handling - One Man's Journey
There's been some discussion recently on Mickoo's thread regarding waste alcohol from cleaning 3d prints, and what to do with it. I'm one of those who sees some value in cleaning and reusing the contaminated alcohol for certain steps in the print cleaning process, so I thought I would detail what I go through. I'll also briefly discuss what I do with the other non-alcohol waste from the 3d printing process, meaning the gloves, paper towels, supports, and any other items laden with uncured resin.
Actually, I'll start with the handling of the peripherals, since it's very simple to explain. I'm of the opinion that uncured resin is uncured resin, whether it be in the bottle, on your print supports, your gloves, or soaked up into the paper towel used to wipe the work mat. As such, I think those leftover items should be processed to cure any resin, before they are disposed of. Beyond any sort of discussion about the necessity or merits of doing so, the reality is that it's a very easy thing to do, that errs on the side of caution by default.
I have on hand any number of quart/liter size round storage containers, bought at the local dollar store. Simply fill one with the gloves or paper or support waste and cure it in the wash'n'cure for 30 minutes. Then throw away and do the next batch, repeating as necessary. One workflow I use frequently is to cure the peripheral waste for 30 minutes while I let my cleaned prints air dry before curing. I use an air source to dry my prints, but I like to let them sit for additional time to make sure they are fully dry. The 30 minutes max time on the curing station is a good interval. Or course there are plenty of other opportunities for curing waste, if nothing else it can be done while prints are running.
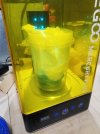
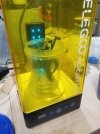
Moving along to cleaning and filtering the contaminated alcohol, there are a few caveats. This method is not intended to produce 100% clean alcohol, which would probably require distillation. Some people are doing that, but I am not one of them. This method instead is intended to produce a mostly clean alcohol that can be used in the primary stage of the common two-stage cleaning process that many people follow. The goal is to reduce the consumption of alcohol by extending its usable life. It will not fully eliminate waste or the need to occasional resupply with fresh alcohol.
First up are the tools. There are a handful of items that I've settled on.
- Quart/Liter storage containers with lids, or any other clear(ish) container that fits in the curing station and rotates freely
- (2) large funnels of the same size, that nest in such a way that the bodies don't touch - I'm using 5" diameter funnels
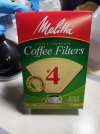
- Coffee filters - I'm using #4's, which fit well in the size of cone I'm using
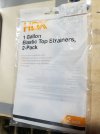
- 1 gallon net type paint strainers, intended to fit over a bucket of paint
- 1 gallon bucket or similar larger container with lid, for use with the paint strainer
Some people will use the paper cone paint strainers as the first filtering step, to remove bits and pieces, but I don't find that necessary.
Obviously, it all begins with a container of contaminated alcohol. Something like this.
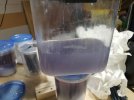
There is something to consider with respect to what sort of resin you are printing with. Many of us have advocated for and taken up use of the Siraya Tech Fast Navy Grey resin for printing. One issue though is that there are multiple pigments added to the resin and the various components tend to settle out over time. This happens with fresh resin in the bottle or vat as well as the resin that is initially suspended in the alcohol after cleaning a part. I think it's important when cleaning this sort of waste to remix the components before curing, as I think it leads to better results in the end. I suspect that this is less of an issue if using other types of resin that only involve a single component. More on that as I go through the process.
Don't bother filtering the solution as the first step, it's a waste of time. Cure first, then filter solids after.
Step 1 is to recombine the resin/pigment/alcohol solution so that everything is fully integrated. Then pour into one of the containers and cure in the curing station for the full 30 minute max time.* The idea with mixing to recombine components is to catch pigments in the cured resin solid, rather than curing only the resin itself and leaving the pigments in the alcohol.
*The 30 minute time is normally sufficient unless the resin content in the alcohol is very high. If so, additional steps will be needed. More on this later.
Step 2 is to let the container of cured resin/alcohol sit for a while. Just as the uncured resin will settle out of the alcohol, the cured and solidified resin will do the same. After several hours or a day, you should end up with something like this.
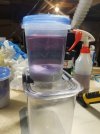
Step 3 is to then filter the alcohol using the funnels and paper coffee filters. But first a few words about the funnels.
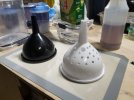
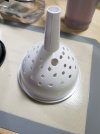
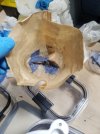
These are cheapo funnels from the dollar store, sold in sets of three different sizes. I use the largest funnels for filtering, 5" diameter opening at the top. As can be seen, I've used a drill to modify the white funnel to add numerous holes around the body. This isn't my idea, although I probably would have figured it out eventually. Credit goes to the Veg Oil Guy, who
3d printed a version and offers the stl for sale if anybody wants to go that route. If anybody has tried to use a funnel and the paper cone paint strainers to filter alcohol from the gooey cured resin, they know that the resin clogs the filter and funnel very quickly. The modified funnel increases the open area for alcohol to pass through the filter, including openings above the mass of resin goo. One thing to note, it's important that the two funnel bodies don't touch, so that there is a gap between them for the alcohol to flow through. These nest in such a way that the gap is maintained. I can see where truly conical funnels may not accomplish that, so a spacer may be needed.
I've used #4 paper coffee filters. They fit nicely in the large funnels, except they are a bit tall. However, after opening them, I invert a section in the center of the filter. This does two things, it increases the surface area that is above the resin goo, and it makes the overall height of the filter a bit shorter so that it sits cleanly in the funnel.
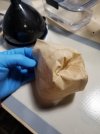
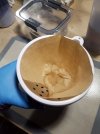
In action. I often have more than one container to filter, so I start with just the clear liquid from all containers. The alcohol drains quite quickly at this point.
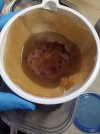
Sometimes the solidified resin will settle to the bottom of the container and form a sort of pancake like blob. This is the best situation, because there usually aren't any bits and pieces of loose cured resin that want to flow out with the alcohol when you pour into the funnel. Also, the filter can be used again later, it will dry out as the alcohol flashes off.
But sometimes there will be loose parts. In that case, once the bulk of the clean alcohol is processed through the filter, I pour the rest in and let it slowly filter and drain. That can take a short while as some of the filter surface area is blocked by the goo. But it will eventually run through leaving the resin in the filter. You can see the difference between this resin and the single blob pictured above.
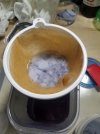
Once filtering is complete, you end up with a contaminated filter. Let it sit for a while until all the alcohol flashes off. I will cure this once more and then dispose of in the trash.
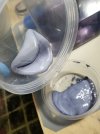
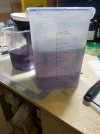
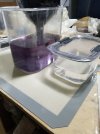
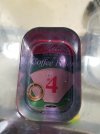
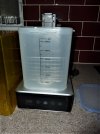
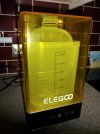
Here are some examples of the cured and filtered alcohol. There is the wash'n'cure tub, which I only use infrequently for initial cleaning of large volume parts. It's a perfect use for the recycled alcohol, as a large volume is needed. There's a second shot of a large and small tub, the clear liquid is fresh 99% alcohol, the large tub is recycled 91% alcohol. I use very little 99% IPA now, but that's due to changes in my print cleaning process. That's a story for another day. You can see the tint to the recycled alcohol, I've had other batches that were much clearer, but never fully clear. I attribute the tint to the dark pigment that is part of the Siraya Tech Fast Navy Grey formula. I think it's the same dark pigment seen sitting on the top of the resin in the vat after a bit of time. I believe that the more thoroughly mixed the resin/pigment/alcohol is before curing, the more pigment gets trapped in the cured resin and thus the clearer the recycled alcohol will be. All a guess of course, but it sounds plausible. The last picture is just to give a sense of the clarity of the alcohol, despite it having a tint to it.
That completes the process, unless that asterisk way back in the post applies. I'll get to that in a moment though. To reiterate, I'm not proposing that this process will yield truly clean alcohol equivalent to fresh out of the bottle. Or that it will leave prints fully clean. To be fair though, I've never tested to see how it actually does behave, so maybe I should do that. But it could very well reduce the total amount of alcohol consumed in the printing process, for those that consider it an important factor. If you want to use recycled alcohol, then I'd suggest doing so until it no longer performs to expectations, then flash off and start fresh.
Now if the alcohol is particularly contaminated with resin, then it takes a bit more effort to get it clean. If the goal is to reclaim the alcohol, then I use the following additional steps. If the goal is simply to cure the resin for immediate disposal, then the passive method of setting a container outside, allowing the alcohol to flash off and the resin to cure in the sun, is probably the easiest thing to do.
For those that want to recycle alcohol,
I highly recommend that you clean your alcohol regularly, and don't let it get excessively contaminated. It makes the process significantly more protracted, which could be avoided simply by cleaning more often. I'm actually considering changing my workflow so that I clean and filter my primary print cleaning container after each use, rather than after several uses, as I think it will yield the best results for recycling the alcohol.
Curing waste resin frequently is easy. Mix everything up, put the container in the curing station, and hit go. The amount of resin in the mix is still low enough that the solution remains translucent, and the UV light can penetrate fully through the mixture. Curing a heavily contaminated mixture creates a problem where the resin is dense enough that it cures to an opacity that blocks UV light from fully penetrating through the mixture. The result will be a layer of cured resin to some depth from the walls of the container, say 13mm or so. Inside of that cured membrane will remain uncured solution, with uncured resin included. The cured resin will not settle out of the solution until the membrane is pierced. It's sort of like the yolk of a fried egg once you jab a fork or a piece of toast in it. The remaining solution must then be cured again, and sometimes even a third time. It's not hard to deal with but takes considerably more time to do a complete job.
Once cured, filtering the alcohol from the blob of resin is impractical through the typical funnel and paper filter combination. The volume of resin would fill the entire funnel body in some cases. Also, the resin will hold a lot of alcohol even though it's cured, that will leach out over time and drain off if given the chance.
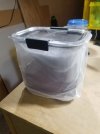
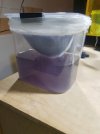
I use the net type paint strainer in this case. Stretch the strainer over the top of a large container, with some sag inside. Pour the cured resin/alcohol mixture into the net, put the lid on, and let it sit for a day or two. The large surface area of the net and larger container will allow any liquid to immediately run through, and the remaining alcohol held in the resin blob will drain through over the next day or so. I would then cure the remaining liquid again and then filter through a coffee filter.
Pictures of that will be added in a second post. I've hit the limit in this one.
One last note about curing outside. I prefer to do my curing indoors. I tried the outside let-it-sit method, and it didn't work so well for me. I'm sure I used the wrong container, a quart container with relatively small surface area instead of a bigger flat pan, but it took forever. I also was leery of leaving the uncovered container outside, thinking that an animal might find it interesting and sample the contents. I may be daft, but then dogs and cats will drink antifreeze if you let them. So if anybody wants to ask me, "why go to all that trouble?' that's my reasoning.
I hope people find this useful, as a tutorial or at minimum an extra data point in the decision-making process. I may do a similar post about how I clean prints, since I use a slightly different process than is typical for that as well. Net strainer pictures to follow in the next post.
Jim







 I don't know what else is involved, other than linking to this thread, but feel free to share. I guess if you take it out of the context of WT, then please attribute it to me, or back to WT?