3D Printing - whether to buy, what to buy and how to use it?

Kev T

Western Thunderer
Simon I hope you don't mind the highjack, but I thought that this is the best place for this post.

I've been struggling to get consistent prints from my Mars 3 Pro. I've only had one failed print but some of the prints could definitely have been better. There is a fairly common comment on the printing forums that temperature is a critical factor in getting good prints and as I'm printing in an unheated room I researched this.
There are quite a few different ways of heating up the printer, but lack of space led me to the collar. The initial design by an Elegoo engineer is for the Mars 2, unfortunately it doesn't fit the Mars3, but there have been a couple of mods done to this while keeping the original concept.
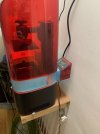
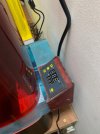
The photos show the idea. There is a small 50mm sq fan behind a 50w ptc ceramic heater, controlled by a smart device using a 10k ntc thermistor outputing via a relay. I've wired mine up so that the fan runs continuously with the thermistor on the input to the rear collar, and the heater on the other side where the carbon filter would fit. This collar has a diverter to send the hot air upwards away from the resin vat and the z axis pillar.
In my room the printer went from 17C to 26C in less than 10 minutes. I've set a hysteresis of 0.2C which with the thermal lag of the system equates to temperatures of 25.5 to 26.3. I expect this to be tighter after thing has been running for a while. The time to go from 25.5 to 26.3 was less than 2 minutes so I think this should be perfectly fine.
All of the components are readily available from Ebay or Amazon and not at all expensive.

Kev

IMG_2187.JPGIMG_2188.JPG
 

simond

Western Thunderer
Kev,

thanks for posting this, most interesting. My utility room is typically around 19-20C, I guess because the fridge is right next to the shelf the printer sits on, so I’ve not been too troubled by the resin viscosity, but I think I could improve matters with a warmer printing environment.

If I’ve understood correctly, the “collar” sits on the printer base and the lift off hood sits on that, maybe 40 to 50mm higher than normal?

A few questions if I may? is the collar itself an assembly of 3DP parts? Does it draw air in or recirculate the air within the hood? (I guess the latter) Is there a link to the original design, and do you have links to the bits you purchased? Does the collar get I the way when filling or cleaning the tank?

I’ve been pondering a heater myself, my thoughts are along the lines of a flat “reptile mat” stuck to the inside of the hood of my Saturn, with an external controller which simply plugs in to an external socket. Trouble is, most of the ones I’ve seen are mains voltage, and I’d rather stay low-voltage if possible. In the Saturn, there is a space to the right of the tower which would accommodate maybe a 35 or 50mm fan and a suitable heater, so I’m inclined to investigate that, but the collar is definitely an interesting alternative.

cheers
Simon
 

John Baker

Western Thunderer
I've been using a home made thermostatically controlled heater for a while now as I print in the garage. It's basically a heating element with a fan, and this warms the print chamber nicely, and I can print even when the garage is around 0oC. The problem I get is with tall, thinner prints. I get horizontal lines where the resin presumably expands when the heater/fan comes on and blasts hot air at it (something to do with a thermal expansion coefficient - which I won't pretend I know anything about!!).

I've just changed my printer, and arriving from Amazon today is a 'heat belt' designed for the home-brewing market to keep the fermentation at the right temp. My plan is to attach this somehow to the vat on my printer to warm the resin. No idea if it'll work, but my thought is that I only need to heat the resin, not necessarily everything around it. Just not sure yet if these belts produce enough power to warm the whole vat of resin through before the heat gets lost into the world....
 

Kev T

Western Thunderer
Simon
yes the collar sits on the base and the hood sits on the collar at about 60mm higher.
The original design was printed in one go on a much bigger machine [jupiter?]. There is a post on line with stl's for a split collar which glue together. I still had a few problems but got there. It's not pretty and I can do better now I'm learning. As an aside I printed some 5mm wide strips to support the joints, painted them with resin and used the portable UV wand to cure them. It worked really well and was fascinating to see the resin change state in just a few seconds.

The Mars is severely limited in the amount of interior space inside the hood so the collar is just about the only option. I would have a look inside the Saturn to see if this will fit. It'll be much easier. Saturn S Chamber Heater (or Saturn) by mpodella
There are a few options for heaters and controllers, https://www.amazon.co.uk/Constant-Temperature-Heating-Element-Heaters/dp/B095RNLMGL/ref=sr_1_2_sspa crid=33D53Z9CCQ3WG&keywords=ptc+heater+12v&qid=1678012753&sprefix=ptc+heater%2Caps%2C165&sr=8-2-spons&sp_csd=d2lkZ2V0TmFtZT1zcF9hdGY&psc=1&smid=AECMJWWDENK8B This heater is in a package complete with fan. It's rated at 100W but it's two 50W heaters in parallel so wire only one in circuit for this application.
https://www.amazon.co.uk/Temperatur...id=1678012957&sprefix=w3002+12v,aps,66&sr=8-2 and https://www.amazon.co.uk/Digital-th...r&qid=1678012995&sprefix=w3230,aps,290&sr=8-5

If those links don't work, search for w3002 and w3230 on Amazon and either 50w or 100w ptc heater, it'll bring up the components amongst the heaters.

Beware, the negative input is tied to one side of the relay output in the w3002 controller, so don't switch the +ve on this controller.

Vogman has designed a heater that'll fasten to the top of the z pillar. I'm not sure I'd be happy putting a fan at this point with its potential vibration.

The collar doesn't get in the way of the resin vat, and if a problem can be removed in a handful of seconds, and the air is recirculated which I suspect is essential.
 

ICH60

Western Thunderer
I have now a Saturn 2 8K and this sits in my loft. The ambient temperature is around 18C.
So this is the method I went for to run the printer at the required temperature for the resin, Siraya Tech Fast

I brought a enclosure that the printer sits in. https://www.amazon.co.uk/gp/product/B08594HX86/ref=ppx_yo_dt_b_asin_title_o06_s00?ie=UTF8&th=1 Designed for a filament printer.
I have put in a 100W heater 12V and a sensor panel to control the temperature. See this youtube video
.
Except I didn't build a box for it to sit in! Being a ex broadcast engineer I know the possible dangers. So you might want to build the box. It just rests inside the enclosure with the power supply outside the enclosure.

Then place my resin bottle in the enclosure, lift the lid off the printer, zip up the enclosure and let it warm up. The temperature is set to max of 30C
Now it takes about 2C per hour to heat up. When it reached around 27C I pour the resin into the vat put the lid on the printer and off we go. Zip up the enclosure The heater is left on through the process of printing the model.

As you can see it takes around 5 hours to warm up the enclosure and resin.
 

Rob R

Western Thunderer
My Mars 2 pro lives in the box room upstairs. It is next to the radiator so it never gets really cold but, without measuring it with a thermometer, by the time it has printed the raft and the supports the whole machine gets quite warm by itself. If I need to top up the resin before printing I just put the bottle on the radiator (if the heating is on) for 20 mins or so before topping up.
Am I under thinking it?
 

Kev T

Western Thunderer
There's been a few more comments since my last post. While researching this I read that it's important to keep a tight temperature swing as it does affect the viscosity of the resin. The poster showed an example of what he thought to be the result with banding on the print. That is why I set the hysteresis so tight and have configured it to leave the fan running. It's also why I've used a 50W heater as I suspect the 100w heater might introduce too much temperature swing.
Again from what I've read, it's only the more esoteric resins that are so susceptible and as I intend to use the Syrayatech FNG I thought it better to try for a stable higher temp. Using the ordinary Elegoo resin I got reasonable prints at 17C but I noticed that details were better at higher temps.
The Vogman heater used by ICH60 is the one with paralleld heater elements so easy enough to wire for 50W instead.
Kev
 

JimG

Western Thunderer
I've got my Phrozen Mini 4K in a large Really Useful box on its side and I have a 100W heater and controller in this box. It's set to quite a tight hysteresis 26C - 27C. In use I switch the heater on two or three hours before use to heat everything and there's enough room to get the bottle of resin in as well. My results have been good with Phrozen Aqua 4K resin so far.

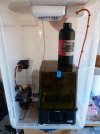
PrinterHeater-01.jpg

The controller is at the left side with the fan heater above it. The power supply is below and behind the controller. Ignore the bathroom extractor fan at the top. This was fitted for my first/previous printer to exhaust fumes but it was never used. I've never had problems with fumes from the Phrozen resins I've used.

The only problem I have had is the chocolate block terminal strip melting. I suspect that I hadn't tightened up a connection enough and there was a bit of arcing going on. There's 8.5A flowing when the heater is on. The contact strip has been replaced with all the connections well made. :)

Jim.
 
Last edited:

Big Train James

Western Thunderer
I'm following Jim G's approach. I think it makes sense to heat the environment around the printer, rather the environment inside the printer. That would seem to me to mitigate the issues of air flows adversely affecting the resin in the vat or any other similar considerations. No empirical data to back up this assumption though :oops:. At least not yet.

I do like the collar idea though, but for a different purpose. I've been considering modifying the gcode to allow the printer z axis max height to reach 170mm instead of the default 150mm. The only thing preventing this is the giant knob on top of the build plate. Most solutions involve printing a new low profile knob. The collar would achieve the same effect. Of course printing a collar would take a substantial amount of extra resin compared to a new knob.

My real interest is the idea of creating a new z axis column to replace the existing one, plus replacing the existing lead screw with one that's twice as long. Then I could print whole O scale stock in single passes. I would also need a taller cover, and I was thinking how to achieve that since the base of the Mars 3 cover isn't a simple square. I could see modeling a transition collar to change the shape to a square, and then fabricating a cover out of acrylic or something similarly appropriate. Something for future consideration.

Has anybody here ever heard of a fellow named Simon Jackson? I caught some videos of his on Youtube while looking for other information. He appears to be a Brit, if his accent is anything to go by. He was selling replacement double rail z columns for 3d printers like the earlier Mars units. According to his website, he's stopped trading, which is too bad as he had some useful bits to improve the printers with.

Jim
 

Kev T

Western Thunderer
Hi Jim
your point about airflow inside the printer is valid. One of the posts I read said that he could see ripples on the surface of the vat. The collar I use has a deflector plate on the output from the fan which sends the airflow up. The temperature inside only varies 0.5C but I'll wait until I've done a large print before I comment. So far I've only printed a couple of test prints to dial in the settings, but so far so good.
Kev
 

simond

Western Thunderer
Diving in here Overall Heat Transfer Coefficients suggests that the temperature differential of about 6 degrees and about 0.8m2 container suface area needs about 18W, a bit less than a car stop light, if you have it inside the hood.

This would be about 3.5A on a 5V USB power supply so maybe a bit high, but certainly reasonable at 12V. Something like a light bulb is essentially self-regulating and doesn't need a thermostat or any sophisticated control - this is quite appealing. Presumably it would want to be in a metal box to avoid any UV emissions spoiling the resin, though I suspect they would be negligible through the glass. A fan to circulate the air would perhaps prevent a hot spot at the top where it is less useful. I feel an experiment coming on...
 

Pencarrow

Western Thunderer
Diving in here Overall Heat Transfer Coefficients suggests that the temperature differential of about 6 degrees and about 0.8m2 container suface area needs about 18W, a bit less than a car stop light, if you have it inside the hood.

This would be about 3.5A on a 5V USB power supply so maybe a bit high, but certainly reasonable at 12V. Something like a light bulb is essentially self-regulating and doesn't need a thermostat or any sophisticated control - this is quite appealing. Presumably it would want to be in a metal box to avoid any UV emissions spoiling the resin, though I suspect they would be negligible through the glass. A fan to circulate the air would perhaps prevent a hot spot at the top where it is less useful. I feel an experiment coming on...

So you're going to attach your 3d printer to the car bumper and sit there with your foot on the brake pedal? Extreme devotion to the cause. Don't forget to keep still though so as not to rock the resin.
 

David Halfpenny

Western Thunderer
Sorry, DogStar, I didn't get a Notification of your message.

It's the Gauge One 3D Circle home groups.io Group

We share STL files for people to adapt to their own needs - or just print 'as seen' - free of charge.

We also cover CAD and other kinds of CAM such as CNC, and have a Control section.

Membership of G1MRA is beneficial - at the very least it gives access to tracks to run one's prints - but not compulsory.
 

King Crab

Western Thunderer
Help Wanted: There are a couple of Elegoo 3D printers for sale locally in the Small Ads.
So plumbing the depths of WT collective wisdom,
is it worth investing the extra cash in the version 3 rather than the version 2.
Bear in nmind I have no previous experience of 3D printing, beyond a crude filament specimen.

Peter
 

simond

Western Thunderer
Peter,

I can’t advise re comparison, as I’ve only had one printer…

if the price is right, and the seller seems genuine, I guess you might make a saving, but check that it all operates correctly before parting with your hard-earned! I don’t have an exhaustive list, but consider at least;-

Why are they selling?
Do all the pixels illuminate?
Does the Z stepper run smoothly?
Is the FEP membrane in good condition?
no cracks or damage to the screen?
cover undamaged?
toolkit included?
mains supply included?

wash-tank included?
UV exposure unit included?

I opted for the certainty of a new item, I’ll buy second-hand where I’m confident, but not keen on stuff I might not be able to fix.

hth
Simon
 

King Crab

Western Thunderer
Peter,

I can’t advise re comparison, as I’ve only had one printer…

if the price is right, and the seller seems genuine, I guess you might make a saving, but check that it all operates correctly before parting with your hard-earned! I don’t have an exhaustive list, but consider at least;-

Why are they selling?
Do all the pixels illuminate?
Does the Z stepper run smoothly?
Is the FEP membrane in good condition?
no cracks or damage to the screen?
cover undamaged?
toolkit included?
mains supply included?

wash-tank included?
UV exposure unit included?

I opted for the certainty of a new item, I’ll buy second-hand where I’m confident, but not keen on stuff I might not be able to fix.

hth
Simon

Simon

Thanks for the list.
I'll go through it with the seller,

Peter
 

Big Train James

Western Thunderer
Peter,
Unless your budget is extremely tight, I would choose one of the Mars 3 versions over the Mars 2 every time. The specs are just better in every way really. The reality is that even a new Mars 3 is ridiculously cheap at the moment, with the Pro at $285 to the UK and the Ultra at only $220 (sadly sold out here in the US but still available in the UK).

I second most of what Simon has mentioned, except that I wouldn't worry about the FEP sheet. It's a consumerable, relatively inexpensive, and relatively easy to change. The other line items are more critical, certainly you want all the hardware to be in good form.

I also wouldn't necessarily expect a wash & cure station to be included, unless the sale price was unusually high. If getting both, I would expect the total cost to be about 1½ times as much as the printer alone.

Last note, there are effectively 3 "phases" of Mars 3 printers. The Ultra is the first iteration of Mars 3, and there are an early and late version of those. The earlier version can be identified by a square cap on the top of the Z axis column.
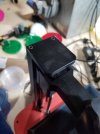
mars 3 ultra early.jpg

The late Mars 3 Ultra has a beefed up Z axis column, I presume it was modified to deal with the "Z axis wobble" issue that was common with the early units. The late version can be identified by a "D" shaped column cap, and flanges seem deeper in the Y direction.
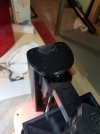
mars 3 ultra late.jpg

The later version also featured an "improved" vat design with a pouring spout on one corner. I don't think much of it though, I find pouring resin out of the vat with or without the spout makes a mess either way.

The last version is the Mars 3 Pro. It has some upgraded features, slightly bigger screen, better glass protecting the screen. I think it's supposed to have a better light array as well, and lastly include some charcoal filters for odor. I don't think the Pro looks much different from the later Ultra models, but apparently it says "Pro" on the front, so I would look for that to identify the latest version.

The point of all of the above is to help you know what you are getting, and maybe which one to choose if multiples are on offer. Setting aside price, I would first choose the Pro, than the late Ultra, then the early Ultra last. Of course price will play a factor though, but only you can balance that versus which unit you choose. I will say that I have both early and late Ultra's, and I am more than happy with the results from both machines. Often the prints are stunningly good. I can't say whether the upgraded specs on the Pro make any sort of difference, I've not used one nor heard feedback from somebody that has.

I guess the bottom line is I don't think you can go wrong with any of the Mars 3 printers. But if there is a big price difference between an available Pro versus Ultra, I would be strongly tempted to choose the Ultra. Put the extra cash toward a curing station or supplies like film or resin.

One other thing I forgot above, both of my Ultra's came with a free one year subscription to Chitubox Pro. You may or may not get that buying a unit second hand. It's not really a deal breaker, the regular Chitubox is certainly servicable, and other slicing options exist as well.

Hope that helps,
Jim
 
Top