7mm The Derby Line - Rolling Stock

dibateg

Western Thunderer
All the painting projects are on hold until the weather gets better, the spray shop needs some sunshine to warm it up and at the moment we seem to be in monsoon season here. . As I'm doing some 'teaching?' in March I though it would be wise to have a project under way as a demonstrator. What better then, than an ex GC 04/1 from Gladiator- as I I didn't have enough 2-8-0s...

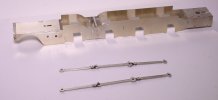
First consideration is what I need to do to the frames whilst they are in the flat, I don't think that I will be putting the step in the frames ( the leading section is narrower ) between the leading sets of drivers..
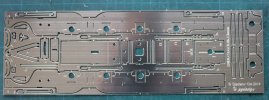
IMG_2687.JPG


Drawings are always a great help. I'm tempted to put the inside motion in, look at the charming way the lower radius rod loops under the 2nd axle!
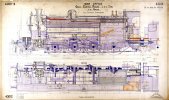
NRMdawing.jpg
 

Scale7JB

Western Thunderer
Tony, I’ve long wanted an 04 myself.

If the step in the frames is between the driving axles, will that make a difference to wheelbase and coupling rods?

JB.
 

simond

Western Thunderer
I guess it could lead to an increase in variation, but if the horns are fitted after the frames are joggled, I don’t think it would be an issue as the rods would be used to locate them.
 

dibateg

Western Thunderer
Chaps - Well, I did try putting the joggle in the frames to bring the rear section out by 0.6mm on each side. It looked ok, but made things a bit tight with the Slaters brass hornguides. So I stripped it all down and straightened the frames out again. At the end of the day, this loco is going to be working on a layout, and no one apart from me is going to turn it upside down and check the frames! So I made up the coupling rods - the inner joins are blackened to prevent the solder spreading and jamming them up solid..
IMG_2703.JPG


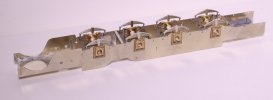
Then - using the Hobby Holidays chassis jig I put the hornblocks in. The laminated springs are made up of 11 separate bit of etch and wire...
IMG_2704.JPG
 

dibateg

Western Thunderer
You must Richard!
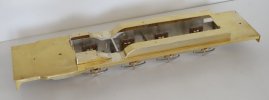
I've made up the running plate and splashers for the O4. There is still a bit of tidying to do. I prefer to cold form brass if I can, but it might have been a bit easier to take the instructions advice and anneal first... There is a small square etch that goes on the front of the leading splashers. My dexterity wasn't up to that, so I cut a strip of etch and put a fold in it that solders underneath the running plate. Keeping it all square is fun as the tops of the splashers like to dip inwards...
IMG_2791.JPG
 

dibateg

Western Thunderer
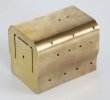
I did have to get the torch out and anneal the firebox, I concentrated on the areas that were to be formed. It was too springy to form cold. That is done with rods of various diameters and it takes a bit of patient bending, unbending and checking against the former until it is right...
IMG_2794.JPG

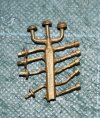
Does anyone recognise this casting? It has some nice washout plugs on it, but not enough for this project... It might be quicker to scratch some up...
IMG_2793.JPG
 

Genghis

Western Thunderer
Tony,

I see on the Guild forum that your O4/1 has morphed into an O4/3!

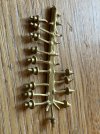
Packing washout plugs for this kit is a real pain: three types of upper washouts (GCR, GWR and LNER) plus the lowers. I have been concerned for a little while that the LNER ones are somewhat lacking in definition. They are also a pig to cast. I wonder whether these would pass?

IMG_4765.jpg

I have no idea about the origin of your brass casting.

David
 

dibateg

Western Thunderer
Nice work Warren, very pretty - I don't think mine is going to be as shiny as that!

David - I found I had some plates for 63859, that just happens to be the first 4mm scale loco kit I ever built when I was 13.. a K's ROD... Now that was a steep learning curve! Those castings look pretty close, although the round bit doesn't protrude much though the cladding:-

63601a.jpg

Regards
Tony
 

Genghis

Western Thunderer
Nice work Warren, very pretty - I don't think mine is going to be as shiny as that!

David - I found I had some plates for 63859, that just happens to be the first 4mm scale loco kit I ever built when I was 13.. a K's ROD... Now that was a steep learning curve! Those castings look pretty close, although the round bit doesn't protrude much though the cladding:-

View attachment 178735

Regards
Tony
Tony,

The castings were intended for the cast whitemetal fireboxes that used to be supplied by Gladiator with the Duchess and Princess kits. Missing from the sprue shown are the couple of castings that go into the boiler etch. I thought it might be possible to use them with washers behind to reduce the effective length of the round section. Happy to send you a sprue if you want to try it. (Must get round to having proper brass castings produced).

David
 

dibateg

Western Thunderer
Thanks David - thats very kind, but I made up some plugs from 1.6mm wire by time I read your message. I always think, when I see castings - someone must have made the master, how did they do it? So it didn't take long to file some squares on the end of the wire and make up some washers. In fact I used washers on the castings that I had. So home made on one side of the firebox and castings on the other...

Best Regards
Tony
 

dibateg

Western Thunderer
I like to be able to access the interior of the boiler, so I'm modifying the interface between that and the firebox, as well as drilling new holes to bolt them together. I've soldered some copper wire to beef up the front edge in preparation for filing the rounded corners, though on reflection, the gauge might be a bit heavy.
IMG_2798.JPG

The washout plugs have been fitted, four cast on one side and five home made on the other..
IMG_2801.JPGIMG_2802.JPG

Regards
Tony
 

dibateg

Western Thunderer
There is a distinct difference between original GCR smokeboxes and the LNE/BR replacements.
IMG_7861.JPG
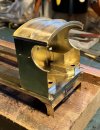
So I have attempted a representation of that by mounting the front plate outside the front edge of the wrapper and rounding the edge off. Same for the rear, but that was with one of the extra wrappers.
IMG_2900.JPG

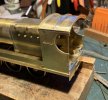
Before I went away on holiday, I managed to get the boiler and firebox attached and the boiler bands on. They are a whisker narrow, but I prefer that to over wide. Everything just plonked together at the moment. The dome definitely needs to come this way a bit. The washout covers are from Mitchell.
IMG_3016.JPG
 

dibateg

Western Thunderer
Still not much loco action on the workbench, I'm concentrating on the layout at the moment. A few jobs are crossing the bench from time to time and it's back to 4mm scale to fit some decoders to some kit built Caledonian loco's in exchange for some scenic work on Basford North.

This 439 had been 'converted' back from EM gauge. The insulated and non insulated wheels were mixed up and the quartering was set at 180degrees. I wondered why it wouldn't run at all in DC.... The cube speaker is very loud!
IMG_8462.JPG


and next - A Jumbo - an old DJH kit from the Banbury days...The decoder is coming out to be reblown...
IMG_8477.JPG

It's always interesting revisiting 4mm scale....
 

dibateg

Western Thunderer
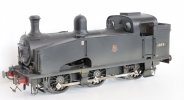
A new addition to the Derby line fleet:- a J50 obtained at a bargain price ( certainly less than the constituant parts ) from the bring and buy at Guildex. Colwick sent a pilot daily down to Basford North and I thought this would make a change from the '350 that I've been using.
Its nicely built, but needed a little attention to the running to eliminate a tight spot. After reaming the bearings, adjusting the plunger pick ups, it turned out to be a tight coupling rod.
It just need some cosmetic springs, and a vac pipe down one side - oh and renumbering from a Hornsey resident to a Colwick one. J50s are a typical loco picking exercise, there are a lot of detail differences between batches. So a review of the RCTS and Yeadon narrowed it down to 68927. The only real fault I can find is it lacks the staring eyes of the prototype's 2ft spectacles, the ones on the model are a little undersize.. It looks like it's one of Jim's kits, currently out of production.
IMG_4230.JPG
 

dibateg

Western Thunderer
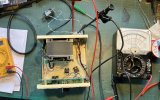
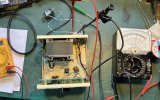
Also passing over the workbench this week, an On Track DC controlleer for Nafferton. It needed new power transistors and rectifier..
IMG_9002.JPG
 

Attachments

  • IMG_9002.JPG
    IMG_9002.JPG
    351.3 KB · Views: 1

dibateg

Western Thunderer
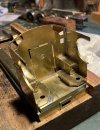
It's been gathering dust on the 'to do' shelf for a while, but I decided to pick up the O4 again today and work on the cab. It's a miserable day outside, so it's nice to have a day at the workbench n the warm.

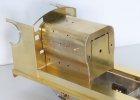
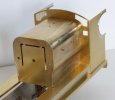
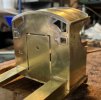
I think I'd prefer to have the front sheet as one piece with the roof sitting behind it to avoid that join. Hopefully I'll be able to get that nice and tidy.The is a little work to get that downturn below the rain strip right.
IMG_9216.JPG

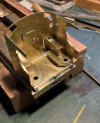
The raised parts of the cab floor that incorporate the sand boxes should be flush with the end of the sidesheets, but the gap will be hidden by the back head. There is also some work to create the cut out behind the veritcal cab handrail.
IMG_9221.JPG

Finished result, but that rear handrail looks a little cramped.
IMG_9222.JPG
 

dibateg

Western Thunderer
The step next to the cab side sheet should accomodate the rear cab handrail, but it was a scale 3" to short. I couldn't live with it, after seeing Mick's improvements, so took off the drag beam, used the step backing plates to extend the valence back by a scale 3". Fabricated up new sections of cab floor and used fillets to plug any gaps. Not quite as tidy as it would have been if I'd got it right in the first place, but it looks so much better. Had to cut out the tapered handrails I had already made up, but they are easily replaced...
IMG_9224.JPG

IMG_9227.JPG

Proportionally, it looks a lot better, with a good tidy up and some paint, it will be fine!
IMG_9228.JPG
 
Top