The Chronicles of Canary Sidings - the Tale of an Untidy Workbench

2024.10 - Skeetsmere - more track laying

Herb Garden

Western Thunderer
So precious little had been done this week as I've been away in Hannover for the Messe.

IMG_20240425_095837241_HDR.jpg
An intriguing city and a visit I very much enjoyed.

I also got my first chance to travel on Germany's rail system. Very different to our own in many ways most importantly it works superbly, almost effortlessly.

IMG_20240424_170425275_HDR.jpg
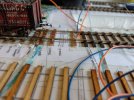
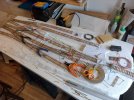
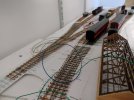
Anyway since getting home I've laid some more track.
IMG_20240427_102529708_HDR.jpg
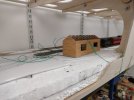
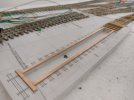
At the front of the station board is the coal yard. And now the siding that will serve it is in place.

IMG_20240427_102612933_HDR.jpg
Also following on from the last post on this subject I've taken the decision to shorten this far end of the track plan by a wagon length. The run rounds and sidings were quite capable of holding far more stock than the time table or fiddle yard can handle. So shortening the track plan has no operational implications but it means there can be more space for scenery on the far side of the lane than originally was provided for

The morals of the story... Design your track plan around the timetable and always leave enough room for the landscape
 

Herb Garden

Western Thunderer
So I've made a few tweaks to my tracklaying method. IMG_20240502_205250651.jpg

IMG_20240428_143513483_HDR.jpg
I've realised that the chaired tracking have is too high to fill the gaps in comparison to the copper clad trackwork I've used for the points.

IMG_20240502_205430837.jpg
So it's copper clad all the way for the layout. With ply sleepers in-between. And without planning it captures the look of the mid Suffolk in it's early years (it only got chaired track in 1948).

So here's some progress shots to date
IMG_20240502_205309881.jpgIMG_20240502_205352286.jpg
Just waiting for some more flux and coupling magnets to arrive and I can lay the extremities and the sidings at the rear of the board
 

Herb Garden

Western Thunderer
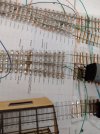
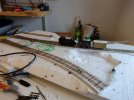
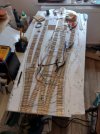
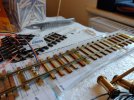
Well the track is now laid on the station board!
IMG_20240505_112748696.jpg
Well almost.... There are a few sleepers needed to be added when the coupling magnets arrive from Wizard models on the rear siding. And a few tweaks here and there.
IMG_20240505_112800767.jpg
Tidying up the wiring definitely helps make it look smarter.

The problem is what to do now.... Do I progress with the other board? Start work on wiring and controls? Or .....
IMG_20240503_065404187.jpg
I think it's best to focus on the level crossing this requires routing of control wires to operate it and as I haven't built it that might need to happen first. I've at least put the check rails in so you can see where it's going to go.
IMG_20240505_113443599.jpg
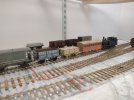
So with that in mind I've placed the landform back into the baseboard for safe keeping. It also allows me to pose some stock on the layout (albeit a random collection of stock)
IMG_20240505_113503111.jpg
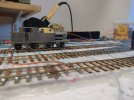
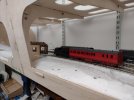
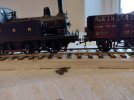
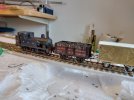
151 has arrived with the afternoon mixed train and is sitting in the platform road
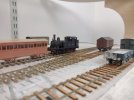
IMG_20240505_113453096.jpg
Whilst some goods wagons lurk in the sidings
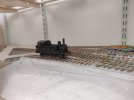
IMG_20240505_113519350.jpg
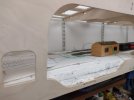
407 lurks outside the locomotive shed next to the company office building (please use your imagination!)
IMG_20240505_113550694.jpg
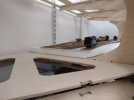
You get a good view from the shell of the mill board . Only the operator at shows will get a view like this
IMG_20240505_113720122.jpg
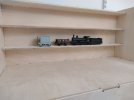
510 hides in the fiddle yard.

IMG_20240505_113800110.jpg
To run trains all I need to do is tidy up this lot .... Oh great!
 

Dave Sutton

Active Member
The problem is what to do now.... Do I progress with the other board? Start work on wiring and controls? Or .....

I prefer to finish all the groundworks and track, test it for running with the worst wagon/coach I have, then move on to wiring etc....not saying it works all the time though :D
 

Herb Garden

Western Thunderer
I prefer to finish all the groundworks and track, test it for running with the worst wagon/coach I have, then move on to wiring etc....not saying it works all the time though :D
IMG_20240503_065508337.jpg
I've been trying to check each bit as I went along with wagons.... I don't really have any coaches.... And then the F4 chassis..... It's actually shown more issues with the F4 than the track so far :))
 
2024.11 - GER B32 class #253 - bodywork

Herb Garden

Western Thunderer
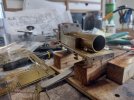
In an attempt to keep readers of this thread entertained and not bored senseless by track laying we travel back to the work bench to find out how work on the next buckjumper is going...

IMG_20240506_110028930.jpg
So now the cab and tanks have been made up as a sub assembly but are still loose in relation to the boiler barrel and foot plate
IMG_20240506_110138535_HDR.jpg
@Suffolk Dave was asking how the kit goes together. Well the chassis and footplate dropped together but this was hard work. No tabs or slots or alignment aids just flat plates and the fit isn't perfect. That said what more can you expect of a kit whose design is a year older than me! Back in 1989 this was cutting edge etched kit design and still holds it's own but doesn't have the modern features of a high level kit or similar.
IMG_20240506_110037650.jpg
That said it only took me an hour or so to do (length of podcast on the ottoman empire) once I had got into the swing... And there's still some tweaking to do.

IMG_20240506_110134294_HDR.jpg
I've added spectacle rims from my spares as the ones in the kit didn't etch properly.

IMG_20240506_111448292.jpg
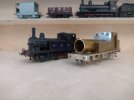
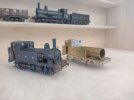
And here she is with sister 151 you can see the difference in tank height. Nice that you can get different variants from the same kit
IMG_20240506_111533103.jpg
 

Suffolk Dave

Western Thunderer
Interesting... I assume the chassis is screwed/bolted to the body?

BTW your depiction of 151 is a work of art!
 

Herb Garden

Western Thunderer
BTW your depiction of 151 is a work of art!
That is such a kind thing to say. You really don't know how much that means to me. Let's just say you have made my day. Thank you!

. I assume the chassis is screwed/bolted to the body?
So I built 151 wrong so there are two bolts holding chassis to body. On 253 I've built it correctly so there is just a bolt at the back under the bunker and a hook at the front that retains the chassis
 

Richard Gawler

Western Thunderer
I take solace from other people's track laying when I am doing it myself, but I will do this as rarely as I possibly can.
I enjoy seeing model trains getting made all of the time, whether I am building myself or thinking about future builds :)
 

Richard Gawler

Western Thunderer
The problem is what to do now.... Do I progress with the other board? Start work on wiring and controls? Or .....
I would try to get some electricity onto every rail and run every loco in both directions (front first, tender first, forwards, backwards) over every leg of every point. I know this sounds excruciatingly dull but it is far easier to adjust rails now than after dressing up the track with paint and ballast. Also try the lightest, shortest and longest wagons. I had one point blade out and back in twice before I felt confident everything ought to run every time, barring a failure on a loco. Well, that's how I felt at the time!
 

Lyndhurstman

Western Thunderer
I'm going to take it by the quantities of likes this post got that you all prefer locomotive building to layout construction.... So do I, but no track means no playing trains. :))
Nope.
I like all aspects of skill set expression, but i enjoy - and appreciate - seeing track built. It potentially serves to dissuade the notion that it is a high level Dark Art, akin to knitting fog. Or winning the Lottery. Warts and All (aka Confessional Modelling) is a great boon too.

Cheers

Jan
 
2024.12 - Skeetsmere - the mill board

Herb Garden

Western Thunderer
Well never thought I would get sick of loco building that I would prefer going back to trackwork but here we are....

IMG_20240509_214234368.jpg
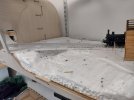
So work on the mill board has started. The land form here is a double layer of polystyrene to accommodate the depth of the river/mill race.

IMG_20240509_214245346.jpg
The locomotive shed in the pictures is the one designed for skeetsmere MK1, built for skeetsmere MK2 and will finally get used on MK3. In the design is positioned here for a couple of reasons: Firstly to hide the double slip (seen behind it), the MSLR didn't have trackwork of this complexity but to get the design to work in the space here it was required so the compromise is to hide it behind the loco shed so at least it's not obvious.

IMG_20240509_214306844.jpg
It also helps to hide or at least distract from the baseboard join.IMG_20240509_214251872.jpg
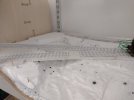
So all I've done really is cug some polystyrene and fitted it to the frame but you get the idea with the bits of available track etc what it might look like
IMG_20240510_062800622.jpg
IMG_20240510_062816381.jpg
 

Herb Garden

Western Thunderer
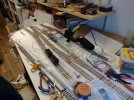
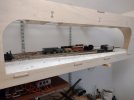
Given the heat it's been a slower day... But I've taken the opportunity to have a bit of a clear up in the modelling room.

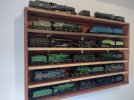
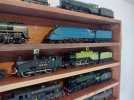
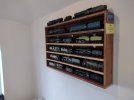
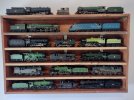
Taking that opportunity I've finally rehung the display shelf and been able to get some of my stored models out of the box

IMG_20240511_150337367.jpg
You will notice that none of these match my usual modelling period. Some date from my childhood trainset, some I've inherited, some have come more recently into the collection having been saved from E. Bay scrap merchants for preservation.

IMG_20240511_182929326.jpg
IMG_20240511_183003692.jpg
IMG_20240511_182945572.jpg

And yes like all good preservation societies I plan to get all of these operational in EM gauge so they can run on gala days. But for now they can look down on my workbench and hopefully approve of progress

IMG_20240511_183041719.jpg
 

Herb Garden

Western Thunderer
My floor is now covered with bits of polystyrene. I decided to do something other than gardening today as the slugs last night decided to have a Eurovision party if Thier own and completely destroy every veg crop I have in almost one night.... Most disheartening!

Anyways back to toy trains... I'm slad so many of you liked the post about the display shelf. I'm happy to elaborate on the provenance of any of the models a provide some more photos at some point.... Just ask.

Back to the layout!

IMG_20240512_180010531_HDR.jpg
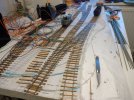
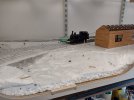
I've spent the day with the hot knife and sculpting tools shaping the landform of the mill board. This is a trickier job than the station board cost that one, like peoples misconception of Suffolk, is relatively flat. The mill board is not!

IMG_20240512_180016699.jpg
The typical south Norfolk, wooden clad over bridge watermill will fit into the corner with the mill race exiting underneath into the mill pond from whence a stream takes the flow under the twin railway bridges towards the mere which gives the hamlet it's name.

IMG_20240512_180030206.jpg
This has required a lot of digging out of holes to get the shape. Other holes on this board include the inspection pit for the loco shed. Which still needs to be a bit deeper

IMG_20240512_180123291.jpg
Slight tweaks to the alignment have been required so that trains can exit and enter the layout here we are looking from the fiddle yard with the exhibition headshunt on the right. For home use the functions are reversed

IMG_20240512_180103992_HDR.jpg
Well there you have it.... Maybe some trackwork is required next?
 

Herb Garden

Western Thunderer
After 3 live gigs this weekend my head is spinning a bit... Nice though not to be playing and get a chance to listen to others

IMG_20240520_064915247.jpg
IMG_20240520_064922730.jpg
The final bit of track is in with coupling magnets to drop off at the mill.

IMG_20240520_065000409_HDR.jpg
Further posing on the rear of the two bridges.... Or at least where they will be.
IMG_20240520_065004712.jpg

View from the back of the layout.
 
Top