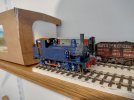
The Chronicles of Canary Sidings - the Tale of an Untidy Workbench

James Spooner

Western Thunderer
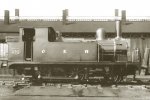
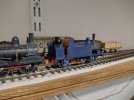
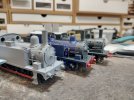
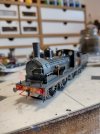
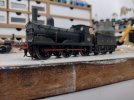
Long term followers of this thread will remember that last year I attempted to convert one of my backdated Hornby Y14(J15) to EM gauge using the brass masters easichas.

Some may also remember that I ruined the loco chassis in the process and the whole thing got dumped back in its box in rage and frustration. Please note there is nothing wrong with the chassis kit design.... Just my handiwork

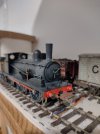
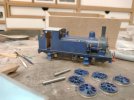
View attachment 208484
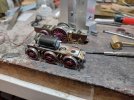
But today it's back in business.

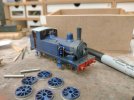
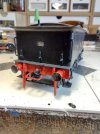
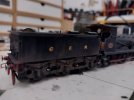
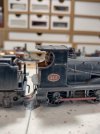
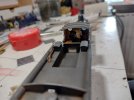
A couple of mods have allowed me to turn the sprung easichas wreck into a compensated flexichas and now it's running again. The tender still has the CSB chassis as per the kit.

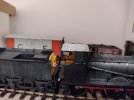
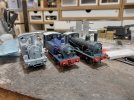
View attachment 208485
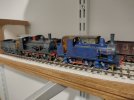
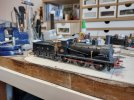
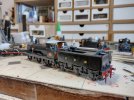
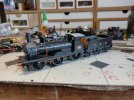
It still needs the brakes refitted a repair to the brake stantion and a new front toplamp bracket and it will joint the other two locos for a bit of touching up of the paintwork

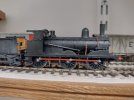
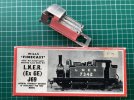
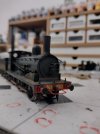
View attachment 208486
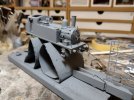
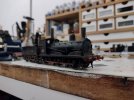
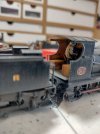
View attachment 208487
For those who are wondering the model was originally a RTR Hornby J15 that I backdated to 1899 condition. I probably have another one or two hanging around so I can demonstrate how to do this at some point

We are now at 3 working locomotives ready for painting and finishing. Break out the brushes!
‘Probably one or two‘ George?! That’s not what I saw when you showed me the photo of your Y14 work in progress shelf!

Nigel
 

Herb Garden

Western Thunderer
IMG_20240205_211704823_HDR.jpg
So those final necessary repairs are sorted on #510. The lamp bracket.....

IMG_20240205_211648879.jpg
The brake handle....

IMG_20240205_211620309_HDR.jpg
And the loco brakes. I've also removed the water level gauge from the tender as they were only fitted from 1902 and this is a 1899 machine. I doubt many people will mind but once I found out....

I've just realised this one will need a crew as well....
 
2024.03 - GER E22 class #151 - it's back in business

Herb Garden

Western Thunderer
There had been a bit of a theme in my modeling recently about getting things moving and working, mostly returning to old projects and getting a batch of locos ready for painting.

Although I am well aware that I do have a layout to build and a deadline to meet my modelling motivation is currently fired up in this direction and i am just going to go with the flow.

So to the next project that should have been finished ages ago.

Although you've seen it before it's never had a proper introduction so:

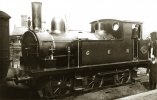
The E22 class, later LNER J65 was the smallest of the modern GER 0-6-0T locos. Known as Babybucks here at canary sidings.

e22_151_1889-1895.jpg
Here is the subject of this project the real #151 just after she was built.

e22_151_1895-1901 (1).jpg
And here she is prior to her first reboilering just before the turn of the century. This is the condition I'm modelling her in with the extra coal rails and the experimental steam ejectors fitted half way down the boiler. This was a one off and they were moved inside the cab on the R24s amongst others.

IMG_20240205_195004791.jpg
The model is built from the ex Riceworks etched kit which I was given for my 30th birthday a couple of years ago and was built to 00 gauge before being re-gauged last year to EM and then suffering a series of paint experiments until it finished up in the cabinet awaiting putting back into service.

IMG_20240205_194956705.jpg

It's now been put back together as a rolling chassis and I'm in the process of adding pickups.

IMG_20240206_180336280_HDR.jpg
It was always built in 2-4-0T configuration and I've kept that for the EM version. This was a trick by the ever frugal GER that when a buckjumper locomotive was on lighter duties the front rods were removed to make it freer running and save on fuel.... It just had to be modelled

IMG_20240206_180347362_HDR.jpg
The plan is that 151 along with 407 will provide the necessary motive power for skeetsmere until some red locos can be built. The pair should hopefully be joined by an accurascale machine as a spare loco later in the year ready for October.

IMG_20240207_070123480_HDR.jpg
For the first time I'm starting to achieve that family look the GER had at the turn of the last century
 
Last edited:

Herb Garden

Western Thunderer
George, I think the J65 was the "cutest" of all the Buckjumpers. Thanks for showing us your work - it's prompting me to finish something I started a looong time ago (inspired by Mr. Rice).
View attachment 208710
Awww that's a proper wills finecast buckjumper! Lovely things! A model railway classic! I know there are state of the art etched kits and RTR models out there now but there is something so charming, so tactile about the vintage W/M kits that I can't put my finger but I have a real soft spot for them.

If you see some of my previous posts on #407 the base model was of the same pedigree as yours although mine had had a much harder paper round

IMG_20240131_213621683.jpg

Here's some more shots of her back from the paint shop

IMG_20240207_070117872_HDR.jpg

Pretty as the J67 may been I agree with you that the J65 is the cutest of the GER tanks ... So much so I have another kit somewhere waiting to be built but I will probs do that as one of the low tank variants and as an 0-6-0T just to be different
 

Herb Garden

Western Thunderer
So it has been surprisingly tricky getting 151 back and running.

I completed the pickups and put her back on the test track and sparks ensued from under the footplate

IMG_20240208_211812443.jpg
The issue was that the front of the chassis was lower than the rear by 0.5mm which meant that the front wheels were shorting intermittently on the underside of the loco body. This must have happened when I rebuilt the chassis to EM. I had obviously put the compensation beam back in a bit high so the front was dipping down.

Problem was I couldn't get in to bend the beam to raise the loco front up at all so the only other option was to melt the solder joint and lower the beam assembly slightly.... Now that could terrifyingly ruin the running of the whole loco...

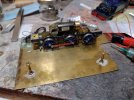
After much head scratching I built this rudimentary jig on which I could support the frames level and have the rear wheels on he ground. Yes it's two bolts soldered upside down to some brass sheet.

IMG_20240208_212000534.jpg
The chassis was then set level on the jig

IMG_20240208_212432243.jpg
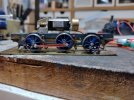
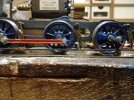
You can see with the other two wheelsets on the deck and the chassis level there a definite gap under the front wheels....

IMG_20240209_104155286_HDR.jpg
In came the soldering iron there was a hiss and a ping and everything went quiet. And luckily now I have a working loco!!!

I do plan to stop this theme of getting locos working shortly but there is one more to do....
IMG_20240209_075957710_HDR.jpg
This is a hint!
 

James Spooner

Western Thunderer
So it has been surprisingly tricky getting 151 back and running.

I completed the pickups and put her back on the test track and sparks ensued from under the footplate

View attachment 208839
The issue was that the front of the chassis was lower than the rear by 0.5mm which meant that the front wheels were shorting intermittently on the underside of the loco body. This must have happened when I rebuilt the chassis to EM. I had obviously put the compensation beam back in a bit high so the front was dipping down.

Problem was I couldn't get in to bend the beam to raise the loco front up at all so the only other option was to melt the solder joint and lower the beam assembly slightly.... Now that could terrifyingly ruin the running of the whole loco...

After much head scratching I built this rudimentary jig on which I could support the frames level and have the rear wheels on he ground. Yes it's two bolts soldered upside down to some brass sheet.

View attachment 208840
The chassis was then set level on the jig

View attachment 208841
You can see with the other two wheelsets on the deck and the chassis level there a definite gap under the front wheels....

View attachment 208842
In came the soldering iron there was a hiss and a ping and everything went quiet. And luckily now I have a working loco!!!

I do plan to stop this theme of getting locos working shortly but there is one more to do....
View attachment 208843
This is a hint!
George,

I’m impressed by the way you are churning through locos in your fleet and getting them operational; it must be very satisfying!

Nigel
 

Herb Garden

Western Thunderer
George,

I’m impressed by the way you are churning through locos in your fleet and getting them operational; it must be very satisfying!

Nigel
It is indeed.... I like playing trains almost as much as making them.... Problem is I now have more working stock than the test track can hold so might have to get back to layout building soon
 

Dave Sutton

Active Member
I was just re-reading some older MRJ's and came across the Iain Rice articles on the Buckjumpers, Do you have copies of this? If not I'll email via the NE EMGS group.
 

Phil O

Western Thunderer
There's a bloke been building Buckjumpers on Scaleforum, workshops, Paul Willis, on beer and buckjumpers. Sorry, no link.
 
2024.04 - GER Y14 class #510 - Painting

Herb Garden

Western Thunderer
So it's been a while....

I thought I would be able to share in detail my painting method but truth be told I'm still working it out and each of the locomotives I'm working on have been painted in a different way... A few steps forward and some back...

Anyhow first to leave the paint shop is 510. In theory this didn't need much work but @Liver & Fry was kind enough to point out that the loco was looking a bit too grey.... So I've darkened the shade to a deeper black and here she is:

IMG_20240225_101200168_HDR.jpg
So this is 510 with the painting complete and yet to be weathered although I'm not sure where to draw that line as a lot of pre weathering has gone into the loco so far.

IMG_20240225_100821253_HDR.jpg
The texture of the paint still has a pattina and isn't museum standard smooth but that is intentional as it aids in weathering.

IMG_20240225_100804064_HDR.jpg
Transfers are from fox and etched plates are to my own artwork because other options don't get the GER font right.

IMG_20240225_102404145_HDR.jpg

Also the commercial options don't include the tender plate in thier offering ... But I do on mine and oh what a difference it makes

IMG_20240225_100743336_HDR.jpg

So there you have it.... Just weathering and details like coal and crew to go. Oh and the refitting of it's DCC chip...
 

Herb Garden

Western Thunderer
Where there's muck.....

Inspired by the work of some of the excellent modelling on WT from @wigancg, @NHY 581 and @Podartist79 I've decided to take the plunge and have a go and do some weathering... I haven't done anything like this in a decade so here goes....

IMG_20240227_215000378.jpg

IMG_20240227_214909454.jpg
IMG_20240227_214729734.jpg
IMG_20240227_215043818.jpg
Well that was fun! Just acrylic paint and weathering powders followed by bits of gouache dabbed hither and thither.

IMG_20240228_071118027_HDR.jpg
Also 510 now has at least one of her crew.... I really shouldn't have bothered painting his moustache as you can't see it.... But I know it's there...

IMG_20240228_071136400_HDR.jpg
IMG_20240228_071351362_HDR.jpg
Loving the modelu figures. Have bought more for all the other locos... Painting them is rather fun too although I'm really making it up as I go along what pre grouping train crews wore

Just a few final details to go.... And the fireman!
 

NHY 581

Western Thunderer
Hi George,

Looking good and tganks for the walk on part. I read a few posts back that this is a back dated Hornby J15. Can you point me towards the steps you took to do the work please ?

I'm assuming (!) that's a Gibson chimney and that you've courageously removed the later extentions to the tender sides but what else have you done ?

Did you start with their LNER No. 7524, with original cab roof line ?


Sorry about the number of questions.......

Rob
 

Herb Garden

Western Thunderer
Hi George,

Looking good and tganks for the walk on part. I read a few posts back that this is a back dated Hornby J15. Can you point me towards the steps you took to do the work please ?

I'm assuming (!) that's a Gibson chimney and that you've courageously removed the later extensions to the tender sides but what else have you done ?

Did you start with their LNER No. 7524, with original cab roof line ?


Sorry about the number of questions.......

Rob
Rob, absolutely no problem in the number of questions I apologise in advance for the number of answers...

I'm getting a bit of a reputation for cutting up Hornby j15s having a few on the go at the moment and a couple more waiting thier turn. James @Liver & Fry challenged me to have a go at this originally back in the early days of the pandemic and was kind enough to do a lot of the research. Which is exceeding helpful given a class of 289 examples built over a 30 year period there are a lot of detail differences

There isn't any details of how I did the conversions on WT as 510 was backdated before joining this forum but there are some pictures and of 151 on the GERS modelling showcase (which it would be remiss of me if i did not plug eh @Godders53 ?)

Unpainted GER Locos

Further to that I did a couple of how to articles in the GE news if you aren't a member I can send you a scan of those if that would help just drop me a pm.

510 was converted from the low cab variety but it's easy enough to convert a high cab one as the extended can roof unit is easily removed by a technical process known as yanking. You have to do this if you want an example built before 1893 as they all had lower cabsides and the only low cabside ones Hornby did have the high roof.

Other main things to watch out are the tender type. Hornby only make the later two variations out of 5 variants but they can be converted with a bit of cutting and shutting to the H14 and Z14 tender types (yes I know I am a geek) aoso good to know if the example you want was fitted or not. In GER days most were not

So to answer your actual questions... Yes it's a Gibson chimney and safety valve. Dome also if you want to do one of the early boiler variants as it was positioned further back.

What else have I done? Yes the tender top and a new plasitcard beading put round... That's a fiddle. The boiler is sanded down and the useless Hornby handrails in the wrong position replaced and the front end and smoke box door has been rebuilt with a scratch built new one. Washout plugs and Ross pop safety valves removed. Loco brakes removed on those which didn't have then in GER days. Cab roof replaced with a wood and canvas style one (plasitcard). I think that's everything.

I can upload some more photos of 510 before it was painted if I can find them on my old pc to illustrate and I should probably get round to getting another couple in service .... But need to get on with the layout as that exhibition deadline is creeping up...

I hope that helps?
 

NHY 581

Western Thunderer
Top stuff, George.

I may well have a go at this........once the latest build is out of the way.

But in the interim, no harm in getting the bits together.........
 

Herb Garden

Western Thunderer
Top stuff, George.

I may well have a go at this........once the latest build is out of the way.

But in the interim, no harm in getting the bits together.........
It's a fun project believe me.

Most important thing decide which specific loco you want to model .... This will drive your choice of donor model.

There's some great articles in the GERS journal and full drawings available for sale on our website for a very small fee which can all help.

Or failing that send a photograph or a running number and I can advise on suitable donor models.... Been there done that got the t-shirts....
 
Top