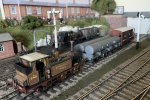
7mm Stroudley Park

oldravendale

Western Thunderer
I'm pleased it was helpful, Ian. A bit late for us but there are some really good photos of Ks coming up quite soon on the Tim Mills thread. I didn't have them, of course, when I was building mine. :D

Brian
 

SouthernFan Ian

Western Thunderer
Oh that really is very nice.

John
Thank you John. I was determined to have a K Class. Determination paid off in the end. I also enjoyed the scratchbuilding as well and I quite understand when modellers say it is easier/preferable to scratchbuild. Some of the parts in this kit were awful and just had to be re-made.
Well, we are model makers after all!
Regards,
Ian
 
Weathering Removal

SouthernFan Ian

Western Thunderer
In the past, I’ve always used my airbrush in the garage for weathering using Floquil weathering colours (all necessary health precaution were taken).
Recently, I thought I’d try the latest trend using more user friendly paint. The effect I was hoping to achieve is a clean, lightly weathered, cared for finish. I am not pleased with the result as the Terrier looks too grubby and should have been much more subtle.
Is there a way to remedy the situation without destroying the paint underneath?
The weathering was in oil paint. When I was an art student, I’ll paint used to take ages to dry, so I thought I would be able to ‘work’ the weathering until I was pleased with it but it dried quicker than enamels.

IMG_1289.jpeg
Regards,
Ian
 
Last edited:

Yorkshire Dave

Western Thunderer
That's a tricky one as there are various oil paint removers out there on the market - probably too powerful.

What is the finish underneath. Enamel, Cellulose, Acrylic?

My initial thought would be to use one of the water soluble oil paint brush cleaners.

In the past I've used Isopropyl Alcohol (IPA) and even the Tamiya paint thinners to remove excess weathering. All with cotton wool buds/tips dipped in the solution and wipe carefully in a downwards motion. With just enough solution on the tip to soften the oil paint layer.

This removes most of the excess weathering and in some cases leaves enough behind in the right places for a rain streaked finish.

The only caveat being mine is on acrylic finishes as I very rarely use enamel paints other than the London Transport colours.
 

SouthernFan Ian

Western Thunderer
Thanks for the tip Dave. The loco is painted with Precision Phoenix so I’m hoping it’s going to withstand the IPA. Looking forward to giving it a try.
Regards,
Ian
 

Yorkshire Dave

Western Thunderer
Just be careful around the decals (and lining decals if used) as not to take any ink off.

I would assume an enamel varnish was used to seal these.
 
Weathering Experiment at Stroudley Park

SouthernFan Ian

Western Thunderer
My stock of coaches kits was not getting any smaller, so I decided 2024 will be a year of coach building. Building coach after coach is not good for the soul. A slight weathering deviation was called for to retain sanity.
Although my preferred method of weathering is with an airbrush, I thought I’d try a couple of experiments with different media and methods. First up is the oil paint experiment. The finish I was seeking was used, cleaned and cared for but I do not think this has been achieved to my satisfaction. The paint I used was Windsor and Newton, Winton oil colour, which seemed to dry much quicker than the oil paints I remember at art college. Maybe, I should have bought some retarder. Even so, I am reasonably pleased with the end result.
View attachment 71660IMG_1623.jpeg
The next experiment was under taken with weathering powders and I was surprised with the end result.
During the process of applying the powders, I was having doubts about doing this. However, my trusty glass fibre brush came to the rescue. I rubbed gently over the weathering powers with the brush. Some may consider this approach brutal but I like the way the glass fibre brush lets down the harshness and density on the planks and forces the powder into the plank gaps leaving a slight residue on the plank surface. This produces a slightly different finish to the airbrush approach. All this was on top of Powsides lettering and a well and truly dried coat of matt varnish.
Oh well, back to the coaches…..
 

Attachments

  • IMG_1622.jpeg
    IMG_1622.jpeg
    297.6 KB · Views: 21
Last edited:

SouthernFan Ian

Western Thunderer
Getting Busy at Stroudley Park
The 0 Gauge Guild Gazette always offers tempting new products in the Trade News section. The latest edition was no exception.
The mail bags from Mudmagnet Models really caught my eye and they arrived a couple of days after ordering. I wasn’t disappointed.
When reading the Gazette, I envisioned this scenario such as this with the mail van.
The mail bags were primed with an aerosol primer, when dry, sprayed with Halfords Matt Khaki. After drying, the bags were painted with a Revell Matt dark brown which was immediately removed with a slightly damp brush which has been dipped in turps and wiped to remove most of the turps.
This is akin to dry brushing but removes the paint instead leaving dark brown in the crevices and creases and leaving a toned down version of the Khaki as a base colour. Highlights were then picked out with a light grey dry brushing to emphasise the highlights.
I’ve been research aerosol theatrical fog to add to the atmosphere. Nevertheless, I’m pleased with the result so far……
IMG_2952.jpeg
and for those of you watching in colour….
IMG_2952.jpeg
A foggy night time scene would, I think be more appropriate for a mail train.
Regards,
Ian
 
Last edited:
Tea Break at Stroudley Park

SouthernFan Ian

Western Thunderer
In an idle moment, I thought the goods platform and LBSC Goods Lock-up needed a better cameo.
My box of S&D figures provided two suitable candidates for what I had in mind.
Using a spare arm holding a drink and scratch building a broom ( yes, I know I’m sad!) yielded the result of a quiet moment I was seeking.

IMG_3526.jpeg
I must really get on with some proper modelling now.
Regards,
Ian
 

SouthernFan Ian

Western Thunderer
Thank you for your kind comment Timbo,
I was referencing the part built locomotives and other stock that has languished unbuilt for many months. At least I will not be alone!! Regards,
Ian
 
Point Control……at last

SouthernFan Ian

Western Thunderer
I tend to tackle most jobs when I’m feeling more positive about the outcome. For a very long time, I’ve been putting off building the point control for Stroudley Park.
The time came to no longer use ‘the fat finger from the sky’ to operate my points. Here’s what I devised. All relatively cheap and home made.
The baseboard edge electrics and levers use slide switches with an operating rod through the slide switch. The switch mounts are constructed from ply offcuts.
IMG_3589.jpeg
The long rods protruding the the switch will have a securing washers solder on and the rod cut off for operator comfort.
The under baseboard devise looks like this.
IMG_3586.jpeg
I’ve used terminal blocks as support for the point rods which run in brass tubing secured in the terminal blocks by the two screws. The main push rod is cut short from the tiebar at rod which is formed separately and formed to suit each location. The two rods are joined securely with another terminal block but no brass tube this time.
The time taken for construct each operating mechanism is around 20 minutes although being able to work on my boards vertically makes life so much more comfortable.
What a joy operating is now!
Regards,
Ian
 

Richard Gawler

Western Thunderer
I’ve used terminal blocks as support for the point rods which run in brass tubing secured in the terminal blocks by the two screws.

How beautifully simple, and with the holes in the housing there to fix the support to the underside of the baseboard.

I used a slide switch in this fashion about five years ago, and it has been 100% reliable since then. This must be one of the easiest ways to arrange mechanical remote control with frog switching, and it works so well.
 
Top