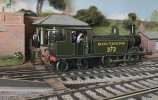
7mm Stroudley Park

oldravendale

Western Thunderer
Thanks for the explanations, Ian. You dealt with the firebox, broadly speaking, using the same techniques as I. However. it shouldn't be necessary, should it?

Your treatment of the slidebars, cylinders and cross heads again broadly follows my own path except that I had the help of Simon T to create the important bits. I bought the H2 slidebars from Laurie as well, but found I was unable to use them, as did you. Your result as shown here is really good.

Another question - did you use the frame spacers as supplied or make new ones? Those in my kit were incorrect and I had to make new ones.

I really agree with you, though. Building this kit taught me so much despite the irritations and inaccuracies. I'd really welcome a properly designed one, though!

Brian
 

SouthernFan Ian

Western Thunderer
Another question - did you use the frame spacers as supplied or make new ones? Those in my kit were incorrect and I had to make new ones.
Here’s where our paths separate Brian. I am a keen supporter of split frames so I will be using PCB as frame spacers.
All of my recent loco builds have split frames and the difference on running qualities is amazing. I was converted to split frames by a fellow Kings Lynn 0 Gauge Group member, Bill Rankin and have never look back since. Bill is a superb model maker.

0725AE98-31E2-40D1-A17F-B859C56B6EF2.jpeg
Here’s one of my first split frame locos, it runs superbly. I just needs a light weathering to finish it off.
Regards,
Ian
 

oldravendale

Western Thunderer
That's a lovely model, Ian.

Yes, of course you mentioned split frames initially. Sorry that it failed to register. However, you've probably saved yourself a bit of frustration going your route with the PCB!

Please keep us up to date with "K" progress. As far as I'm concerned it's one of the most attractive of loco designs apart from being one of the most successful too. It's a shame that one was never preserved.

Brian
 

34091 Weymouth

Western Thunderer
It looks like your doing a nice job of the kit. I built the ivatt n1 some years ago now & wrote a small article in the guild gazette about the model. It came from McGowan origins & the chassis needed some modifications to make it sit level with the body. If I remember rightly the rods were interesting too. It built well enough in the end & I thought the white metal castings were nice. It was also cheaper than the 4mm Kit sold elsewhere.

N.e.r days kits, now they are bad kits to build.
 

SouthernFan Ian

Western Thunderer
It been quite a while since I posted an update on WT, that’s because my wife and I have been catching up on some serious travelling. That does not mean progress has stalled while we made most use of our passports, however…..
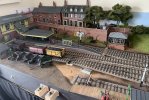
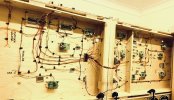
One of the two ‘daunting’ projects has been completed with great success. A complete requiring has taken place with full cab control and working signals, both ground and semaphore. What a joy it is to control train movements with working signals.
IMG_6752.jpeg
The second ‘daunting’ project was ballasting. I wanted to make sure everything worked as I wanted before tackling this job. I planned to carry out this task over the winter but couldn’t resist a try out session.

IMG_6768.jpeg
Just a siding with the ballast laid dry to see how it would look. The crew of the USA tank take a tea break.

I couldn’t hold back, it made such a difference, I carried on and great progress is being made.

IMG_8036.jpeg
The end result is very satisfying. I have used a mixture of Green Scene 4mm and Woodland Scenics ballast held together with WW Scenics Ballast Bonder. There is a slight sheen after applying the Bonder but that will be taken care of when the track is weathered; and finally……

IMG_8038.jpeg
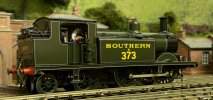
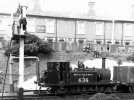
The D3 makes its way to the loco siding. Weathering is required on the loco too.

IMG_8044.jpeg
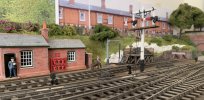
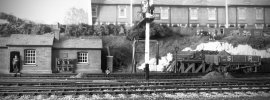
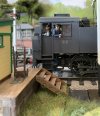
Stroudley Park loco siding with two trainspotters who have just ‘snuck’ through the fence.
 

SouthernFan Ian

Western Thunderer
This looks really good, very nice what you managed to place in a small space.
Thank you for your kind comment
looks very good.

I suspect you've been "smellchequed"


:)
Doh! You’re right Simon, sometimes I do not like 21st Century technology. Funnily enough, that’s why I rewired the layout. I moved from digital back to something I understood!

IMG_4696.jpeg
 

SouthernFan Ian

Western Thunderer
Hi Ian

Your railway is looking great.

Do you mind me asking what the origins are of the USA tank locomotive? Is it from the Ace kit? I've been contemplating the purchase of one and I'd be interested in your comments.

Cheers
Mike
Thank you for your kind comment Mike.
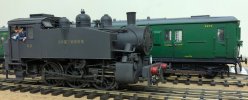
It is indeed an Ace Kit although, I didn’t build it. I bought it ready built from the GOG website when they had an E&T section. I did paint and weather it though and here it is in all it’s mucky glory.

IMG_0576.jpeg
I understand they are challenging to built, that’s why I snapped up a built one!
Somewhere, I read the key to construction is to build the cab and side tanks and slide the boiler in from the bunker end. I cannot confirm or deny if this methods works but sounds useful.
 

spikey faz

Western Thunderer
Thank you for your kind comment Mike.
It is indeed an Ace Kit although, I didn’t build it. I bought it ready built from the GOG website when they had an E&T section. I did paint and weather it though and here it is in all it’s mucky glory.

View attachment 193878
I understand they are challenging to built, that’s why I snapped up a built one!
Somewhere, I read the key to construction is to build the cab and side tanks and slide the boiler in from the bunker end. I cannot confirm or deny if this methods works but sounds useful.
Well, after reading your comments I've gone ahead and ordered the kit. I think the several glasses of wine I've shared (post dinner) with Mrs Faz may have helped! :))

Mike
 

Yorkshire Dave

Western Thunderer
Is the ACE USATC S100 the ex-Oakville Kit?

I understand they are challenging to built, that’s why I snapped up a built one!
Somewhere, I read the key to construction is to build the cab and side tanks and slide the boiler in from the bunker end. I cannot confirm or deny if this methods works but sounds useful.

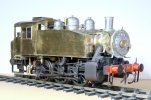
Yes, it is a challenging kit. As I recall when I built mine I started with the frames to get the chassis working followed by the side tanks and cab as this forms the datum with the frames. The boiler was the last major item to be slid in and secured.

I started an Oakville kit many years ago and is currently a shelf queen. It took me a while to work out what was wrong and it turned out to be the front of the frames were a buffer beam depth too long - which I shortened. Mine (coincidentally No.68) is being built as depicted after the first SR modifications whilst retaining the US fittings prior to second modification where they received standard SR Wainwright fittings.

S100 1.jpg


Well, after reading your comments I've gone ahead and ordered the kit. I think the several glasses of wine I've shared (post dinner) with Mrs Faz may have helped! :))

As @SouthernFan Ian alluded to get as much reference material as you can and take your time ;).
 

SouthernFan Ian

Western Thunderer
Well, after reading your comments I've gone ahead and ordered the kit. I think the several glasses of wine I've shared (post dinner) with Mrs Faz may have helped! :))

Mike
Hello Mike,
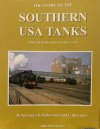
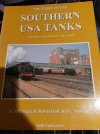
You might like to get a copy of this book, both interesting and useful…..

IMG_8635.jpeg
Regards,
Ian
 
Top