7mm Still On The Intercity Workbench - Class 06 D2440

S

SteveO

Guest
Any news Intercity? Rob Pulham directed me here – I had previously missed this entirely (now bookmarked!) and I'm totally agog at what you've achieved from a such a basic kit. I've also trawled through your blogs on RMW and has been a fascinating read.
 

Intercity126

Western Thunderer
Hi Steve - glad you found it interesting. Unfortunately I've not managed to make much progress since the last entry. I bought myself an air compressor at the start of the summer and sand-blasted the bodywork ready for painting. Unfortunately during this process I managed to knock off one of the footsteps - not due directly to the industrial type sand blasting equipment I used, but due to the step getting caught on the clumsy leather gauntlets I was wearing to hold the model. Doh!

I'll re-solder this soon, but it has been getting shoved to the back of the priority queue all summer due to the re-emergence of another of my interest bubbles (an old Triton motorcycle for those interested in such things).

One small bit of progress was receiving my specially commissioned Worksplates from Diane Carney. She had two versions of Barclay worksplates available, but not the exact type I required for the 06. I've spent so long on this kit that I decided to bite the bullet and get her to make correct artwork for this type.

I found the best source of information to be auction catalogues - I spent a lot of time scaling the highest resolution broadside photos I could find before I eventually realised that auction houses accurately list the dimensions - The attached listing from GCR Auctions is from the same batch and indicates the size as 9 3/4"x7 3/4"(although I found another listing which notes the minor dimension as slightly smaller).

"Lot 358 A diesel locomotive worksplate, "ANDREW BARCLAY SONS & CO LTD, KILMARNOCK, CALEDONIA WORKS No 463, 1960", from a BR Class 06 0-4-0 204 HP diesel mechanical shunter D2436 allocated new to Ayr in April 1960 and withdrawn from Eastfield in November 1971. It was cut up at BREL Glasgow in December 1973. Cast aluminium oval, 9 3/4"x7 3/4", the characters are polished, though the plate retains its original green paintwork. The lot is accompanied by a letter from the builders dated 1980 in which they provide information on the history of the locomotive and its mechanical specification. - Sold for £190"

After one false start due to Barclay having two "standard" sizes over the years, these lovely etchings arrived:

Worksplates - Diane Carney.jpg

This is just part of the sheet - there are a number of spares on the sheet. To give you an idea of size, each plate is just under 6mm wide.

Having worksplates with the works number of my chosen loco suddenly somehow brought the thing to life in my mind.

Address for those interested - Diane was extremely helpful and can be highly recommended.
Worksplates address - Diane Carney.jpg

Those with keen eyesight will notice that I've got plates with works numbers for two locos:
No 467 for D2440 (this loco) and No 464 for D2437 (06 008) - just in case of future project... I pored over so many photos of the latter loco in my hunt for prototype info that I became quite attached to it.

For comparison, these are the worksplates included in the kit. I guess the designer originally put some artwork on there that just wasn't possible to etch in this thickness and the whole thing has just been eaten away.

Worksplates - Kit.jpg
 

alcazar

Guest
LOVELY plates and wow!!! to those others. You did well to recognise 'em as worksplates......

Did you have to provide artwork, or did Diane do it?

I have noted that address for future builds. Two Rustons, for a start.
 

Intercity126

Western Thunderer
Hi Jeff - Diane did all the artwork from photos and sizes I sent. She even asked if I wanted the screw heads etched in. There was a small wait as she does all the etching herself as and when there is enough work stacked up.
 

alcazar

Guest
Just noted that they are no longer taking orders for photo etched plates, just for artwork.
The situation to be reviewed in Spring 2014.........:(
 
The day the Earth stood still

Intercity126

Western Thunderer
Good grief - almost 8 years since I last posted any progress on this thread... Seems more than overdue an update. After all I made some real, measurable progress as recently as November 2014 when I wafted some green paint over the thing. It has been sitting glowering at me every time I went into the Railway Room since then.
IMG_20220217_005849.jpg
Coat: Brunswick Green, Gloss - Precision Paints (vintage) 1983.
Dust: Model's own

@Steph Dale gave me an excellent tip to use Slaters wheels as the basis of crank arms in 2012 - immediately purchased for their imminent use in 2022 as the basis for ugly, but functional, crank arms.

IMG_20220213_162536.jpgI rashly cut off all the spokes as an incentive to actually do something in january of this year, but had no clue as to proceed further. I came up with the idea to draw guide lines on the sheet of bathroom shelf that I use as a flat modelling surface, but was acutely aware of the importance of sighting from the correct position to avoid parallax errors. My reasoning was that if I align the balance weight as accurately as I can now, using all the focus my bodging brain eyesight will allow, any discrepancy will be less obvious when the things are whirring round in operation.

I would have loved to have set things up on a machine of some sort, but hoped that as the Slaters cranks gave accuracy to the bit that mattered my balance weights are just decoration.
IMG_20220213_163508.jpg
I did realise that some crudely shaped strips of 40 thou plasticard could give some sort of interlocking between the balance weight filler and the vestigial wheel webs.

Some overlays made with black plastikard and an olfa cutter were glued on. Hopefully the use of black plastikard will result in paint wear being less noticeable
IMG_20220213_170332.jpg
Important for subsequent shaping with hacksaw and coarse sandpaper was that I had well defined edges to follow.

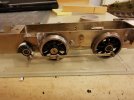
Trial run in the chassis seems promising - it's not free running as yet, but there doesn't seem to be any obvious binding. Good enough to start final detailing of the chassis and fettling of the axle bearing clearances.
IMG_20220215_204306.jpg
 

Attachments

  • IMG_20220215_204306.jpg
    IMG_20220215_204306.jpg
    161.2 KB · Views: 1
Top