Monks Ferry: a layout for the Grandchildren.

jonte

Western Thunderer
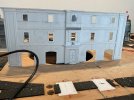
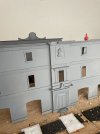
Made another early start to move things on in respect if the station building.

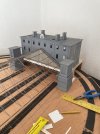
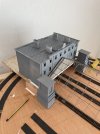
Amongst other tasks, I began by gluing down strips of card on the layout to aid (accurate) positioning of plinth and building. The tower supports for the removable roof aren’t yet fixed as their orientation depends on the (best possible) positioning of the building on its plinth. I hope to start priming both sections of building later (removable rooves asist immensely here), while fitting in some soldering in respect of lighting whilst the sun shines (in between a spot of gardening).

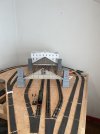
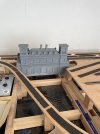
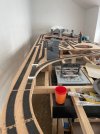
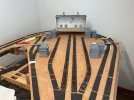
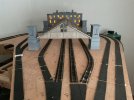
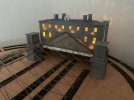
In the meantime, here are a couple of shots of the building in situ and a second street level station:

IMG_0490.jpegIMG_0488.jpegIMG_0489.jpeg

Thanks for looking and your much appreciated ‘likes’ re my last post.

jonte
 

jonte

Western Thunderer
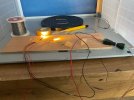
One set of lights prepared, thinking of placing two sets in each section:

IMG_4469.jpeg

Another crest appears on the latest ‘front’ section (seen with acid etch primer before receiving ordinary primer along with the rest):

IMG_4470.jpeg

This was the smallest crest I could get to fit inside the frame.

Cheers.

jonte
 

jonte

Western Thunderer
Added a couple of coats of primer earlier to the build whilst managing to avoid the impending showers:

IMG_0491.jpeg

Then completed the remaining led interior lighting which I’ll fit using black-tac as per the signals at the next opportunity.

That’s it for today’s modelling session, unfortunately.

Many thanks, all for your continued interest and likes.

jonte
 

jonte

Western Thunderer
No modelling since my last, but took an opportunity to mount both sections on the plinth and take a couple of shots for my own interest.

Had a couple of spare moments so thought I’d share them with you, and hope they’ll prove of interest:

IMG_0492.jpegIMG_0493.jpegIMG_0495.jpegIMG_0496.jpeg

I know I’m repeating myself when I mention that that final shot won’t be seen from normal viewing angles. At least we’ll know it’s there.

Thanks for your interest.

jonte
 

jonte

Western Thunderer
I’ve made a start on fitting the led lighting:

IMG_0503.jpeg

Fixed with black-tac (like those in the gantry signal), the feeds will only be temporary as I’m out of the connector plugs I’ll need to make disconnection easier when removing the building for track cleaning purposes. I’ll also have to fit the box, I’ve meaning to get round to, over the gap for the handle on the station roof.

Incidentally, talking of track cleaning to the station tracks, here’s a shot which shows how it will be conducted:

IMG_4477.jpeg

First the rear section of building will be removed, then the the tower-tops removed from their bases and finally the roof itself to gain access to the tracks below.

Cheers.

jonte
 

jonte

Western Thunderer
Turning attention, at long last, to track I made a start by checking which of the twenty one/two points were faulty/not switching.

Thankfully only two turned out to be at fault, both of which were switched by two of the second hand modules I bought (throw of the dice I suppose buying second hand, and pointless really as most of them used the brand new ones, the bulk of the second hand carp put aside). We live and learn.

I maintain the points themselves are fine, but unfortunately I can’t just swap the motors for new ones as they’re glued on to save the tags from showing, thus a couple more will have to be ordered; droppers wired on; stocks wired to checks so’s not to rely on point blades for power; tested;motors fitted which have first been wired and tested; primed; painted; weathered ………. You get the idea.

Finally; the lights in operation:

IMG_4480.jpegIMG_4481.jpegIMG_4478.jpeg

Thanks for looking.

jonte
 

John57sharp

Western Thunderer
Nice yellowish glow Jon. Looks like everybody’s working late!

You do have to become a Jack of all trades in this hobby - if you have the time - keep on plugging at it - it’s looking great.

John
 

jonte

Western Thunderer
Nice yellowish glow Jon. Looks like everybody’s working late!

You do have to become a Jack of all trades in this hobby - if you have the time - keep on plugging at it - it’s looking great.

John

Absolutely, John.

Umpteen tools seem required even for the smallest of jobs. Seems as though at times I spend more time gathering up all the tools required, then putting them away again, than actually performing the task.

Glad you like the ‘glow’. Think I’m right in saying that the lighting on old buildings was a dim yellowish colour, although this will be lost on the children ;)

The contrast is stark between the single skinned side and the three-ply other in terms of the bulbs being conspicuous. I’ll just hide the with some squares of duck tape once the backing plate has been glued on.

Thanks for your reassuring words and kind interest as usual.

Best.

Jon
 

jonte

Western Thunderer
After a long (uninterrupted modelling session) day of addressing the rogue points - or more to the point, point motors- I set about fabricating new sleeper extensions for both points from material to hand, to replace the existing ones which were damaged beyond repair when removing the (glued in) point motors. Here is the mainline one to show what I mean:

IMG_4483.jpegIMG_4484.jpeg

However, shortly after doing so, I conducted further tests just to make sure the points were indeed in order which I’m glad I did. After twenty tests on the yard one, twice the switch rails became stiff to move in one direction; twice too many in my book.

So whilst the (super) glue dried, I braved the pre-bank holiday traffic and headed to the model shop in Widnes where I purchased two Peco point motors and a replacement point fir the one in the yard. Thankfully I did so in record time: 59 minutes (road works as usual in Widnes increased the journey time considerably…..).

Then it was into the garden to endure the heat and wire up point and motors as before. Felt like I’d been there before………..

As before, the point motors didn’t fit Hornby (Rivarubbishy) points thus followed much fettling of the point motor tags with files and circular filing board in modelling drill to achieve the best possible (but far from perfect) outcome.

Then it was over to hand drilling the new sleeper extensions to take its point motor. Somehow, despite as much filing of the tags as possible, the pin still only managed to penetrate partially the tie bar hole in the point, so this will be relegated to the yard point; the new proprietary point will become the mainline point as it forms a vital part of the station throat (can’t take the chance of a dodgey point).

Anyway, both points have been put aside to allow the glue on the point motor tags to dry overnight. Tomorrow, I’ll file down the protruding parts of the tags to make them flush with the sleepers before priming the new point. I’ll paint it after it’s laid.

What a day.

Thanks fir reading.

jonte
 

jonte

Western Thunderer
Pleased to report that the fitting of new point motors to old and new points has proved fruitful:

IMG_4487.jpeg

Faced with the onerous task of having to clean primer and paint from over twenty points and a mountain of plain track, I decided to ensure that primer was removed from the new point soon after it had been sprayed (I tried masking the rails as kindly advised by Nigel @James Spooner but the Tamiya tape to hand (I have finer but where on Earth did I put it?7 :( ) needed cutting into finer lengths as it obstructed the rail sides and I was just too lazy…..). To that end, I used a cotton bud dipped in lighter fluid, gently stroking along the rail tops then going over again with the bud dipped once again in fluid, paying attention to avoid the plastic check rails, which worked a treat. With the job of cleaning the existing painted track in mind, I selected a crossing at random and tried the same technique: it made not a jot of difference. So, out came the cellulose thinners which eventually began to break up the paint, but still it stuck to the rail tops like you-know-what to a blanket :rant:

Anyway, a whole hour later of scrubbing:

IMG_4486.jpeg

Still not sure though whether it’s clean enough. I suppose time will tell.

Now, just another twenty or so to go………

Sorry for moaning (all my own doing).

jonte
 

jonte

Western Thunderer
Having just spent another hour (felt like a day) cleaning a point and half of the other crossover, I just don’t think I can carry on like this with the others, especially since I still feel they’re still tarnished, despite polishing with a piece of balsa.

The plain track and curves should be easier as I can simply take a piece of 2x1 to them as kindly advised (no tender bits to damage), but the points and crossovers…………need to take time out to consider my options here.

jonte
 

jonte

Western Thunderer
Many thanks for your kind acknowledgments, chaps, and I’m deeply sorry that I seem to have let you down. I’m privileged that a simple train set could have garnered such interest and thereby disappointment, so thank you again.

I suppose the least I can do to make good is offer some sort of explanation for my ‘shock’ decision. As usual, there isn’t one lone, solitary reason at source. Life just chooses to conspire at times, or at least I’m a firm believer in such.

The recent frustration and disappointment with the track hasn’t helped; in short, it looks like I’d have to dig deep and replace it for reasons outlined. As the point motors are glued to the bases for a couple of reasons of hit upon in the thread, I’d also have to factor in the possibility of buying new motors to boot. A big outlay I’m sure you’d agree, to say nothing of having to purchase new wiring etc.. Then there’s the time of having to wire up twenty odd points and crossings, plus the time involved to populate such a ‘large’ layout with scenery, ballasting etc., to say nothing of the increasing cost of materials involved. The thought of the cost of the small number of buildings to date sends a shiver down spine when I consider how many more structures will be required.

To save waffling on and stating the obvious about the cost of the hobby (doesn’t it affect us all?), it will come as no surprise to learn that TIME is the major factor here.

You see, we now have the grandchildren with us up to three times a week which keeps us busy (they really do entertain me!) with an elderly sister with us on a fourth on ‘leave’ from her care home where she now resides full time due to her permanent incapacitation. Then there’s family at weekends, leaving me one full day if I’m lucky. Where I used to grab the odd hour here n there, I now find myself falling asleep when I sit down due to the effects of those darned statins. I’ve had to start taking these as I can no longer train due to extensive arthritis, most recently in my ankle for which I’m now under the hospital again. Consequently, low mood without exercising has seen me starting to pig-out creating increased levels of cholesterol in my blood stream, hence the medication. Vicious circle or what………

Anyway, long and short of it is that my circumstances have changed since I started so I have to face facts and cut my losses.

Thankfully, my enthusiasm for the hobby hasn’t waned, and so - as mentioned elsewhere - I’ve decided to dig out a much smaller affair in MF LNWR which is smaller and thus more manageable, and as a bonus, is far more advanced in terms of track being laid, wiring and baseboards/fiddleyard completed. I’ve also some recent positive (for a change) and uplifting (for me anyway) news to share with you on this front which I can’t wait to disclose.

Thank you all once again for your kind expressions of concern, but hope and trust you can understand.

Best.

jonte

 

jonte

Western Thunderer
Oh no! Hey Jon hope all is well? This is a drastic move indeed.

John

Hi John: you beat me to it :)

I’ve just posted an ‘account’ which I hope will explain my ‘drastic’ decision.

Thanks as always, John. Hope you’ll tune into my much smaller affair of Monks Ferry LNWR :thumbs:

Jon
 
Top