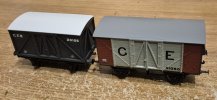
Liver & Fry's workbench

GER open wagons
  • Liver & Fry

    Western Thunderer
    Big steps forward have been made tonight!

    All four GE wagons are finished, so far as painting is concerned, with the wood interiors being painted and the wagon plates being touched up with white:

    20241227_221240.jpg20241227_221545.jpg20241227_222155.jpg

    I'm hoping to make good progress with lettering this weekend, but will likely hold off on an update until Sunday evening.

    - James
     
    GER open wagons
  • Liver & Fry

    Western Thunderer
    And that's a wrap! With one day of 2024 to spare, I've finished the Dia.31!

    20241230_214925.jpg20241230_215834.jpg
    Screenshot_20241230_221430_Gallery.jpg

    This one is probably my favourite of the four, simply because it's a bit different!

    Lettering for the Dia.31 is a generic Fox alphabet (FG1003) to allow me to write the various words needed. The G in GER is somewhat unique font wise, but I got round this using a C, tilted backwards to the end of the tail was horizontal, and then squared off by overlaying a 'full stop'. It's not perfect, but I do feel it works! Equally, the solebar G's on all four wagons are simply a C, because at 1mm, they pass for the GE font G. The rest of the lettering (I.e the large 'GE' on the post-1903 wagons) is by Powsides.

    Credit to @Herb Garden for the designing and giving me the opportunity to build these. I do also believe I've significantly increased the percentage of finished wagons this week!

    I think I may have to do a little photoshoot with a C53, some vans and these at some point!

    - James
     
    2024 - A Year Review (Part 1)
  • Liver & Fry

    Western Thunderer
    I didn't do one of these last year, but it became apparent to me during the Autumn that it might be nice to look back on something positive from this year, considering how much my modelling activity seems to have increased.

    In 2023 I completed 10 wagons (GE lowmac, GE gunpowder van, E.O.L open, GE meat van and 6 HR opens) but in 2024, 21 wagons have passed over the workbench; in that time I started learning to solder, built my first whitemetal kit, experimented with other mediums such as wooden bodied wagons and built what was essentially a scratch aid wagon. I also demonstrated at my first exhibition, which was a new but fun experience.

    It has, from a modelling perspective, been a good year for me; even with the time off due to my wrist being in cast and the subsequent focus on my PgCert coursework.

    So, from the top, this year's achievements include:

    A GNR 4 plank and a GNR 5 plank:

    20240313_201258.jpg20240313_201125.jpg

    A GCR open:

    20240810_202910.jpg

    A Midland Dia.299:

    20240308_210438.jpg

    A reworking of an Oxford Rail GE van:

    20240315_213731.jpg

    A Highland Railway Jones van:

    20240607_230223.jpg

    An L&Y Dia.1 open:

    20240420_113928.jpg

    A Highland Railway cattle wagon:

    20240516_212020.jpg

    A pair of Highland loco coal wagons:

    20240618_230230.jpg20240625_231138.jpg

    That takes me up until July. Due to file size, the second half will follow in their own post...

    - James
     
    2024 - A Year Review (Part 2)
  • Liver & Fry

    Western Thunderer
    Obviously there was a bit of a pause during the summer months, but upon my return to the workbench, the following wagons made it through:

    An M&GN ballast wagon:

    Screenshot_20241231_084246_Gallery.jpg

    A pair of M&GN open wagons:

    20240916_213611.jpg20240916_222947.jpg

    A GNR goods van:

    20240918_220359.jpg

    An LDEC 6 plank:

    20241104_221431.jpg

    A repaint of a Rapido Dia.O21 into GWR red:

    20241202_232447.jpg

    And M&GN brakevan:

    20241204_221506.jpg

    And finally four GER open wagons to diagrams 17, 31 and 48:

    20241229_225257.jpg20241229_225550.jpg20241230_215834.jpg20241229_224836.jpg

    And that's without considering 'Project Holme Hale' and the Middleton Towers 03!

    20241128_095411.jpg20241111_204609.jpg

    I appreciate these posts may seem a little self indulgent, and in some ways they are! But it's nice to be able to look back on everything I've achieved this year and feel a sense of pride in that work. It's been a tough year. Throwing myself into modelling, at times, almost acted like a form of therapy, so it's nice to have something positive to show for it!

    Thank you to everyone who has supported me this year, followed my thread and left me 'likes'. It means more to me than you could know!

    Happy New Year everyone - Here's to 2025!

    - James
     
    GER covered goods vans
  • Liver & Fry

    Western Thunderer
    First post of 2025!

    Upon completing the GE opens, I had some spare builders and tonnage plates on the etches, so I figured why not add some details to my previous GE projects? There aren't enough spares for all my vans, but I figured it would elevate a couple of them.

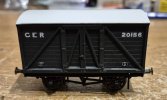
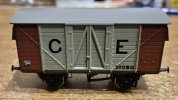
    My vans of choice were Dia.15 No.20156 and Dia.47 No.31050.

    20250105_191515.jpg

    No.20156 was chosen as a pre-1902 example, which looked somewhat naked without any detailing below the lettering on the upper planks.

    20250105_191716.jpg

    No.31050 has that very clear portrait in Tatlow and the van has always been one of my favourites of the Oxford reworks, so I figured it made sense to "complete" it as per the photo.

    20250105_191737.jpg

    It's a gentle start to this year's modelling efforts, but I've got a few plans in the works... Watch this space!
     
    GER covered goods vans
  • Liver & Fry

    Western Thunderer
    Whilst on the topic of vans, I've had a bit of a head scratcher this last week.

    Someone shared with me a Ken Werrett drawing of a ventilated GE dia.15 that was also fitted with vac brakes, and was drawn in the post-1912 livery with large V markings at each end (which fits, as the measurements were taken in 1917). An interesting prototype, by all accounts, except the running number was GE 20732 - The very same number I'd used on my ventilated Dia.15, albeit, my van was not fitted. I'd used that number as it is the one provided on the powsides transfer sheet, which, it seems, take influence from the Ken Werrett drawing, as the style of the V (split into two lines at the bottom) is identical to that as drawn.

    My concern, however, was that whilst I could update my model to feature vac brakes, previous discussions here and elsewhere have made me skeptical as to the accuracy of his drawings. Indeed, the livery for GE 20732 is given as cream sides and black ends... Close if you squint, but not correct.

    So I went down a rabbit hole of trying to find photos of ventilated Dia.15 vans (as @Herb Garden will verify through gritted teeth, I'm sure!). This led me to a photo found on Facebook, which is not credited, nor has any information to supplement it regarding location, date etc.

    FB_IMG_1736036031109.jpg

    It shows, what I make out to be GE 20791, interestingly with a dark solebar, instead of the usual French Grey. The problem with this? My unventilated Dia.15 had been numbered 20791 after I lifted that number from the Railway Heritage Register (allegedly that of an unventilated example to be found at the Mid Suffolk?).

    Long story short? I've renumbered both!
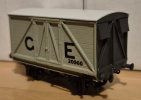
    20250106_222033.jpg20250106_222005.jpg

    GE 20960 is based on a survivor currently at Mangapps and GE 20393 is, I confess, me committing the cardinal sin of modelling a model, for that number is one of the ones used on a van in the model collection at the NRM!

    20241126_114748.jpg

    They're now going away before I find out anything else unexpected!

    - James
     
    GNR open wagons
  • Liver & Fry

    Western Thunderer
    Bet you didn't expect me to add to this threadmark, did you? Neither did I! Well, not entirely. With my GER focus of late, I nearly started 2025 by building a pair of GE brake vans. I've also got plans for some more L&Y wagons. However, my post-grad is due to restart soon and so I didn't want to start a project I'd have to put on pause, but I still have a few days to fill, so I went with something I know I can get done quickly.

    Enter another GNR Dia.1 4 plank, by Mousa Models:

    20250108_193925.jpg

    This one differs from the last in that it represents an earlier wagon by having both brake levers at one end. Something for variety, I figured. It's mostly because I wanted one with the earlier style of lettering.

    Anyway, the print was very neat from the outset and required very little clean up. I've then painted the body and underframe in their respective colours, as well as the base coat on the underside of the floor. This will get fitted when dry and then the inside of the wagon can be painted as one part.

    20250108_215720.jpg

    - James
     
    GNR open wagons
  • Liver & Fry

    Western Thunderer
    And there we are! The first wagon of 2025 is complete!

    20250112_211025.jpg

    When I built the previous GN opens, I was quite taken by the earlier style of lettering, once I'd learnt it existed. However, because I'd mentally committed to having that Dia.1 with the more recognisable post-1898 G N lettering, I put that thought on the backburner. Thankfully the transfer sheet provided by @Overseer allowed me to do it this time around (and the fact they were on there is pretty much the sole reason I decided to build another one).

    - James
     
    L&Y Dia.3 van
  • Liver & Fry

    Western Thunderer
    "And now for something completely different..."

    Back in April last year, I came across the kit for an L&Y Dia.3 van by Three Peaks Models (which subsequently led to me building the Dia.1 open). At the time I was put off by the obvious seam line around the ends of the van and so I never went through with ordering one.

    Then one day, whilst researching for a future project, I discovered something interesting:

    Much like the Hull and Barnsley refrigerator van of Hornby fame in the early 1970s, Triang produced an Insulfish van that was quite clearly based on an L&Y Dia.3. It got me thinking, can you breathe life into an old model by making it into what it was meant to be?

    One auction site visit later and I got this:

    20250113_211019.jpg

    Dimensions wise, from what I can tell, the body is the correct length, 2mm too wide and unclear on any height discrepancy. However, the side strapping looks correct and so will form a suitable basis.

    I split the wagon apart:

    20250113_212553.jpg

    Before giving the body a wash and removing the transfers:

    20250113_215314.jpg

    The roof and chassis will be replaced and some relevant components are on order. This is very much a trial and error project and I'm not wholly concerned about 100% accuracy of the finished item. It's simply a bit of fun, to see what I can make of a 60 year old wagon!

    - James
     
    L&Y Dia.3 van
  • Liver & Fry

    Western Thunderer
    I now have a rolling chassis on the Dia.3 van. This was courtesy of some pre-made w-irons I'd thrown together a month or two back as spares for when I fancied a quick build.

    The underside of the body was marked up for the correct 9ft wheelbase before being framed by some 1/8" square balsa strip to make up the underframe of the wagon. It's quite delicate stuff so I did have to perform surgery with some filler but fingers crossed it should turn out OK! The w-irons were then fixed in place:

    20250115_224222.jpg

    The finishing touch for tonight was to add the brake shoes:

    20250115_230107.jpg

    As far as I can tell, these vans were initially single sided for brake shoes, with a pair of brake levers both pointing to the same end (right, in the above instance). I am happy to be corrected before it's too late, mind you!

    Some L&Y buffers also arrived today, but I've run out of time to fit them tonight. The land of nod calls!

    - James
     
    L&Y Dia.3 van
  • Liver & Fry

    Western Thunderer
    Detailing has been the name of the game tonight! Axleboxes, springs, buffers, drawhooks and solebar ironwork have all found their place on the Dia.3 this evening, whilst the shade of the air has turned a shade of blue and my knees now ache from crawling round on the floor looking for said bits of ironwork I kept dropping...

    Still, I think it was an evening well spent:

    20250116_225327.jpg20250116_225215.jpg

    I still need to extend the framework on the end of the van and fit brake levers (and invisible clutches...) when they arrive. The roof will be another adventure entirely! But, it's all coming together nicely now...

    - James
     
    L&Y Dia.3 van
  • Liver & Fry

    Western Thunderer
    Live from the workbench! I'm finishing off the lower end detailing before I move on to the roof (although, that will come after I've added weight inside, which will need to set, so I may give a preliminary coat of paint and add weight today and do the roof at a later point...)

    Anyway, enough rambling! I've tried some wood offcuts and extended the end framework over the bufferbeams:

    20250119_122627.jpg

    This project (and modelling generally) will potentially slow down for a few weeks from tomorrow as I have another module starting on my post grad. I'll do bits where I can (I think I'll need to for my sanity!) but the updates may not be quite as regular.

    - James
     
    L&Y Dia.3 van
  • Liver & Fry

    Western Thunderer
    I've been toying with the roof hatch on the Dia.3 this evening. This will, eventually, be sheeting over, but some prep work is required:

    First of all, the battens around the edge were put in place. These were made from 1mm thick styrene rod.

    On prototype photos of L&Y vans with this feature, it would appear that under the tarpaulin (?) sheet there is a ribbed effect (presumably battens attached to the material to keep its shape) and these were replicated with thin brass rod (size unknown, lost to time, but smaller than the styrene).

    The roof has then been painted an off white:

    20250122_203507.jpg

    I'm currently working on an appropriate medium to replicate the sheet with. On the recommendation of @Herb Garden I am trialing a colour catcher sheet. If this works, then it will be fixed in place and the final detailing can be added.

    - James
     
    L&Y Dia.3 van
  • Liver & Fry

    Western Thunderer
    I'd argue the colour catcher sheet was a success, and so I took the liberty of fitting it, putting a thin layer of glue along the back and pinning the front under a plank glued across the top of the doors:

    20250123_202320.jpg
    20250123_202400.jpg

    I need to look up where the numbering goes on these vans - some sources I've seen suggest the ends, whilst others suggest the sides. Once I've confirmed, I'll apply the lettering, with the final task being some handrails.

    - James
     
    Top