Liver & Fry's workbench

HR Cattle Wagon

Liver & Fry

Western Thunderer
But, knowing how these things go, I'll probably find something else to do!

And thus it'll be no surprise to anyone that I found something else to do...

20240501_203532.jpg

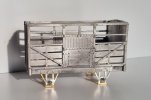
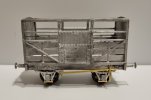
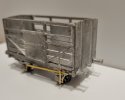
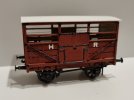
Recently acquired from a well known auction site is this Model Wagon Co. Highland Railway cattle wagon. This is a Drummond design introduced in 1899. The kit looks fairly straight forward but I'm going to take my time on this one, doing this amongst other (non-modelling) jobs.

- James
 
HR Cattle Wagon

Liver & Fry

Western Thunderer
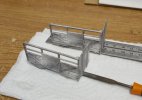
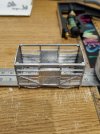
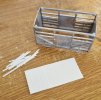
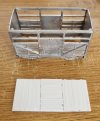
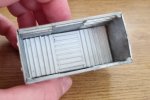
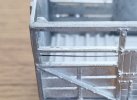
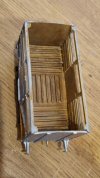
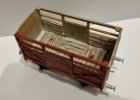
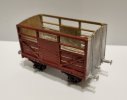
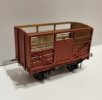
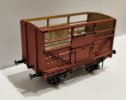
I've been dabbling at the cattle wagon last night and today, getting the body together using Araldite and then working on a floor section... Plank by plank... I'll probably never see it once the roof is on but I'll know it's there!

20240503_183756.jpg20240503_211915.jpg20240504_140459.jpg20240504_142221.jpg

These photos are of the test run to make sure I had enough strips, but you get the idea...

I'll likely continue Monday as it's meant to rain all day in true bank holiday fashion!

- James
 
HR Cattle Wagon

Liver & Fry

Western Thunderer
Late in the day but as promised, here is the fruit of todays labour:

20240506_224534.jpg

Essentially all that's left is to paint and fit the roof!

Aside from the w-irons, todays work included:

20240506_184528.jpg

Adding batons to the floor - losing a lot of the plank effect but ultimately being more prototypical to the wagon.

20240506_184416.jpg

Adding wire to the lower windows (Do we call then windows on cattle wagons? Seems the most appropriate term...)

20240506_224631.jpg

Drummond style buffers and drawhooks

20240506_224803.jpg

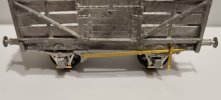
And finally springs, axleboxes and brake gear. I removed the original moulded springs as they were warped and somewhat less detailed than the ones I picked up at the York show.

I have an evening lecture tomorrow so no work on this for a day or so now but I'm really pleased of how this has come together!

- James
 
HR Cattle Wagon

Liver & Fry

Western Thunderer
Now, if I said "Pat" and "red van" you'd probably think I was getting nostalgic for children's TV shows about postmen, however, those words perfectly sum up this evening, for the paint came out for the cattle van!

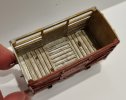
Yesterday I did the base colour for the wood and painted the ironwork below the solebars black. Today I finished the wood effect on the interior (see below) before essentially covering it up again with progressively lighter/whiter layers of grey to give a lime wash effect inside the van.

20240509_202123.jpg

Did I need to paint a full wood effect first? No. But I like to build things up as they would be in the real world. Even in 4mm it adds depth if some of the undertones show through; this is the same as me asking did I need to make a fully planked floor, or add the batons when this will mostly be hidden once the roof is on? Also no, but it's nice to know it's all there.

So, leading on from that, did I need to model cow pat? Also no, but I did it anyway! Tiny balls of liquid lead, glued in place and painted brown. Works a treat!

20240509_215508.jpg
20240509_215943.jpg

And, as you can tell, one side got a coat of red oxide as well...

20240509_215418.jpg

Once the wagon has been fully painted and lettered, the outside will get some lime wash staining as well.

- James
 
HR Cattle Wagon

Liver & Fry

Western Thunderer
Not much progress to report as I made the most of the weekend sun, but I have now painted the body in its main coat of red:

20240512_224735.jpg

Detailing such as black ironwork and buffers will follow, then I will varnish, letter and weather*

It's getting there...

- James

*Weathering insofar as external staining of lime wash, which even with my current "not weathering" mentality is something that can't be ignored with such a wagon...

(I can and have weathered stock before and I will get back to doing so one day but whilst these are confined to being display pieces for lack of a layout, I prefer to look at them in display condition)
 
HR Cattle Wagon

Liver & Fry

Western Thunderer
It has been a productive evening! Lettering and a roof have found their way onto the cattle wagon...

20240516_212020.jpg

These features alone seem to have completely transformed how the wagon looks, I think for the better!

And how appropriate it seems that it's (almost) complete just two days before I take a solo jaunt up to Inverness for a wee tour of the Highland lines (a little treat to myself as I see out my twenties next week...)

(I promise my goal is still to model the Lynn and Fakenham!)

- James
 

Liver & Fry

Western Thunderer
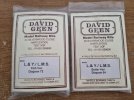
There was a kit for the L&Y 10T Butter van. A quick internet search throws up kit # M018 from the David Geen range.

So, something arrived in the post last week following success on a well known auction site...

20240526_195417.jpg

It would seem, therefore, that the multicoloured van idea is now in full swing!

I may do these next, but I did also place an order today for something else of a Highland theme. The only clue I'll give is that I'd have been baaa-rmy not to include a couple of these in my fleet...

- James
 
HR loco coal wagons New

Liver & Fry

Western Thunderer
So, as is pretty standard for how these things go, I've decided to build something completely different to that which I previously alluded. Mostly because the mystery items haven't arrived yet and the L&Y vans are a bit more involved, and right now I want something... Simple? Untaxing is probably the right word...

So here we have a pair of Highland Railway Loco Coal wagons:

20240529_212527.jpg

These are Sutherland Models kits featuring plastic bodies and white metal underframes. I'll clean up the parts for the bodies and build these before working out what's what in the underframe department.

I figured it's easier to batch build both kits at once as they're identical. I still maintain these shouldn't take too long, even with two to go at!

- James
 
HR loco coal wagons New

Liver & Fry

Western Thunderer
I can confirm, for those who have never had the pleasure, that these kits are a bit fiddly...

Namely getting the correct alignment for the solebars on the body. The thankful thing is that as these are white metal, any discrepancies can be flexed to shape with patience.

20240530_222335.jpg

So, here is where we are at; bodies together with solebars and floors fitted.

I imagine I'll be making up some brass w-irons tomorrow rather than using the white metal ones supplied, but I may find a way to incorporate the details of these (axleboxes etc).

- James
 
HR loco coal wagons New

Liver & Fry

Western Thunderer
Yesterday was a fruitful day insofar as I built and added the brass W-Irons to the wagons

20240601_233757.jpg

The kits, as designed, have whitemetal W-Irons but these do not allow for compensation so I've gone down the brass route, with the intention to overlay the whitemetal detail overtop.

This has proved a slow process, as the fine tuning of filing to get them to sit flush to the brass W-Irons is taking its time.

20240602_220131.jpg

On the left are the cut down versions for the compensation units, the middle is the version going on the fixed end and the right is what I've started with.

Rome wasn't built in a day! Better to take time and get it right...

Hopefully I'll have an update for you all tomorrow!

- James
 

Overseer

Western Thunderer
Yesterday was a fruitful day insofar as I built and added the brass W-Irons to the wagons

View attachment 216816

The kits, as designed, have whitemetal W-Irons but these do not allow for compensation so I've gone down the brass route, with the intention to overlay the whitemetal detail overtop.

This has proved a slow process, as the fine tuning of filing to get them to sit flush to the brass W-Irons is taking its time.

View attachment 216817

On the left are the cut down versions for the compensation units, the middle is the version going on the fixed end and the right is what I've started with.

Rome wasn't built in a day! Better to take time and get it right...

Hopefully I'll have an update for you all tomorrow!

- James
Better to file the whole remnant W iron off the back of the axlebox and spring so we can see the nice etched brass W irons. Actually, the axleboxes look ok but the springs less so. These wagons had 7 plate springs and the spring shoes are outside the W irons (so longer springs). It should be possible to find some off another kit or from another supplier that look more like the prototype. The wagon body looks good.
 

Liver & Fry

Western Thunderer
Better to file the whole remnant W iron off the back of the axlebox and spring so we can see the nice etched brass W irons. Actually, the axleboxes look ok but the springs less so. These wagons had 7 plate springs and the spring shoes are outside the W irons (so longer springs). It should be possible to find some off another kit or from another supplier that look more like the prototype. The wagon body looks good.

Good to know - Thank you!
 

Overseer

Western Thunderer
For anybody watching in colour and not familiar with Highland wagons the loco coal wagon is HR Diagram 33. Fifty were built by Hurst Nelson in 1903. 16 ton capacity, 18'4" long body on a 10' wheelbase. There are at least 3 portrait photographs of these wagons surviving, illustrating 1657, 2773 and 2783. 16 had reused random numbers between 1497 and 2190, the remainder were in a block from 2760 to 2793. A couple of the photos from the Highland Railway Society collection are available online at am baile (Am Baile - Highland History and Culture) one being this one -
HR d33 1657 28656.jpg
 
HR Dia.17 Sheep Vans New

Liver & Fry

Western Thunderer
So, whilst I wait for some springs to arrive in the post, I figured I'd share the other Highland wagons that arrived recently:

20240605_201634.jpg

A pair of Jones Dia.17 sheep vans! These iconic double-decked wagons are available from 'Scottish Wagon Works' and are a very fine quality of kit. They are 3D printed, but with my examples, there was little to no flash and all the pieces fit together nicely in a demo-run build. The quality of print on the side bars is particularly notable.

20240605_201801.jpg

Provided in the bags of bits are W-Irons, springs, axlebox covers, buffer casings and builder/number plates:

20240605_201904.jpg

I will use brass W-Irons, but the other detailing parts are a welcome addition!

I've ordered some larger 14mm coach wheels (8 open spoke) in anticipation, along with some more W-Iron etches. I also now wonder if I need to revisit my Jones 8T goods van as that may also require larger wheels (something I overlooked before now!).

I half wonder if I'll shelf the coal wagons for now and start on these instead as I'm feeling rather impatient and these look lovely!

- James
 

paul_309

New Member
Hi James

Glad you like the sheep vans.

The 8T Jones Type Q vans used 3'8" 8 spoke wheels, whereas the Type S Luggage vans used 3'8" Mansell wheels.

I'd recommend painting the body and floors first before assembly, it's a real PITA trying to paint all the bars once the floors are in. On the plus side you can see all the batons on the floor.

Adding sheep is an art form in itself.
Enjoy

Paul
 

Overseer

Western Thunderer
So, whilst I wait for some springs to arrive in the post, I figured I'd share the other Highland wagons that arrived recently:

View attachment 216997

A pair of Jones Dia.17 sheep vans! These iconic double-decked wagons are available from 'Scottish Wagon Works' and are a very fine quality of kit. They are 3D printed, but with my examples, there was little to no flash and all the pieces fit together nicely in a demo-run build. The quality of print on the side bars is particularly notable.

View attachment 216999

Provided in the bags of bits are W-Irons, springs, axlebox covers, buffer casings and builder/number plates:

View attachment 217000

I will use brass W-Irons, but the other detailing parts are a welcome addition!

I've ordered some larger 14mm coach wheels (8 open spoke) in anticipation, along with some more W-Iron etches. I also now wonder if I need to revisit my Jones 8T goods van as that may also require larger wheels (something I overlooked before now!).

I half wonder if I'll shelf the coal wagons for now and start on these instead as I'm feeling rather impatient and these look lovely!

- James
The Jones sheep van prints look impressive. Before you glue them together you might like to add the vertical rods across the middle of the wagon. These wagons had two compartments on each level - hence the four doors. This crop from a Kyle of Lochalsh photo shows a pair of them with the doors open so the vertical rods are visible.
HR Type XY sheep.jpg
 

paul_309

New Member
The Jones sheep van prints look impressive. Before you glue them together you might like to add the vertical rods across the middle of the wagon. These wagons had two compartments on each level - hence the four doors. This crop from a Kyle of Lochalsh photo shows a pair of them with the doors open so the vertical rods are visible.
View attachment 217002
Thanks for the info, I will see if I can make the bits to do it - assembly my be interesting tho'

Paul
 
Top