Liver & Fry's workbench

Liver & Fry

Western Thunderer
Hello
On my WB thread is a stop/start account of building a Diagram3D GNR brake in 4mm. I have to say that it’s been an interesting introduction to the world of lasercut kits. But based on my experience, I would heartily recommend them to you. In particular, they have benefitted from the excellent support of the designer; Tad had helped me no end in converting the kit from 00 to P4 (which it really wasn’t designed for). I haven’t threaded my posts yet, but you’ll see my required modifications to the printed solebars, which resulted in Tad printing several sets of new ones.
View attachment 222353
Tad sees the kit as an aid to building. So it’s light on the details; the kit comes without handrails or lamp brackets; I’ve made the former and used Extreme Etchings for the latter.

Drop him a line; like I say - he’s very helpful.

Cheers

Jan

I'll go give it a look, thank you!

I like the idea of the Diagram3D concept and I'm definitely going to try one of their GNR outside framed vans. I just wasn't sure how the card coach sides would turn out compared to Isinglass' 3D print. Good to know there's support available too!

- James
 
GER open wagons

Liver & Fry

Western Thunderer
Just a quick update for today:

The two GE opens I've been slowly planking have now been brought to the same point as the original was:

20240825_182212.jpg

I have one more body left to put together - Another 7 plank which is likely to become a Dia.17R for the sake of adding variety. However, after that I need to stop as I'll have nine unfinished wagons on the go!

- James
 
GNR outside framed van

Liver & Fry

Western Thunderer
In my last post I erroneously said I'd have nine unfinished wagons on the go - Turns out I'd forgotten how to count as three M&GN, four GER and an LDEC makes eight open wagons... So I figured I should probably rectify that!

Whilst diving into the world of GNR 6 wheelers and deciding whether to give Diagram3D a try, I noticed they also produce wagon kits. One that caught my eye (as I'd previously been eyeing up the Mousa kit before it disappeared) was a kit for a GNR outside framed covered van. The GNR has over 1500 of these on their books and many found their way on and off the M&GN, amongst other routes.

So as well as ordering a Dia.245 coach kit, I also ordered one of these, which arrived this morning:

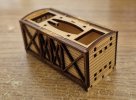
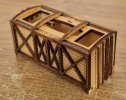
20240829_110543.jpg

20240829_145407.jpg

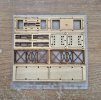
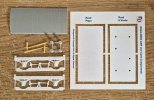
Included is an "etch" of wooden body parts along with some 3D printed components and what appears to be replacement card roof sections?

The 3D printed parts aren't the best quality, having a fibrous/"hairy" finish to them whilst lacking in detail (I'm not au fait with the different methods being 3D printing but I've not experienced this previously) and as such I'm planning to source detailing parts from elsewhere.

The focus of today therefore was on the body, which went together like a dream!

All the parts were easily removed from the etch and required minimal clean up.

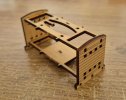
I started by attaching the ends to the floors and ceiling sections:

20240829_114713.jpg

Followed by the sides:

20240829_120319.jpg

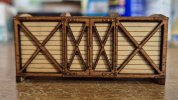
The outside framework:

20240829_141505.jpg

And finally, the end stanchions and roof membranes:

20240829_144154.jpg

Sufficient time was given between each stage to let the wood glue dry and in the instance of the outside frames I laid the body on it's side and weighed it down to keep everything together over lunch.

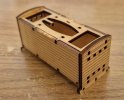
The result is quite pleasing!

20240829_144529.jpg

In some ways (me being awkward?) this is as far as the kit takes you, as I plan to fashion my own solebars using spare wood from the etch frames and then the underframe will consist of MJT w-irons plus break gear etc.

That said, for what is a fairly inexpensive kit, you get a sturdy and well detailed van body out of it, that also makes for a genuinely therapeutic and pleasant modelling experience (it sounds cliché but it was a nice relaxing way to spend a few hours) and so if anyone is in the market for a GNR van, I can highly recommend it!

- James
 
GNR outside framed van

Liver & Fry

Western Thunderer
Not knowing when to stop, I continued working and made up some solebars!

20240829_160447.jpg

The floor piece sits slightly lower than the inner side section (which is where the 3D part is meant to sit) so I used the outer frame of the floor etch to make the solebar as it has the notches in the correct place to straddle to lugs of the floor, as seen below:

20240829_172257.jpg

I've then fitted a thin plasticard floor to cover the holes and allow me to attach w-irons in the usual fashion.

However, in doing this I then considered how much space I had between the solebars and it would appear they're a tad too chunky to allow w-irons (particularly a compensation unit) to be fitted, so I've gently reemed the inner faces back to make the necessary space:

20240829_192747.jpg

Which thankfully doesn't detract from the external look:

20240829_172158.jpg

All in all, a successful day!

- James
 

Lyndhurstman

Western Thunderer
Nice work!
The GNR Brake Van also had hairiness; the 4 axleboxes, steps, and spring collection gave some challenges in tidying it up. I understand that choice of filament (and its age) makes a contribution to these things (it's stil a a dark art, for me...).
I note you got a printed roof; that speaks of an evolution. The brake had a card one, which I replaced using some of this LX479-OO Laser Engraved 9" Wooden Planking - OO/4mm/1:76

Cheers

Jan
 

Liver & Fry

Western Thunderer
Nice work!
The GNR Brake Van also had hairiness; the 4 axleboxes, steps, and spring collection gave some challenges in tidying it up. I understand that choice of filament (and its age) makes a contribution to these things (it's stil a a dark art, for me...).
I note you got a printed roof; that speaks of an evolution. The brake had a card one, which I replaced using some of this LX479-OO Laser Engraved 9" Wooden Planking - OO/4mm/1:76

Cheers

Jan

Thank you!

I did get a printed roof, however, the profile isn't the best when viewed from the ends, so I'm inclined to make my own - I'll give that planking a look, thank you!

- James
 
GNR carriage seating

Liver & Fry

Western Thunderer
This will seem somewhat random given it'll be a little while before I build any M&GN (ex-GNR) coaches, however, when I ordered the Dia.245 kit from Diagram3D, I also ordered two carriages worth of seating from Isinglass Models.

20240831_132456.jpg

These are 3D printed bench seats suitable for Howlden stock. They actually come as a double unit (with a plasticard partition) but as the Diagram3D kit has wood partitions as part of the kit, I cut these in half to make individual compartment seating.

Diagram3D advises that "GNR third class coaches had green rep upholstery". The preserved examples I've found on the internet appear to be have red, however, that may well be a preservation thing and who am I to argue with the instructions given?

Handily, I have a friend who completed a college certificate in chair upholstery, so I asked her what an appropriate shade of green for the late Victorian era might be and this is what we came up with:

20240901_190114.jpg

I have no idea if this is "correct" but I quite like them!

The coaches will follow eventually...

- James
 
GNR outside framed van

Liver & Fry

Western Thunderer
Having made up some w-irons, I've started on my wagon completion tour by working on finishing the last thing I started.

20240901_190611.jpg

Some springs, GNR axleboxes, buffers and drawhooks have all brought the wagon to life. I just need to figure out how to do the earlier style of GNR brake gear and then I can begin painting.

I've also filled the inside of the body with liquid gravity:

20240901_190740.jpg

- James
 
M&GN 3 plank opens

Liver & Fry

Western Thunderer
The M&GN wagons come with some 3D printed buffers that are rather chunky. However, I believe these are modelled off of the earlier L&F/E&MR buffer heads, as seen on preserved L&F brake van No.12 at the NNR:

20240523_114209.jpg

As the ballast wagon has been demoted to departmental use, I decided to use the buffers supplied for this, and the two still in revenue service will have metal buffers fitted. If nothing else it adds a bit of variety!

20240902_223959.jpg

- James
 
GNR outside framed van

Liver & Fry

Western Thunderer
Been twiddling my thumbs whilst waiting for some brake components to arrive. I'd expected them to arrive today but luck was not on my side so instead I turned my attention to the roof.

Previously I stated that the roof piece didn't have the correct profile from the ends, but to perhaps be more accurate, there was a notable air gap between the end of the van and the curve of the roof.

Further inspection showed that this was actually down to the van itself rather than the roof:

20240905_142343.jpg

As can be seen, the ends sit lower than the roof trusses.

OK then, I thought, maybe I will give it a go. But what of the roof itself?

20240904_172631.jpg

Well, as you can see, the print would require a clean up to remove the print lines which were deeply ingrained in some parts. I used an emery board for this, and a little patience, before giving it a coat of paint:

20240904_194607.jpg

Whilst that was drying, I turned my attention back to the ends of the van. If I could just plug the gap with something, maybe that would work? Well, thankfully I have lots of polystyrene strip from my various planking adventures, so I cut a short piece and a longer piece and placed them over the ends:

20240905_160056.jpg

Et violà! One test fit later:

20240905_195250.jpg

It's not perfect, but it'll be fine once painted and it's far better than seeing daylight through the end!

- James
 
GNR outside framed van

Liver & Fry

Western Thunderer
My brake components finally arrived! So it was only natural that I cracked straight on after I'd done my tasks for today:

20240906_182221.jpg

The shoes are a 51L Midland pair cut in half to give one shoe hanging and one that will sit above. GNR vans had one shoe each side, working on opposite corners, but with the levers both pointing to one end only. I chose the fixed axle as the lever end:

20240906_200423.jpg

And a view from each side:

20240906_200623.jpg20240906_200543.jpg

I've also used some of the detailing parts from the MJT w-iron frets to detail the solebars.

All that remains now is to paint it! Almost seems a shame to; there's something oddly satisfying about it's appearance in this as-built state!

- James
 
M&GN 3 plank opens

Liver & Fry

Western Thunderer
It wasn't just parts for the GNR van that arrived today either...

20240906_222401.jpg

These will feature a hybrid of MR style brake levers and NER shoes for a 8'6" wheelbase (the wheelbase is meant to be 9' but I found corresponding parts to be too tight a fit) - The NER parts I ordered, however, match prototype photos quite well!

This is as far as I'm going with this one tonight, but it's getting late and I feel I've done enough for one day!

- James
 
M&GN 3 plank opens

Liver & Fry

Western Thunderer
These wagons are like buses ("three come along at once..."), but it had to be said, once I'd fathomed out how to make the first one go together, the other two flew along like a dream!

20240908_180840.jpg

Now all that's left is painting the black and touching up some of the bodywork. I'm probably going to add some weight underneath too!

- James
 
M&GN 3 plank opens

Liver & Fry

Western Thunderer
Weight was added overnight but otherwise no progress as I have an exam tomorrow and an essay deadline looming. The joys of doing a post grad a decade after you went to uni!

Anyway, here they be...

20240909_201309.jpg

The eagle-eyed will notice that they have shoes on one side only when compared to my previous post (#237). I had my doubts when I did the first one and following a chat with @Herb Garden we concluded that one side only was the way to go. Removing the one I'd already done was an easy enough task, thankfully!

I hope to get the painting done before the weekend (it's handy having something to distract and unwind with after a whole day of critical analysis of the use of VFA in Bone Densitometry - This essay will be the death of me!).

- James
 
Top