Hunslet Works in 7mm

Andy Ross

Western Thunderer
After last weekends success at blasting and priming, it was time to start adding the colours. This will all be done with the airbrush and Army Painters paint. The roof section which will be done with rattle cans again from Army Painter.

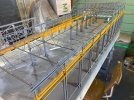
The first colour to be applied was the orange for the crane tracks.
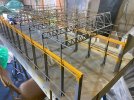

IMG_2859.jpeg.1f786d7d6fbdb7b76366f2d18800e707.jpg IMG_2860.jpeg.1abeb0cb2ee82aee112f16426bfc8f64.jpg

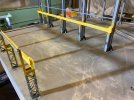
Once this was allowed to dry overnight, the crane tracks were masked up.
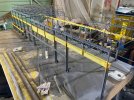
IMG_2861.jpeg.13843b2908e8304b78b44c264536ea9f.jpg IMG_2863.jpeg.bf36d2ced956c3fd6fa3a5064bdf81cf.jpg

I had thought that at this stage I could go straight onto the blue, but doing a final check of the photos I noticed the steal work around the door on the outside was green. So I did this next.
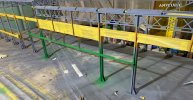
IMG_2865.jpeg.f60102d094ffe054fb3f6deb2f69cc29.jpg

Once this dried, the outside area was masked up.
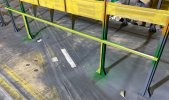
IMG_2869.jpeg.6a61c1e746483f9ba920ae6c7af36cab.jpg

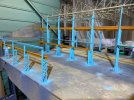
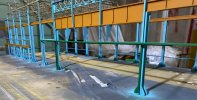
Then came the biggest job of all, spraying the blue on all the uprights. The removable section of roof helped but access under the North light section was tricky, and working out which face to do first and from ware was a challenge. This took well over four hours of continues spraying, by the time I was done I was more than ready for a break.
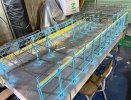
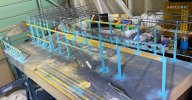
IMG_2871.jpeg.4f92b84bcc324fe721cfd2d64d663793.jpg IMG_2870.jpeg.14c9284a3ead2c144693301782c3041e.jpg

For masking up for the roof section I created a skirt with masking tape that has a polythene edging. This was attached on along the crane tracks on one side and close to the rafters on the other side.
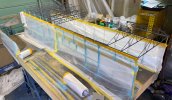
IMG_2872.jpeg.a00ad46c996d29732bce049d0c0f435a.jpg

The roof structure was painted with one of the Army Painters colour matched primers - they do have some strange names, this one is Skeleton Bone. It did take two tins due to mainly painting fresh air between the beams etc.

IMG_2875.jpeg.2faa0618050571a9c8e975bc701a8a31.jpg IMG_2874.jpeg.6934974634012c6d09833651718a72a7.jpg

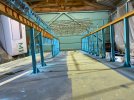
This morning, with a bit of trepidation, I de-masked everything except the thin strip still covering the crane tracks. I was obviousley hoping that none of the paint would come off with the masking tape. I must of got something right as all the masking tape came off with no issues.
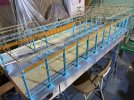
IMG_2877.jpeg.610d9e9c62212456d06a2ba91b06d19d.jpg IMG_2878.jpeg.31eb66a907f5dae73fa0b47f92cff795.jpg IMG_2880.jpeg.f7fc4cafb0361b5892e2b67547930669.jpg

IMG_2879.jpeg.4c3f11dfa2eebb45c5c85f1a3638ed02.jpg

I cannot express how pleased I am on how this has come out. The next job is to start toning it down with the airbrush which I hope to get done over the weekend.

Once all the structure is tones down I will paint the baseboard top black for now until the floors are done. I will then start fitting some of the wall sections etc for Guildex in September.


Andy
 

Purple-haze

Western Thunderer
Excellent work Andy. Having seen the photos of the real thing, IMHO, I don't think anyone could have done better!

regards Rog
 

Greengiant

Western Thunderer
This brought back memories of when I painted the gantry crane on The Yard. The tricky masking, getting access with the airbrush and air line, being careful not to snag any of the model. Having suitable lighting so you can see what you are doing! Remembering which direction you had done and the amount that gets sprayed into the air.
Then with the weathering, initially done with an airbrush, but the bulk then being done with MiG Oilbrushers. Lost count the number of times the paintbrush handle got caught up in the model. For some parts I cut short a paintbrush handle to give better access.
I did enjoy how the weathering brought it to life.
Keep up the good work Andy.

Martin
 

Andy Ross

Western Thunderer
This brought back memories of when I painted the gantry crane on The Yard. The tricky masking, getting access with the airbrush and air line, being careful not to snag any of the model. Having suitable lighting so you can see what you are doing! Remembering which direction you had done and the amount that gets sprayed into the air.
Then with the weathering, initially done with an airbrush, but the bulk then being done with MiG Oilbrushers. Lost count the number of times the paintbrush handle got caught up in the model. For some parts I cut short a paintbrush handle to give better access.
I did enjoy how the weathering brought it to life.
Keep up the good work Andy.

Martin
Martin

Thanks for the comments - This is the first real job with the airbrush, other than a few small bits on the bench, this was a first.

The toning down at the week end will be fun and the trick will be keeping it at the same level from one end to the other.

Andy
 

Andy Ross

Western Thunderer
Friday after work I started toning the paintwork down. As with the test piece ai did a few weeks ago this was done with an Army Painter wash called soft tone. These are for detailing figures but they work really well through the air brush.

IMG_2890.jpeg.8ce5d1562b280563ed983f8f08e2605a.jpeg IMG_2891.jpeg.d5cd0e967c8e0806e192d67fca147de3.jpeg

This was all going really well and took a fraction of the time I thought it would. Unfortunately, as I was doing the wheel shop crane columns I caught one of the far side columns with the airbrush hose, leaving a black mark. I tried to flatten this back and it made a right mess. So the only option was to repaint it blue again.

IMG_2892.jpeg.43e6b3eda027843288272f047bf001db.jpeg IMG_2895.jpeg.4e25ff301e3bf80ccabc37c09b1dae41.jpeg

With all the masking removed I cut a masking plate from some ply withe the laser and taped it on.

IMG_2896.jpeg.034c7620ae1e2149704c2c6ac6bc0a28.jpeg

This worked well with no overspray on the crane track beam.Once this was dried this was toned down to match the rest.

Saturday was spent with a brush, using a darker wash create dirt on top of the beams.

On Sunday I removed the masking tape from all the track and painted the baseboard top to cover up all the overspray.

IMG_2905.jpeg.81328016cb24f01baca5b7b7dd3f534d.jpeg IMG_2904.jpeg.ad396d9bba9569b336dd07dd99c591f1.jpeg

The photo from the 80's shows how close I have got the colour and level of dirt.

TWMetro4083F.jpg.b8318e884b96b7a96e1dfd96b000db7e.jpg IMG_2914.jpeg.67e85e1427403201acb506aeaac467da.jpeg

Now all the painting is done I will start putting the wiring back in place for the cranes and the lights using the tubes I fitted to the back of the columns.

As well as the painting, I have been cutting the parts for the new control panel.

IMG_2915.jpeg.fd129682294d9590134a03ec38a26d7c.jpeg IMG_2916.jpeg.8cfac4761bd873b99f603dc1a757c9b3.jpg

These have gone together well with just a couple of adjustments required.

IMG_2917.jpeg.6548c96905358c645c17fb206e64edf1.jpg IMG_2918.jpeg.ff839abca99be05143a791701e888b89.jpg

The master unit and one of the controllers was dropped in and all fit.

I will decide tomorrow if I am going to paint this, and if I do, what colour.


Andy
 

Andy Ross

Western Thunderer
Time for an update.

There has been progress in several areas since the last post.

One of the scenes I will be creating is the despatch of Jubilee Bahamas.

S18.jpeg.75568dd73dfbeded689b34b21f08e324.jpg

I had bought a David Andrews Kit and it was becoming more obvious that it would be a long time before I would have time to build it.

One of our club members, Alan Smith volunteered to build it for me and a couple of weeks ago he brought it to the club.

IMG_2924.jpeg.06da35d9c73d35b698e3aa9e6ec17391.jpg

Peter Kirmond has offered to paint it too.

The doors have been weathered last weekend.

IMG_2947.jpeg.b51ae04a1cc25562048d474697f2fddd.jpg
This weekend I put one of the packing case sides on so I could tip the layout on it side to refit them.
IMG_2977.jpeg.755d8dcbb19104d4d6baebe878096e3d.jpg IMG_2978.jpeg.a71f52d312d1869810abc2c9bcb6c92b.jpg

Once it was back the right way up I could test them properly. Part of the top track was bunged up with paint but one cleared they all work as they should.

IMG_2986.jpeg.b977f1706570d6b0dc90572cdbdd3656.jpg
I had been concerned that I would scratch them getting them back in, but I must have got the perfect order this time as they went straight in.

The original plan before started the painting was to get all the steelwork done and then just put all the walls etc back on as they are unpainted for Guildex and Swindon.

As things have gone so well with the painting process I looked at what else could be done. I did some test on the internal roof structure with Army Painter dark wood wash. This worked so well I did the boilershop roof panels. these have been glued to the removable section and look just the part. I also painted the roof end panel and streaked with a lighter wash.

IMG_2987.jpeg.81e5194506015cc88fae8052ee4dc9b6.jpg IMG_2991.jpeg.e9ecd5e9b15dc200dd4481fc480de279.jpg

IMG_2988.jpeg.05c67d9e050a583da1f222b90594acfd.jpg

IMG_2946.jpeg.85db949fe0081ae243ac1ca2172daabf.jpgI also cut some test panels to come up with how to paint the brickwork.

The internal wall is painted with white primer and then washed down.

I tried several options for the walls, and this is still a work in progress as the walls are of varying ages and type. But for the long wall on the far side of the shop I have finalised with a base of red primer, the long job of picking out bricks in different shades of grey and a dark flesh colour. Jill said I was mad as this looked like a building in Disney Land and to be fair she was not wrong. To do the 1 1/2 metre of wall took well over eight hours.

IMG_2981.jpeg.d87f4ca327d136408a1cc84b7fc33d62.jpg

But when you add a large amount of dark wash it then goes the other way and looks far too dark. I think I got carried away and it is a little bit darker than it should be, but it is at the back of the layout on the outside and I am sure it will be ok.

IMG_2983.jpeg.8551571924857d3b80dd8cb2a049e65c.jpg

This is then rubbed over with filler to bring out the mortar.

IMG_2990.jpeg.9b2df94f47bcec3e4e8dbb06634be57b.jpg

The wall was painted on both sides and the inside was white washed with a build up of dirt.IMG_2989.jpeg.fb3feb42d9b68f2108cc5b7626d5789c.jpg

The next priority is to test the cranes, the feeds need putting back and I need to make sure they still run up and down the shop.

I will then add the North Light roof sections back on. These will not be painted as I need to modify and recut some of the parts for these.

The wheel shop walls also need recutting and painting.


Andy
 
Last edited:

Andy Ross

Western Thunderer
This weekend I got round to testing the cranes now all the structure is painted.

I had masked up the crane rails but I had to weather down each side on top of the beam and some had got on the rail.

So I gave them a good clean and then put some fresh graphite on the rail head. I also cleaned the crane running wheels.


The good news is that it works.

I have also been recutting some walls and painting panels. Photos to come next time.

I have also been doing some experiments on how to do the sets in the yard that are on the siding. A lot of the yard is concrete but there are sets right down the siding.

D38.jpeg.3f29f397e6a24f8e61aa3544d07e00a7.jpg

I had thought about all the traditional methods such as scribing plaster, making a press tool for clay. It then came to me that I might be able to 3D print some panels.

IMG_3017.jpeg.c503c97f47e1a7fa3ec2d60e9b3eae6c.jpg

I am still tweaking the drawings but I have put some trial sections together on the layout and it looks quite convincing.

IMG_3021.jpeg.2c4204412f35098d0c258d67e2569a4f.jpg IMG_3018.jpeg.30c784750d0b4b280d59a16d75a8fdfc.jpg

With the cranes now working and still several weekends before Guildex everything seems to be coming together ok.

Next major job is to sort new control panel and get the majority of the wiring sorted so it's not just lashed together.

Andy
 
Top