You are using an out of date browser. It may not display this or other websites correctly.
You should upgrade or use an alternative browser.
You should upgrade or use an alternative browser.
mickoo
Western Thunderer
Always the way........... but this took me much longer than I thought it would.

Coming along nicely

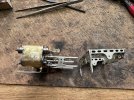
Pleased with today's progress. Clearances are very tight. One that surprised me was the second axle and the expansion link support. The inner girder is screwed onto the assembly so I was able to remove and get out my new toy - a Vallorbe 6" number 2 cut file - and move the inner girder out a little. I still had to thin the coupling rod boss.
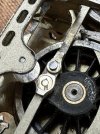
The instructions forewarn that clearances are an issue behind the crosshead, but this is not unusual. I had to thin the coupling rods and ensure that the threaded bush was well inside.
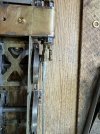
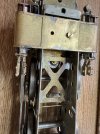
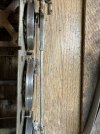
At every stage of the thinning process I took care to ensure that I still had a free rolling chassis.
I then added the drop arms to the crossheads and then secured the cylinder subassembly to the motion bracket. This locks the crossheads in place.
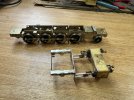
The assembly slides into the frames.
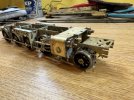
Then added the footplate.
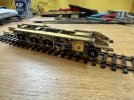
I am going to order some hex headed 12BA screws to fix the con rods to the crossheads. It's either that or use the countersunk screw with head to the rear and a nut on the outside. The jury is out. The crosshead is tapped 12BA on the inner face. There is no room for any protrusion on that side.
The kit provides long and short con rods with short and long union links to match. I am using the shorter rods.
I think I will return to the body. I hope this will give some light relief before I get on with the valve gear.

The instructions forewarn that clearances are an issue behind the crosshead, but this is not unusual. I had to thin the coupling rods and ensure that the threaded bush was well inside.


At every stage of the thinning process I took care to ensure that I still had a free rolling chassis.
I then added the drop arms to the crossheads and then secured the cylinder subassembly to the motion bracket. This locks the crossheads in place.

The assembly slides into the frames.

Then added the footplate.

I am going to order some hex headed 12BA screws to fix the con rods to the crossheads. It's either that or use the countersunk screw with head to the rear and a nut on the outside. The jury is out. The crosshead is tapped 12BA on the inner face. There is no room for any protrusion on that side.
The kit provides long and short con rods with short and long union links to match. I am using the shorter rods.
I think I will return to the body. I hope this will give some light relief before I get on with the valve gear.
Dave Holt
Western Thunderer
Progressing very nicely. I've had trouble in 4 mm models with the inside part of the valvegear support frame interfering with the rods and had to move it out as you describe. Similarly, the need for fully recessed crank pin retainers behind the crosshead and con rod. It's slightly reassuring to see these same issues in 7 mm.
Dave.
Dave.
spikey faz
Western Thunderer
Clearances are tighter still in Scale7 and yet I don't recall having much of an issue when I used the MOK supplied wheels for my Crosti 9f. I've not measured them, but to my my eyes they look narrower than the wheels I have on other models. Maybe narrower wheels are the way forward! 
Mike

Mike
Ian@StEnochs
Western Thunderer
Clearances are tighter still in Scale7 and yet I don't recall having much of an issue when I used the MOK supplied wheels for my Crosti 9f. I've not measured them, but to my my eyes they look narrower than the wheels I have on other models. Maybe narrower wheels are the way forward!
Mike
The last outside cylinder loco I built in S7, WD 2-8-0, didn't have clearance problems. The front section of the rods does come close to the wheel though and the front crankpin is flush with the rod.
Commercial wheele are fairly generic and not always entirely suitable for every prototype. As a general rule modellers are more interested in number of spokes than wheel dimensions. When I reprofile Slaters wheels I take quite a bit off both front, back and boss to bring them to scale width. I am not at home just now to check dimensions but I recall driving wheel tyres being 5.5" wide and the wheel boss around 8" but these dimensions do vary with prototype. A GA drawjng will usually give you the sizes.
Ian
Lancastrian
Western Thunderer
The frames have been in the paint shop and are now ready for installation of the pick-ups and refitting the wheels.
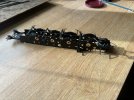
Cab, reverser assembly, cab floor and fall plates added.
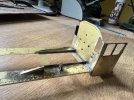
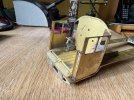
Firebox next.
Just got the nod that I need to fly back to Taiwan for a couple of weeks to deliver some training, so bench activities likely to be curtailed as I don't think it will be worth taking much with me. Having said that I may take some basic tools and a kit and cut out and clean up etches.

Cab, reverser assembly, cab floor and fall plates added.


Firebox next.
Just got the nod that I need to fly back to Taiwan for a couple of weeks to deliver some training, so bench activities likely to be curtailed as I don't think it will be worth taking much with me. Having said that I may take some basic tools and a kit and cut out and clean up etches.
Firebox next. Bob Alderman recommended forming a hole in the firebox front former and boiler rear former to allow weight to be added. I needed to cut in an opening for the speaker, stay alive and chip, so I got out the slitting wheel and formed a letterbox having got the formers lined up. There are still two of the 5 alignment holes remaining to ensure that the boiler/firebox alignment can be set.
The wrapper was then added and cleaned up. Bob had noticed the importance of getting the washout plug etches in place. They would be next to impossible to fit later in the build. There will be some additional tidying up to do, but probably best to wait until the boiler is soldered to the firebox. I was pleased that the wrapper went round the former with no issues and with only minor material to remove from the bottom.
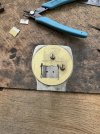
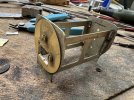
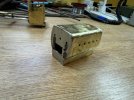
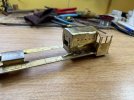
The wrapper was then added and cleaned up. Bob had noticed the importance of getting the washout plug etches in place. They would be next to impossible to fit later in the build. There will be some additional tidying up to do, but probably best to wait until the boiler is soldered to the firebox. I was pleased that the wrapper went round the former with no issues and with only minor material to remove from the bottom.


oldravendale
Western Thunderer
I miss Bob even now, Dave. He was so understated and willing to share his knowledge. It was a sad day when we lost him.Firebox next. Bob Alderman recommended forming a hole in the firebox front former and
Brian
He generously offered to provide a set of instructions for this kit to supplement the ones that peter Dobson wrote. Peter never got around to producing the drawings to go with the written word, which made the kit difficult to put together. Bob's good work resolved that.I miss Bob even now, Dave. He was so understated and willing to share his knowledge. It was a sad day when we lost him.
Brian
One of life's real gentlemen and much missed.
Today has been spent refitting the wheels, this time with motor. Very happy that all runs smoothly.
Also been working on the boiler and smokebox. Although the rear of the boiler fitted the former perfectly and was a good fit with the firebox, the front was too big a diameter for the former. The former for the smokebox was also the same size as the boiler front former (as it should be) and the smokebox when rolled was also a little large. So out with the files and reduce the sizes. Not by much. In the end we have this:
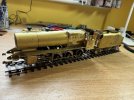
Smokebox, boiler and firebox not yet fixed, but showing how it will be. I will solder these and then revert to the motion. At least it is now looking like an 8F.
Also been working on the boiler and smokebox. Although the rear of the boiler fitted the former perfectly and was a good fit with the firebox, the front was too big a diameter for the former. The former for the smokebox was also the same size as the boiler front former (as it should be) and the smokebox when rolled was also a little large. So out with the files and reduce the sizes. Not by much. In the end we have this:

Smokebox, boiler and firebox not yet fixed, but showing how it will be. I will solder these and then revert to the motion. At least it is now looking like an 8F.
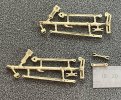
There will not be any progress on the 8F for a few weeks as I am out east for a short while. I lost mojo when doing the 8F valve gear. It is very fine and having twice soldered solid the forked joint at the ends of one of the union links, I managed to destroy the link when cleaning it up for the third time. I had hoped that a visit to the Gladiator scrap etch pile might be useful, but not. There are two lengths supplied: long ones for the short connecting rods and short ones for the long rods. If anyone does have a spare pair of long union link etches please let me know, otherwise I'll be scratching a replacement. I am now being charged over £100 for a sheet of nickel silver etches, so I'll not be ordering one just for that.
Otherwise the valve gear has gone together OK-ish. The -ish part is down to lack of clearance. There is b****r all clearance between the con rod and the expansion link. The con rod needs to be as close as possible to the coupling rod for everything to work.
As some light relief I have packed a Precursor tank kit and will have a go at that when I get time. I thought it would be useful to compare an out of the box build with the higher quality models that Nick and Mick are making.
dibateg
Western Thunderer
I couldn't find any spare etched ones -
I have some spare cast ones - 7.5mm centres and 12.5mm centres, a bit chunky but if they are any good.... you can have them..
try blackening the drop link with some Birchwood Casey - even with a marker pen if you havn't got that... ultimately saves a lot of swearing!
Regards
Tony
I have some spare cast ones - 7.5mm centres and 12.5mm centres, a bit chunky but if they are any good.... you can have them..
try blackening the drop link with some Birchwood Casey - even with a marker pen if you havn't got that... ultimately saves a lot of swearing!

Regards
Tony
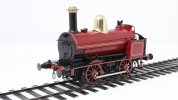
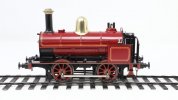
I'm out east for a couple of weeks and have left the 8F safe at home. To keep me busy I have brought with me a Gladiator Precursor tank. Following Nick's comments on his build I thought I should get on with this and see whether to discontinue it or upgrade.
The frames are a simple fold up affair:
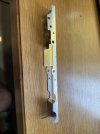
I had spoken with Mick about the possibility of using the etches that he designed for the kits that he and Nick are building, but we agreed that they are not commercial, so the jury is still out.
I am not over impressed with the bogie. To complicate matters my client wants the original 3'9" wheels fitted. This means that the bogie frame sits higher and the springs interfere with the frames. I have yet to decide the solution to this but will likely mean repositioning the springs a little lower on the bogie.
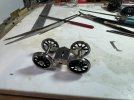
I haven't fitted any bushes yet: although included in the kit they are not mentioned in the instructions and the axle holes seem designed for use without bushes.
So I put these aside for a while while the thinking cap does its job and got on with the body. I don't like boilers with half etched relief for the bands but this seems not to bad. It was a pleasant surprise that all of the tabs and slots line up as they should. Here are the unsoldered bits piced together.
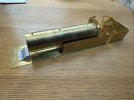
I forgot to pack the valances in this kit, so they will be a late addition.
A couple of hours with the soldering iron resulted in the following:
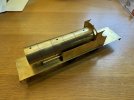
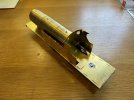
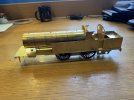
I forgot to pack my box of scrubbing implements, so solder clean up will be a late effort.
The frames are a simple fold up affair:

I had spoken with Mick about the possibility of using the etches that he designed for the kits that he and Nick are building, but we agreed that they are not commercial, so the jury is still out.
I am not over impressed with the bogie. To complicate matters my client wants the original 3'9" wheels fitted. This means that the bogie frame sits higher and the springs interfere with the frames. I have yet to decide the solution to this but will likely mean repositioning the springs a little lower on the bogie.

I haven't fitted any bushes yet: although included in the kit they are not mentioned in the instructions and the axle holes seem designed for use without bushes.
So I put these aside for a while while the thinking cap does its job and got on with the body. I don't like boilers with half etched relief for the bands but this seems not to bad. It was a pleasant surprise that all of the tabs and slots line up as they should. Here are the unsoldered bits piced together.

I forgot to pack the valances in this kit, so they will be a late addition.
A couple of hours with the soldering iron resulted in the following:


I forgot to pack my box of scrubbing implements, so solder clean up will be a late effort.
A business trip back to Taiwan has interrupted loco build progress, but I did bring with me 4 Gladiator LNWR 6 wheel coach kits to keep me busy. It was supposed to be a 2 week trip, but an additional trip to Japan has been inserted into the itinerary so it will end up as 4. I have been making progress with the coaches, intended to detail sides, ends and roofs prior to assembly back home. Here is the passenger brake, basking in the morning sunshine.


