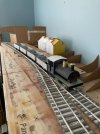
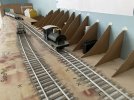
A small country halt somewhere west of Middlesex

michael mott

Western Thunderer
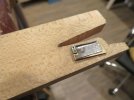
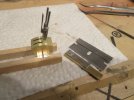
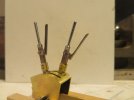
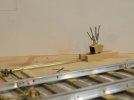
A few frustrations with making the guide pieces out of steel (a couple of broken .031" drill bits, managed to sharpen one of them) and then decided to use brass for the guides at the lower end of the levers. I used the folded steel of some straight safety blades for the actual handles.

IMG_5498x1024.jpg
IMG_5499x1024.jpg

The lifting rod is .020" diameter brass rod after bending a .030 loop in the end I then flattened it with a small hammer and tightened the loop up after. The small locking tabs were turned on the lathe then filed to create the "T" section with the .040" diameter section dropping into the slot. All that is left now is the curved raised sections to engage the tab in order to lock the levers at each end of the travel. My neck and eyes need a rest for now.
IMG_5504x1024.jpg
IMG_5509x1024.jpg

'Tis a fiddly bit of gear for sure. Tim Watson's 2mm scale valve gear has been the inspiration pushing me forward to get this done, nearly there.

Michael
 

Tom Insole

Western Thunderer
As always Michael some fine craftsmanship. It's one I really want to try squeezing with my own digits.
As I know logistically speaking that's quite a long way to come to try your levers I'll just have to say you'll have to record a video of it's operation once done.

Tom.
 

michael mott

Western Thunderer
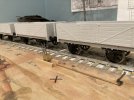
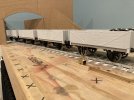
Taking a few minutes for a breather to let my eyes and brain rest and am working on assembling a few wagons that I acquired from Northern Finescale.
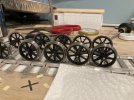
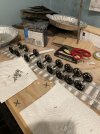
first task was to re profile all the wheels, trimmed them down to a better diameter then used a file to reshape the flange. and reset the back to back.
IMG_1120x1024.jpg
IMG_1121x1024.jpg

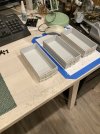
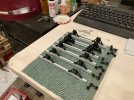
The moldings are clean.
IMG_1124x1024.jpg
I will replace the bushes with brass ones.

IMG_1123x1024.jpg
Also got some parts to build a brake van like this one

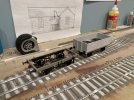
So now the observant of you will put 2 and 2 together and realize where the little (big) open wagon came from that I have been using to test my track.
IMG_1122x1024.jpg

Michael
PS my layabout Crew keeping eyes on me, L to R Charlie, Jasper, and Sasha
IMG_1119x1024.jpg
 
Last edited:

Tim Watson

Western Thunderer
I particularly liked the catch handle idea, Michael. I made a working catch handle on my Kirtley 0-4-4 BT, but my eyes were 43 years younger then. These days I find I make something, reckon it’s OK but then come back to it later and usually refine / redo it.
Tim
 
Last edited:

michael mott

Western Thunderer
These days I find I make something, reckon it’s OK but then come back to it later and usually refine / redo it.
Funny to should mention that Tim,
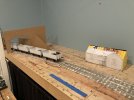
I have been having a good think about the landscape of the layout and how the story will unfold, to that end I am switching the side on which the ground frame is situated this will also give me the opportunity to refine a couple more of the track components

The halt will now be below the over bridge with a set of steps down to it. lots of opportunity for landscape and trees
IMG_1132x1024.jpg
IMG_1130x1024.jpg
IMG_1129x1024.jpg
IMG_1133x1024.jpg

Time to rest.

Michael
 

michael mott

Western Thunderer
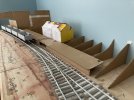
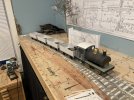
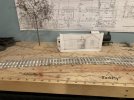
So as to not get bogged down in one state of mind I spent the morning reading through some of Steve Howe's work regarding landscape on his Sandsifters layout . I remembered that the old tried and true method of card forms and weaving strips works well and is inexpensive and easy to change. for a rest and to firm up my ideas about how and where things will fit took a hour this afternoon to play with the north end of the layout.
first the visual block in the form of the bridge.
IMG_1141x1024.jpg
Not sure if I want the bridge to be level or rising, stuck the drawing to a chopped up shreddies box to get a sense of volume for the halt building.
Still need to sort the size of the halt platform.
IMG_1142x1024.jpg


Michael
 

michael mott

Western Thunderer
Thank you Roger.
Having some fun playing with the lay of the land, I'm sure this will take a while before I am happy with the final design. I am thinking that the front will need some contouring upwards to create a bit of a cutting sense.
IMG_1145x1024.jpg

IMG_1147x1024.jpg
IMG_1144x1024.jpg

At 1/32nd scale there is much less room for wide open spaces so it is going to have to be cozy.

Michael
 

Tim Watson

Western Thunderer
That last photo reminds me a bit of a ‘Railway Modeller Shows You How’ booklet. Nothing wrong with old techniques tho’.

Tim
 

michael mott

Western Thunderer
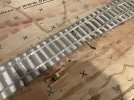
Now that I have some idea of where I want to go with the landscaping I will let it all sit while I finish the track. I want to do something different with the two points at the south end. Earlier I had asked Martin Wynne, about the white point levers that I used to watch the men using at the shunting yard in Acton when I was a kid. The levers would fall back to the same position no matter which way the points were set.
I searched the internet looking for a bit more information about this type of lever (how they operate ) and kept coming up blank, Probably because I was asking the wrong questions (algorithms cannot read minds ) eventually I sent Martin a PM with a picture (Alarmy) of one of these and questioned him expecting him to know the answer.
I was rewarded with a great response and a link to these levers and how they operate. my question for you is given the layout that I am building would it be appropriate to put two of these to operate the other end of the "loop" on my layout?
layoutx1024.jpg
The red circled area on the left is the locking point. The red circled area on the right is a bit of the yard to something (not sure yet) the yellow circle is an exit either tunnel or bridge (not sure yet) to possible cassettes. overall length is 15 feet 10 inches width is 24 inches

I don't want to make something that is obviously wrong. even though I understand rule number 1 and that this is all a work of fiction.

Thanks Michael
 
Top