7mm Mickoo's Commercial Workbench

Graham Bustin

Active Member
Your posts have a far greater impact than you may realise, so please do not think that they are not read.
I have learned so much, and continue to do so. I have also put work to one side thinking that I can never achieve your standard thinking why bother.
I do go back, often much wiser due to a nugget of information in one of your posts.
Thank you

Graham
 

mickoo

Western Thunderer
Your posts have a far greater impact than you may realise, so please do not think that they are not read.
I have learned so much, and continue to do so. I have also put work to one side thinking that I can never achieve your standard thinking why bother.
I do go back, often much wiser due to a nugget of information in one of your posts.
Thank you

Graham
Graham,

I have no hesitation that they're not read, it was just a lack of interaction that leaves you wandering a wilderness occasionally.

Regarding my standard, that's polite of you, but you should aim for what makes you happy, comparing models is never a good yard stick in my view, more important is the doing and enjoying it.

MD
 

mickoo

Western Thunderer
The fat lady is warming up back stage....

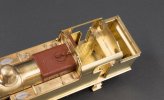
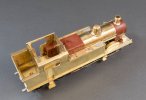
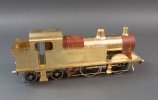
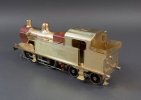
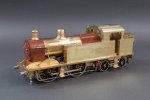
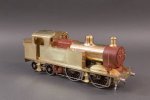
One or two small bits still to add, most are in the post (I hope) so won't take long to wrap up when they arrive....high and low level vac hoses plus steam pipe, 8BA die to lengthen the buffer stock thread to make them captive, sand traps and hoses, wash out plug clamps and back head fittings.

From the fabrication point there's only a handful of items left to complete so hopefully those'll get wrapped up tomorrow, mostly auto control gear gubbins. The only note of caution is the cab roof, it has notches cut front and rear for the vent pipes, there shouldn't be any at the rear, or not on any of the photos I've found to date.

The rear vent pipes are tucked up tight under the roof overhang to prevent coal and grit getting into the tank. You need to fill the little notches with some brass sheet the same thickness and dress smooth.

A gent on Facebook warned me of the cab rear error and advised drawings were in the LMS Journal Special preview, so I purchased said book from our very own WT shop owners emporium......thank you Simon for the rapid postage...it kept the project on schedule. From that I made a new cab (lower) rear and scratch built the handbrake and stand which isn't in the kit. The book drawings showed the inner tank extensions so they were 3D printed along with the reverser which still needs a handle fabricated. I also added the small valve handles on the rear of the tanks, 45° down is open, 45° up is closed.

The cab roof is a sliding fit under the gutters, they're probably a bit chunky but any thinner and I don't think they'll have the strength to hold the roof in place, a necessary compromise in my view,

IMG_11824.jpg

IMG_11826.jpg

IMG_11827.jpg

IMG_11828.jpg

IMG_11829.jpg

IMG_11830.jpg
 

spikey faz

Western Thunderer
Hi Mick

What are your plans for the motor/gearbox and will you have pickups on the bogie wheels? I'm looking at a Finney7 Drummond M7 as a possible future project (which has the same wheel configuration as your current project), so any tips would be very welcome. Your method of suspension/springing looks interesting.

Cheers
Mike
 

Tim Humphreys ex Mudhen

Western Thunderer
Mike,

If you're going to use DCC then I find that fitting a decent size 'stay alive' really helps with pick-up issues. The loco will run for 2 or 3 seconds with one and in that time power pick-up is resumed.

Tim
 

spikey faz

Western Thunderer
Mike,

If you're going to use DCC then I find that fitting a decent size 'stay alive' really helps with pick-up issues. The loco will run for 2 or 3 seconds with one and in that time power pick-up is resumed.

Tim
Currently old-school DC for me. :D But maybe I'll explore DCC in due course.

Mike
 

Ian@StEnochs

Western Thunderer
An impressive and interesting build thread Mick which I have followed closely.
I haven’t commented on your build as I had nothing constructive to add but your use of 3D parts is giving me a lot of thought. As a hobby builder do I really want to spend the time in front of a screen instead of at the bench?

I have drawn, and had printed, some tender springs to replace castings from my hand made master but that took an age. The learning curve for 3D drawing is steep and I taught 2D Cad at work! My mind is still not made up, but I am not losing any sleep over it.

Incidentally my first sheet metal kit build was one of these engines from a Jamieson kit in 00 gauge. Chosen because it was the cheapest kit in their range but pretty basic. I used Hamblings brass tyred wheels, still got their wheel press, and an X04 motor. The result was fine for a teenager but certainly not comparable to the model you have built.

Ian
 

paratom

Western Thunderer
Folks, this is why you spend weeks feeding the bin monster with test shots. The real McCoy, 23 + hour print perfectly straight with imperceptible surface defects or artifacts <smug mode ON>.

It did highlight two problems I've not encountered before, a tub big enough to wash it in and it barely fits in the curing cabinet.

The slight banding you can see is colour and not tactile, Fast Navy Grey (FNG) needs to be well stirred before use and starts to separate after about 6-8 hours. With long (time duration) prints the build plate is clear of the vat so you're relying on the actual printed part moving to agitate the resin, it's not very effective so you get a marbling in colour which varies from white to the main dark grey colour.

Tomorrow it'll get all the sacrificial surfaces cleaned up and a blow over in filler primer.

View attachment 178607
Nice looking print. Is there a reason why you did not print the item parallel to the build plate. There seems to be a lot of wastage in printing it this way. I think a lot of people get fixated by this rule that you have to print things at a 45 degree angle when in fact it's not always the case. Correction, I have just realised why you have done this. It's too long to go the other way but would you still have printed it this way had you been able to fit it flat on the build plate?
 
Last edited:

spikey faz

Western Thunderer
Although I use a computer (laptop) at work, I don't actually own a computer. Just a mobile phone and a Kindle. I've never used CAD. Is it too late for me to embrace the world of 3D printing? :) Where would I start?

Mike
 

mickoo

Western Thunderer
An impressive and interesting build thread Mick which I have followed closely.
I haven’t commented on your build as I had nothing constructive to add but your use of 3D parts is giving me a lot of thought. As a hobby builder do I really want to spend the time in front of a screen instead of at the bench?

I have drawn, and had printed, some tender springs to replace castings from my hand made master but that took an age. The learning curve for 3D drawing is steep and I taught 2D Cad at work! My mind is still not made up, but I am not losing any sleep over it.

Incidentally my first sheet metal kit build was one of these engines from a Jamieson kit in 00 gauge. Chosen because it was the cheapest kit in their range but pretty basic. I used Hamblings brass tyred wheels, still got their wheel press, and an X04 motor. The result was fine for a teenager but certainly not comparable to the model you have built.

Ian
Ian,

Very interesting perspective, there are some where bashing metal is no task for them and they quite enjoy it, I'm not quite one of them I have to say, yes I enjoy it.....whilst it's going well...but get cross quickly when it doesn't. To be fair the more you do the less mistakes you make and the less cross I become.

However if we take the smokebox module, that would have taken me at least a good days work to mark out, punch the rivets by hand (no etch indents to guide you) form, solder up and clean up. By virtue it took me just under an hour to draw, the machine took five hours to print and it took.....lets be generous here.....a further 15 minutes to clean up, cure and waft some paint on.

So my reprose is thus, do I really want to spend 8 hours at the bench when I can spend 30 mins there and an hour on the PC, then spend the 6½ hours saved doing something else more worthwhile ;)

Some know my hourly rate and the time saved is passed onto the customer and is roughly an evening out for two with drinks, especially when you add the firebox and cab tanks in to. Some may be reticent about 3D, none are backward when offering a discount like that for a simple change of medium.

If you're modeling for yourself and you're happier at the bench then crack on and keep doing it, if you're doing it commercially then time is your enemy and the customers too. For me it's a use of a medium (prints and CAD) I am overtly happy to use and the time saved for me is massive, it also allows far more detail to be added for a given budget.

I'm fortunate, possibly even gifted in that I can see 3D shapes with ease, I can transpose 3D to 2D and vice versa; but, what the lord giveth with one hand he taketh with the other and I'm not an overly good socialite :cool: I can tolerate groups of people for a few hours then I have to get away and shows on the stand take their toll heavily.
 

mickoo

Western Thunderer
Nice looking print. Is there a reason why you did not print the item parallel to the build plate. There seems to be a lot of wastage in printing it this way. I think a lot of people get fixated by this rule that you have to print things at a 45 degree angle when in fact it's not always the case. Correction, I have just realised why you have done this. It's too long to go the other way but would you still have printed it this way had you been able to fit it flat on the build plate?
Despite the printer being too small I still would have printed this at an angle, orientation is critical to surface smoothness, if you print flat on the plate then the layering (always present even at 20 microns) will occur on any curved surface, in this case the crown of the roof for the whole length. That'd be near impossible to post process and even so, would look like a post processed print which is not acceptable.

By angling you push the layering in this case toward the end of the print, what I call pushing the error, careful orientation will allow you to push the layering to an area that is smaller and easier to post process, in this case it's just up around the cowl headlight, if I added a roll component to the part I can then push that error into one corner of the cowl. However, adding a roll component will induce the risk of lateral warping and for the BLP roof we cannot have any warping at all.

Sometimes you have to accept the support waste, what is mildly annoying among the naysayers is they decry the support waste, yet throw masses of etch carrier sheet into the bin or brass casting feeds; in some cases the mass of the brass feed outweighs the parts ten fold, but not a word is breathed about that waste.

Despite the waste, angling and orientation is utterly critical for surface smoothness, there are very few shapes that perform well parallel to the build plate.
 

mickoo

Western Thunderer
Hi Mick

What are your plans for the motor/gearbox and will you have pickups on the bogie wheels? I'm looking at a Finney7 Drummond M7 as a possible future project (which has the same wheel configuration as your current project), so any tips would be very welcome. Your method of suspension/springing looks interesting.

Cheers
Mike
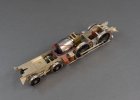
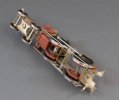
The motor combo was supplied in the box, it's an ABC unit, not sure of the ratio, probably 27 or 30 to 1 but it's not that critical, it looks like a VML gearbox which is not my preferred set up as the final gear is so stupidly large, the Mini is the same frame and ratios but much smaller final gear wheel, therefore easier to hide.

Pickups will be on the drivers only, my reasoning is that if it were an 0-4-0T that's all you'd have, and, as Tim has suggested, DCC stay alives are a god send for small engines like this.

Springing, well it's smoke and mirrors, there is none, initially it was there to give good pick up but with DCC and stay alives that aspect is virtually nullified, plus folks tend to take more care with their track work.

Having said that, there is some flex in the leading axle but it's not sprung, I simply opened out the top hat bearing slot downward by 0.5 mm, the rear axle is fixed where the gear box is. Testing shows the engine runs smoothly as have all previous ones that follow a similar approach.

Over the top hat bearings are cosmetic 3D prints, they just add a bit of eye candy but have no mechanical attributes at all.

Pick up's will be micro plungers, you can just see the small holes (ahead of each axle at the rim) ready to fit them after paint and I still need to add the small motor fixing plate to grip the tail end of the motor to the chassis.

IMG_1831.jpg

IMG_1833.jpg
 
Last edited:

spikey faz

Western Thunderer
The motor combo was supplied in the box, it's an ABC unit, not sure of the ratio, probably 27 or 30 to 1 but it's not that critical, it looks like a VML gearbox which is not my preferred set up as the final gear is so stupidly large, the Mini is the same frame and ratios but much smaller final gear wheel, therefore easier to hide.

Pickups will be on the drivers only, my reasoning is that if it were an 0-4-0T that's all you'd have, and, as Tim has suggested, DCC stay alives are a god send for small engines like this.

Springing, well it's smoke and mirrors, there is none, initially it was there to give good pick up but with DCC and stay alives that aspect is virtually nullified, plus folks tend to take more care with their track work.

Having said that, there is some flex in the leading axle but it's not sprung, I simply opened out the top hat bearing slot downward by 0.5 mm, the rear axle is fixed where the gear box is. Testing shows the engine runs smoothly as have all previous ones that follow a similar approach.

Over the top hat bearings are cosmetic 3D prints, they just add a bit of eye candy but have no mechanical attributes at all.

Pick up's will be micro plungers, you can just see the small holes (ahead of each axle at the rim) ready to fit them after paint and I still need to add the small motor fixing plate to grip the tail end of the motor to the chassis.

View attachment 180957

View attachment 180958
Thanks Mick. I shall definitely have a look at DCC. I don't really want to he left behind with some of this tech stuff! :eek:

Mike
 

mickoo

Western Thunderer
Hi Mick, which / whose pickup plungers are you using?
I've been ordering these but see they're out of stock, an alternative would be any 4 mm plunger pick up I suppose.


I'm sure they'll be available elsewhere, just never needed to check, I usually buy five or ten packs at a time.
 

Ian@StEnochs

Western Thunderer
Ian,

Very interesting perspective, there are some where bashing metal is no task for them and they quite enjoy it, I'm not quite one of them I have to say, yes I enjoy it.....whilst it's going well...but get cross quickly when it doesn't. To be fair the more you do the less mistakes you make and the less cross I become.

However if we take the smokebox module, that would have taken me at least a good days work to mark out, punch the rivets by hand (no etch indents to guide you) form, solder up and clean up. By virtue it took me just under an hour to draw, the machine took five hours to print and it took.....lets be generous here.....a further 15 minutes to clean up, cure and waft some paint on.

So my reprose is thus, do I really want to spend 8 hours at the bench when I can spend 30 mins there and an hour on the PC, then spend the 6½ hours saved doing something else more worthwhile ;)

Some know my hourly rate and the time saved is passed onto the customer and is roughly an evening out for two with drinks, especially when you add the firebox and cab tanks in to. Some may be reticent about 3D, none are backward when offering a discount like that for a simple change of medium.

If you're modeling for yourself and you're happier at the bench then crack on and keep doing it, if you're doing it commercially then time is your enemy and the customers too. For me it's a use of a medium (prints and CAD) I am overtly happy to use and the time saved for me is massive, it also allows far more detail to be added for a given budget.

I'm fortunate, possibly even gifted in that I can see 3D shapes with ease, I can transpose 3D to 2D and vice versa; but, what the lord giveth with one hand he taketh with the other and I'm not an overly good socialite :cool: I can tolerate groups of people for a few hours then I have to get away and shows on the stand take their toll heavily.

Mick,

Thanks for your comprehensive explanation which I fully understand. I used to do a bit of kit assembly and short run scratchbuilds. I incorporated quite a lot of home cast components where you are employing 3d prints. If I was working now I would probably be doing the same as you.

Commercial building is entirely different from building for fun. One always has to keep an eye on the clock, time is money and customers always want a bargain. Funny how they are happy to pay a plumber, joiner! electrician etc. sh##t loads of cash for even basic work but expect a locomotive built for little more than the price of a pint!

This afternoon I thought that I would see how long it took to make a smokebox. This one only took 41 minutes from marking out and assembly to giving it a polish on some emery cloth. Admittedly it is a simple one with no snap rivets, pre-group 0-6-0T, and no extended front but I did find time to drill the front handrail and door hinge holes! I know that one like yours on the 2P would take me a considerably longer.

From experience I know that the door will consume almost an hour and a chimney 2+ but if there is a good play or ancient comedy on the radio I won’t think about the time.

Ian.


45CDEDC3-C597-4B46-BE6C-E2292F8574A5.jpeg
 

mickoo

Western Thunderer
Mick,

Thanks for your comprehensive explanation which I fully understand. I used to do a bit of kit assembly and short run scratchbuilds. I incorporated quite a lot of home cast components where you are employing 3d prints. If I was working now I would probably be doing the same as you.

Commercial building is entirely different from building for fun. One always has to keep an eye on the clock, time is money and customers always want a bargain. Funny how they are happy to pay a plumber, joiner! electrician etc. sh##t loads of cash for even basic work but expect a locomotive built for little more than the price of a pint!

This afternoon I thought that I would see how long it took to make a smokebox. This one only took 41 minutes from marking out and assembly to giving it a polish on some emery cloth. Admittedly it is a simple one with no snap rivets, pre-group 0-6-0T, and no extended front but I did find time to drill the front handrail and door hinge holes! I know that one like yours on the 2P would take me a considerably longer.

From experience I know that the door will consume almost an hour and a chimney 2+ but if there is a good play or ancient comedy on the radio I won’t think about the time.

Ian.


View attachment 180974
Impressive, you have a skill set far greater than mine :bowdown: it'd take me considerably longer, but that may be because I turn to 3D much sooner than most?
 

adrian

Flying Squad
I bet all the recent talk on this thread about the 'like' button has actually increased it's use - in this thread - by some margin. There's irony for you... ;)
Perhaps on this thread but overall there's no discernible variation. It's all within the usual daily variation. With the smallish size of the forum it's a not unsurprising erratic variation. I don't monitor or get worried by the stats in anyway - as I said before it's the quality I appreciate rather than chasing numbers. That said the forum has settled quite nicely on about 80-100 posts per day and about 3 times that for the reactions. I'm sure I could do a more in depth data analysis, number of different posters per forum numbers etc etc but life is too short. Up to 100 posts a day is comfortable for me to catch up with everything that has been posted and there are always at least a couple of dozen posts of interest and ideas to pursue for which I feel rewarded with.
Screenshot 2023-02-21 at 23.03.44.png
 
Top