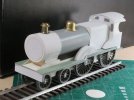
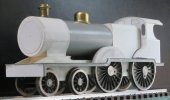
1/32 LMS 4-4-0 class 2P

Tim Watson

Western Thunderer
Fascinating stuff Michael. I recollect a builder, I think from Central Europe, making outstanding gauge 1 models from card. His SNCF 241P was amazing, but I can’t find a link anywhere.

Tim
 

Allen M

Western Thunderer
Another builder in card was the late Colin Binnie who produced a book of his efforts. This and other description s of his modelling are available on the web site looked after by his son Peter.

For the coaches see, (but I suggest the whole site is worth a visit)

May be of interest.
Regards
Allen
 

simond

Western Thunderer
Thanks Allen
I had many Binnie skips in my 16mm days, along with panel track and home brewed Rustons. Long time ago...

there are obvious similarities between Colin Binnie's method, and that propounded by David Jenkinson. Whilst plasticard doe not, Card-card does lend itself to lasers...
 

michael mott

Western Thunderer
Allen thank you for that link, I thoroughly enjoyed Colin's irreverent and humorous style of writing about the method of construction, I would think that our modern lasers and Silhouette type cutters will forge new standards for card work....oh if only I were independently wealthy. I found the choice of card that Colin prefers interesting also the use of shellac as a hardener. I can see the advantage of penetrating the whole structure.
The advantage of the file folders is they are larger than the 8 1/2 x 11 printable cardstock. The density of the various card types is also useful depending on the application. And as Colin mentions the use of card as a building material has been evolving for decades, and many more talented model builders than I have done remarkable work in this medium. I liked the way that Colin shaped his round corner punches a little more robust as easier to sharpen than the way I made mine to I will make some more to his style when I need more.

I think that given our current printing abilities and the ways we can cut out the card including registration holes in the sheets similar to those that were used for silkscreen or lithography we have an easier time rather than gluing the stack together and folding them.
Whilst plasticard doe not, Card-card does lend itself to lasers...
My friend who I was helping with his Corel program for his laser cutter is successfully cutting 6mm acrylic sheet for archbar type bogie frames and .020 styrene.
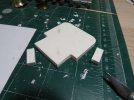
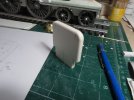
Using combinations of materials is in my view a boon to the model making community, and the current level of sophistication of 3D printing in combination with metal wood and card will produce some incredible work by those willing to combine them.

Michael
 

michael mott

Western Thunderer
Yes Tim I am using an equivalent type of Cyanoacrylate glue to harden. The fumes are as you say to be avoided. I also have some of the activation spray if I need it. The brand I am using has three viscosities ultra thin, medium and thick.
Michael
 

simond

Western Thunderer
My friend who I was helping with his Corel program for his laser cutter is successfully cutting 6mm acrylic sheet for archbar type bogie frames and .020 styrene.

acrylic cuts brilliantly with a CO2 laser. like a hot knife through butter, and with a similarly smooth cut-edge too. I believe the peak absorption spectrum more or less matches the frequency of CO2 laser “light”.

Plasticard is not great, scorches and melts, and can even close up the cut line after the beam has passed.

there are other materials such as Trotec which do laser well, Giles has had some notable success, I think Phil also uses it. I haven’t tried.

And avoid anything like PVC with chlorine in it.

organic materials from paper to card, hardboard, thin MDF & ply all cut well

atb
Simon
 

michael mott

Western Thunderer
Four layers of archival matt board first glued with the Express PVA diluted to milk consistency, then rough cut with the trusty #11 blade

IMG_5326x1024.jpg
Then the edges treated with CA and shaped with sanding sticks. after the intial shaping a second treatment of the curved edges then some fine sanding and it is smooth as glass.
IMG_5329x1024.jpgNext a 1/2 inch Forstner bit to cut the fire hole I strengthen the layers as the cutter went through each layer, by removing the piece from the mill/drill treated the next lower layer and so on till I cut all the way through The piece is like a bit of 3/16 Styrene sheet. even sounds like a bit of plastic when dropped onto the table.
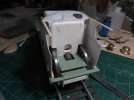
IMG_5331x1024.jpg Now to wait for the books to arrive to plot all the holes for the valves and piping. Then to finish boxing in the wheels.
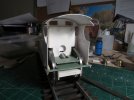
IMG_5335x1024.jpg


Michael

PS the month is up and I was able to drive again today. went to the store and picked up a new weight scale that I can actually read the numbers without a set of binoculars, because I have to keep track of that too now, and a new teapot.
 

Peter Insole

Western Thunderer
Spot on with that smokebox door Michael! I am so relieved that it worked, as I was beginning to panic after mentioning the spoon! I was afraid that you might ask for more information - and it was, after all, fifty years ago that I did mine as an experiment, so for the life of me could not remember quite how I actually managed it!

Pete.
 

michael mott

Western Thunderer
Michael
Was the glue still wet when you worked the smokebox door?

Jon
Jon The smallest section (top circle) 1 piece archival mat board, was shaped first and then treated along the edge with the CA clue and then sanded around the edge to form the small radius, the back side of the domed circle was also sanded to create a small flat so that it can be glued to the thinner middle circle 2 layers of printable card stock, that was also treated with the CA around the edge so that the tiny radius could be sanded.
The largest bottom circle archival mat board will be slipped into the barrel of the smokebox when the proper one is laminated with the correct rivet pattern. The next task is to make the hinges and bolt clamps, before it is all finally glued together.

Spot on with that smokebox door Michael! I am so relieved that it worked, as I was beginning to panic after mentioning the spoon! I was afraid that you might ask for more information - and it was, after all, fifty years ago that I did mine as an experiment, so for the life of me could not remember quite how I actually managed it!

Pete.
Pete thanks for the tip it worked beautifully the difficult part was finding the right cup to use as a mold, I did not want to turn one up as that would is some way be defeating the purpose. The way I proceeded was very slowly being gentle so not to crease the card.
Such a joy to see all this lovely handwork, it is going to look really good!
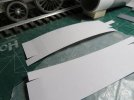
Simon thank you, it is an interesting challenge for sure, given our modern glues I think has moved the need for us as far as what can be acheived with this humble material. The backhead has proven to me what can be done with some very simple tools. Knife, ruler, files, sandpaper, and Glue. I am hoping the books from Wild Swan get here before Christmas but no matter I will enjoy them enyway.

Michael
 

michael mott

Western Thunderer
Finalized the smokebox section, the top layer with the rivet detail had to be pulled off and re-positioned which caused no end of anxiety!
Now I can drill the holes for the clamps and set the door section in place.

IMG_5348x1024.jpg
IMG_5360x1024.jpg
capture 5359.jpg

Everything is just resting on the footplate at the moment once the backhead and the cab are pulled down the gaps disapear, plus the beading need to be applied after the slashers and cab are finally located. Still contemplating what to make the connecting rods out of.

Michael
 

Peter Insole

Western Thunderer
I think people still don't quite believe my 5" loco coupling and connecting rods are made of plywood. The engine has taken a real pounding this year - and the motion is as sound as a bell, (hauling grown-ups as well as children!) with no visible wear or distortion.

My little Horwich ZM9 clocked up a few miles (on the old 32mm gauge garden line) with plasticard rods, so I'd be prepared to bet that the suitably treated card would do the job surprisingly well!

No wet lubricants can be used of course, but I have found that graphite from a soft pencil works perfectly in plain wood and (or) plastic bearings!

Pete.
 
Top