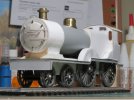
1/32 LMS 4-4-0 class 2P

Tom Insole

Western Thunderer
I am enjoying your "alternative medium" build so much Michael! It takes me right back to the innocent days (?) of modelling with scissors, cereal packets, Celotape and Page's gum - and all on Mum's kitchen table!

I try to retain the childish joy of discovering what is possible with improbable media, and the delight obtained when experiments eventually succeed!

Paper and card is such lovely, clean and friendly stuff to work with - isn't it...?!

Pete.
You know this means you'll have to photograph and show your little loco you made with a loo roll and I seem to remember sat on the mantle in your bedroom! I'm fairly sure that's where I remember seeing it. in 00 guage form?

Tom.
 

Tom Insole

Western Thunderer
Pete thanks for the tip it worked beautifully the difficult part was finding the right cup to use as a mold, I did not want to turn one up as that would is some way be defeating the purpose. The way I proceeded was very slowly being gentle so not to crease the card.
When you said turning I instantly thought you meant that the mug was still full of tea..
It was only then that it clicked you meant the lathe, Comically I read this before I started typing up a silly remark about how much milk you must have in your tea if your smoke box door is so pale still. I'm sure dad will relate to the referance when I say about a lighter shade of pale and family connections to that...

Tom.
 

michael mott

Western Thunderer
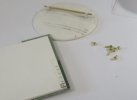
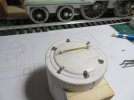
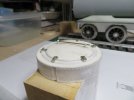
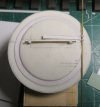
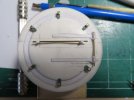
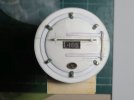
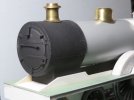
Working on the smokebox with fiddly bits of card is challenging to say the least also drilling cross holes in small diameter plastic rod.
IMG_5362x1024.jpg
capture5366.jpg
IMG_5368x1024.jpg
IMG_5370x1024.jpg
The clamps need to be reduced a bit in their overall size but a change in my medications are slowing me down a bit, but I'll get their eventually.

Michael
 

Dog Star

Western Thunderer
Working on the smokebox with fiddly bits of card is challenging to say the least also drilling cross holes in small diameter plastic rod.
Put the rod inside of a piece of plastic tube, file a flat on the outside of the tube, drill through the tube....

If necessary, use tube of different diameters to get to a comfortable point for drilling the cross hole.
 

michael mott

Western Thunderer
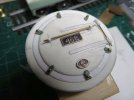
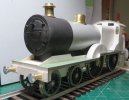
Glued up all the bits so far, not perfect alignment but will have to do, a bit of distortion from the camera angle. The hinges were pretty challenging, finally used a really fine pair of tweezers to roll the hinge ends.
Just the lamp bracket and number plate and shed plates to add

IMG_5380x1024.jpg

A -45c wind chill this morning, looking forward to this cold snap ending!

Michael
 

michael mott

Western Thunderer
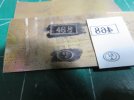
In thinking about the number for this loco I chose 648 because I was born on the 6th April 1948 and wondered what the shed code might be so looking for a P2 LMS loco Number 648 led me to here and here so the loco was first assigned to Scotland then Kittybrewster shed 61a

So This is rewarding.

Michael
 

Roger Pound

Western Thunderer
A very appropriate number for you, Michael. I believe that these locomotives were very popular on the old G&SW lines in Scotland in particular. Several 'blocks' of the original 6xx series were allocated to Scottish sheds for most of their lives. I enjoy the steady progress you are making with this splendid model and look forward to your continuing news.

Seasons greetings to you.
Roger.
 

michael mott

Western Thunderer
Thank you Roger for your observation and feedback on the location of this locomotive. Thanks also for your encouragement on my build. Today I am going to see if I can make a descent looking number plate and shed plate.
Michael
 

Roger Pound

Western Thunderer
I agree wholeheartedly with Jon. I would never have considered attempting to try your method - being one of the ten thumbs brigade, for letters and figures I am solely reliant on decals.........:rolleyes:! Well done, Michael.

Roger
 

michael mott

Western Thunderer
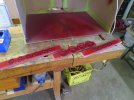
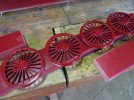
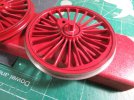
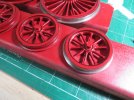
A lick of colour on the wheels auto motive rattle can "Dupli colour" "Tornado Red" over red oxide primer now the tricky bit doing the black on the rims
IMG_5413x1024.jpg
IMG_5414x1024.jpg
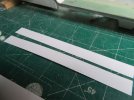
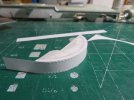
and some detail work on the splashers ordinary 20lb copy paper .003" thick with embossed rivet detail on 3 inch scale spacing.
IMG_5409x1024.jpg

IMG_5412x1024.jpg

Painting was done on New years day will let it harden up for a day or two before doing anything else with them.

Riveting done this morning.

Michael
 
Top