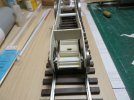
1/32 LMS 4-4-0 class 2P

michael mott

Western Thunderer
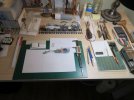
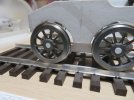
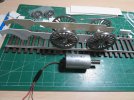
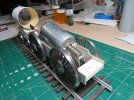
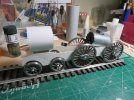
A couple of years ago I purchased a set of Mark woods wheels for the G1RMA "Dee" project for Live steam. Since then I changed my mind (who ever does that) and the wheels which are so nice needed a project. and also I decided that I would rather it be a P2. I know the wheel sizes are all a bit off but a bit of creative license, and the drawing that was published a while back in Railway modeller, and the wonderful article by Peter Dobson in the March 2005 issue was enough to get me started a while back. Now seems like a good time to move it forward a bit, and eventually have my hybrid P2 lope around the garden track.

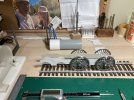
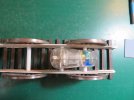
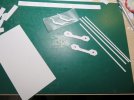
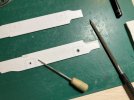
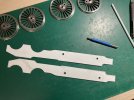
The frames were printed on card stock then stuck to some acid free matt board with some 3M double sided tape to give a total thickness of .064" the edges wer soaked in CA glue.
IMG_0936x1024.jpg
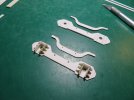
The holes for the 3/16 axles were first punched out with a small chisel then opeded up with a 3/16 punch then given the CA glue treatment befor opening up a tad with a large tapered broach.
IMG_0938x1024.jpg

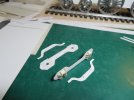
IMG_0940x1024.jpg

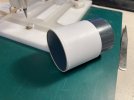
The frames will now get some spacers made from card and then the footplate I have a decent motor for it so will figure that out soon. Judy has been very patient getting me supplies from the model workshop to allow me to work in the office with the rudimentary materials and my little rivet punching tool. The rivet detail looks good in the cardstock, I was used to marking the area that i wanted punching with tick marks but found out recently that drawing the rivets on the back side of the sheet that will have the rivet detail made it much easier to get the rivets punched more accurately and easier to see them wile doing the punching.

IMG_0922x1024.jpg

IMG_0925x1024.jpg

This will keep me satisfied for a few weeks till I can move back to the workshop.

Michael
 

michael mott

Western Thunderer
Thanks for the encouragement It is greatly appreciated.
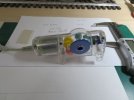
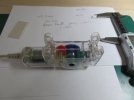
I have been looking at the different ways to power this little project and have decided to modify this.
Knex drive mechanism
IMG_5223x1024.jpg

IMG_5224x1024.jpg
I will cut off the inline drive as the cross drive is a nice tight fit for 1/4 inch axle, and it has a fair bit of power at 3 volts
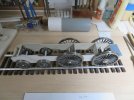
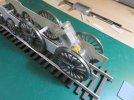
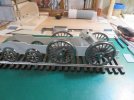
The frames are fairly stiff with the spacers in . although I need to do some remedial work to open some clearance above the lead bogie. The frames are close to scale width.

IMG_5222x1024.jpg
Judy and I keep having a good laugh over the next item that need to be brought in from the workshop to the new workbench in the office.

IMG_5225x1024.jpg

Time for a rest.

Michael
 

michael mott

Western Thunderer
After chopping up the Knex motor and locating it between the frames.

IMG_5230x1024.jpg

IMG_5228x1024.jpg

IMG_5229x1024.jpg

The steely eyed will notice that all the frame spacers have been removed, this was needed to re profile the area near the ront bogie in order to allow a bit more movement for the tight curves on the garden line, also the frame at the rear interfered with the motor mounting.

Michael
 

michael mott

Western Thunderer
Jon the axles are just styrene at the moment. But I will probably make the final axles from brass. The card frames are much tougher than I expected. When I started to cut the relief above the front bogie it was like cutting through 1/16th styrene, had I been out in the workshop I would have used the jeweler’s saw. I am enjoying seeing what I can do with the minimal tools and humble card.
Michael
 

Jon Nazareth

Western Thunderer
Michael
I'll watch your progress with card with much interest.
Interestingly enough, I was thinking about using brass for axles as they wouldn't rust. Once blackened, the brass wouldn't be at noticeable.

Jon
 

Roger Pound

Western Thunderer
Michael ,

I believe you are aware that I do not model in G 1/32 but notwithstanding, I am a real fan of the Johnson/Fowler 2P 4-4-0's. I look forward to seeing the end result and would add that I am indeed fascinated by your ingenuity and novel use of everyday materials. There is a lesson for us all here :)!

Roger
 

michael mott

Western Thunderer
Jon, Roger, thanks for your kind remarks. I finished a box of shreddies this morning so I am going to use it for the bogie frame. The drawing I have is not as informative as I would like, and the photographs on the web are not much more help. I was looking at the pictures on Nick Dunhill’s thread and I thought that it was helpful even though it was of a different loco. Any help with details would be graciously accepted.
 

michael mott

Western Thunderer
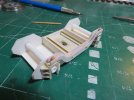
Changed my mind on using the shreddies box and instead printed up multiple copies of the sides then laminated them together with carpenter's glue thinned down a bit. then used some thin white card to build up the horn blocks.
IMG_5231x1024.jpg
IMG_5235x1024.jpg
IMG_5237x1024.jpg

The three layers give me .030" which is just under 1inch scale thickness.

Michael
 
Last edited:

michael mott

Western Thunderer
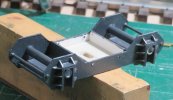
A bit more work on the Bogie The card block in the middle is approx 3/16 thick. I can now finish off the curved plates that sandwich the post on top of the wheel bearings.
IMG_5243x1024.jpg

IMG_5244x1024.jpg

IMG_5246x1024.jpg

The vertical piece between the frames is just resting there to hold the frames apart and will be replaced by the mating block to hold the pivot pin/post.

Michael
 

michael mott

Western Thunderer
A bit of progress and since this is card I decided to use a bit of 3/16 styrene tube fixed into the bogie and will use some 1/8th brass for the axle.
IMG_5247x1024.jpg
The spring part will get painted separately,
.

All the tallented painters can turn their heads for a moment.

A lick of brush paint Tamiya German Grey. lots to do to bring it up to some semblance of respectability so this is the trial by fire so to speak.

capture5248.jpg
I am pleased with the overall strength of the assembly.
Michael
 

michael mott

Western Thunderer
A bit of a change in the motive power for this loco, The Knex unit was just a bit too much of a whine and it was loud so have done another rummage through the bin of odd motors and the drawer of worms and have got a new set up that will work well with the Loco-remote I have a basic unit that works from 6 to 12 volts and if this works out as well as I hope it will I can always opt for the Loco-remote that includes the sound
this copyright drawing from Railway Modeller for illustrative purpose only shows the new motor location
new motor location.jpg
and the actual motor
IMG_5251x1024.jpg

IMG_5252x1024.jpg

Michael
 

adrian

Flying Squad
Thanks for posting, following with interest as a 2P is definitely on my scratchbuild bucket list as it fits in nicely with my general theme of Midland region around Gloucestershire.
 

Roger Pound

Western Thunderer
Excellent progress, MIchael. I do hope you will forgive a slightly 'off the wall' question. Not being au fait with the drawing to which you refer in your opening text I just wondered which pattern of tender you intend to have for this 2P ?

Roger ;)!
 

michael mott

Western Thunderer
Hi Roger, According to the text in the October 2022 railway modeller it is the standard Fowler 3500 gallon one. The drawings were originally published in the December 1984 railway modeller and depict the 2P in original condition with midland style capuchon chimney. The drawings were done by the late Ian Beattie.
Michael
 
Last edited:
Top