You are using an out of date browser. It may not display this or other websites correctly.
You should upgrade or use an alternative browser.
You should upgrade or use an alternative browser.
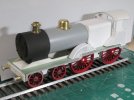
1/32 LMS 4-4-0 class 2P
- Thread starter michael mott
- Start date
Ian@StEnochs
Western Thunderer
In my part if the world they were known as the ‘Wee Black Yins’ when they arrived. This distinguished them from the Compounds but sometimes the 2Ps did the work of a compound! See ‘Tales of the G&SWR in LMS days’ by DL Smith for rhyme and reason.
Ian.
Ian.
michael mott
Western Thunderer
michael mott
Western Thunderer
Jon Nazareth
Western Thunderer
Michael, you are very inventive!!
Jon
Jon
michael mott
Western Thunderer
Yes I guess “his masters voice” does come to mind.
Michael
Michael
michael mott
Western Thunderer
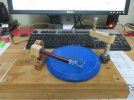
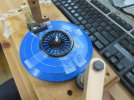
The test result is encouraging, The starting and stopping will need a bit of practice and the unit will need to be clamped to the table or work surface.
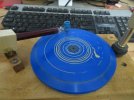
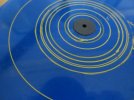
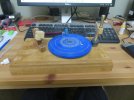
I used Model Color 70.916 sand yellow by Vallejo straight out of the bottle. and a couple of drops into the "Rotring" blue tip. with the needle removed, so just the tube part. I can try a different col;or tip next if I can remember where they are
Michael


I used Model Color 70.916 sand yellow by Vallejo straight out of the bottle. and a couple of drops into the "Rotring" blue tip. with the needle removed, so just the tube part. I can try a different col;or tip next if I can remember where they are
Michael
michael mott
Western Thunderer
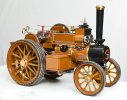
Beautiful work on the Traction engine mike, the guide pin idea looks like it worked very well.
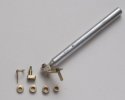
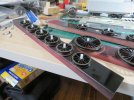
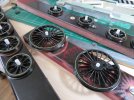
I switched from the Rotring type tip to a No 23 hypodermic needle ground short and held in a universal mount fixed to a bit of 3/8th brass.
Well not up to the professional standards but I am happy with the results.
Michael
I switched from the Rotring type tip to a No 23 hypodermic needle ground short and held in a universal mount fixed to a bit of 3/8th brass.
Well not up to the professional standards but I am happy with the results.


Michael
michael mott
Western Thunderer
Oh Dear!! the new books are such a goldmine of new information, I don,t know whether to have a haircut or whatever. I think that the driving wheels at 83.808 are the closest things to reality. Looks like a few bits will need to be redone.... at least I am not building a kit. I only have myself to be critical of. I will have to live with the slightly larger bogie wheels. looks like a new integrated cab roof and cab sides (that's easy)
Michael
Michael
WM183
Western Thunderer
Michael,
This is stunning work. The fact it's in card makes it even more impressive. Gorgeous modelling, on par with any scratchbuilds I have seen in brass or styrene. I might try this as a relatively inexpensive way to try building something new, or something with new (to me) components or challenges. If I can ask, what weight cardstock do you use? And what other types of paper or card would you recommend to a newcomer to this type of building?
Lastly - that rivet press is great! Did you make it, or buy it somewhere?
Stunned and impressed (and eager for more!)
Amanda
michael mott
Western Thunderer
Hi Amanda, thank you for your kind words. I am mostly using the letter size card stock that is available at stationary stores and off cuts of picture framing white Matt board. The riveting press was made from some scraps of plexiglass about 40 years ago with punches made on an as needed basis depending upon the size and scale that’s needed at the time.
I’m using diluted yellow carpenters glue to assemble multiple layers and fixing edges with cyano acrylate glue CA.
Michael
I’m using diluted yellow carpenters glue to assemble multiple layers and fixing edges with cyano acrylate glue CA.
Michael
michael mott
Western Thunderer
michael mott
Western Thunderer
Thank you for your continued support of my project. The horn guides have worked out well so far
I used the same wood for the axle boxes and reamed them 3/16”

I will stain them black rather than paint. then use graphite because they do slide nicely at the moment.
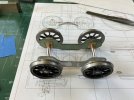
and the right side up. The card is a scale 1 1/8" thick the card is the hard shiny old file folder divider card with the large label print stuck to the outside surface for cutting out the shape.
So Far so good.
Michael
I used the same wood for the axle boxes and reamed them 3/16”

I will stain them black rather than paint. then use graphite because they do slide nicely at the moment.

and the right side up. The card is a scale 1 1/8" thick the card is the hard shiny old file folder divider card with the large label print stuck to the outside surface for cutting out the shape.
So Far so good.
Michael
Last edited:
michael mott
Western Thunderer
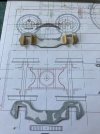
Next steps working on the equalizer beams for the springs
first after shaping then drilling the spring hanger holes
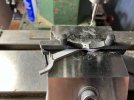 The blocks at the ends were glued in and a final trim of the ends on the shooting board with styrene pieces o hold it square.
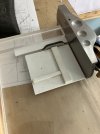
Some pins turned from 1/8th brass rod inserted, I compromised on the beams by leaving them both flat instead of stepping them down, which with the card would have been quite difficult. All the pictures of the front bogie that I have looked at it is hard to tell that the beams are stepped down toward the pins that ride on top of the axleboxes.
and side view
Next to make the hangers and springs.
Michael
first after shaping then drilling the spring hanger holes
 The blocks at the ends were glued in and a final trim of the ends on the shooting board with styrene pieces o hold it square.
Some pins turned from 1/8th brass rod inserted, I compromised on the beams by leaving them both flat instead of stepping them down, which with the card would have been quite difficult. All the pictures of the front bogie that I have looked at it is hard to tell that the beams are stepped down toward the pins that ride on top of the axleboxes.

and side view

Next to make the hangers and springs.
Michael
David Waite
Western Thunderer
Hi Michael
What a wonderful project this is, your workmanship is astonishing.
David.
What a wonderful project this is, your workmanship is astonishing.
David.
michael mott
Western Thunderer
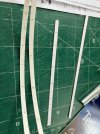
Thank you David. Having looked a bit harder at the picture of the loco and seeing that yes the stepping down of the equalizers can be seen I have a plan to emulate the widest part at least on the outside plate the one that can be seen. This first attempt at assembling the leaves of the springs confirmed that the method will work. to get the leaves at close to 5/8th thickness by printing on the label paper at sticking the sheet to one side of some manila folders with some blank label paper on the other.
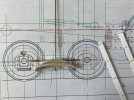
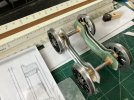
I used the guillotine to chop the long strips, but it is not as accurate to hold so the next ones I shall use the old method of ruler and craft knife. I am pleased with the principle though. The first pic shows the loose leaves
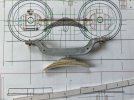
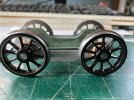
Second pic after gluing together with AC
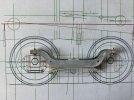
And a little sanding to get a slide fit between the equalizer plates.
Michael

I used the guillotine to chop the long strips, but it is not as accurate to hold so the next ones I shall use the old method of ruler and craft knife. I am pleased with the principle though. The first pic shows the loose leaves

Second pic after gluing together with AC

And a little sanding to get a slide fit between the equalizer plates.
Michael

