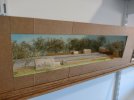
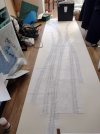
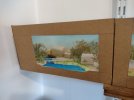
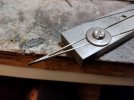
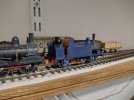
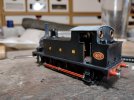
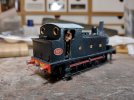
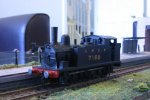
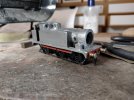
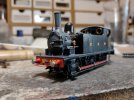
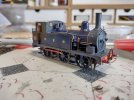
The Chronicles of Canary Sidings - Eastern Eccentricity in EM

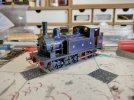
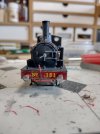
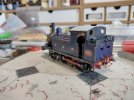
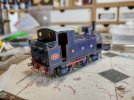
2023.01 - GER 73 class #74
  • Herb Garden

    Western Thunderer
    Hello,

    Greetings to you all....

    With encouragement from @AJC @Rob R and @john lewsey I've started this post to tell the stories of the various bits of rolling stock I build. Or try to.....

    This continues from a previous thread 'Greetings from Gosforth East' but for necessity of completeness I may end up repeating myself, apologies if I do.

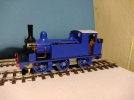
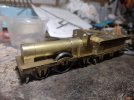
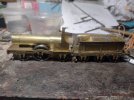
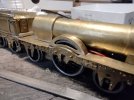
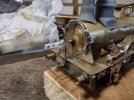
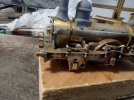
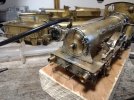
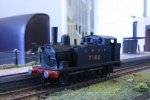
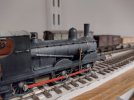
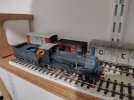
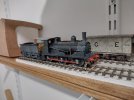
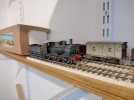
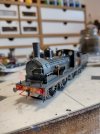
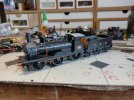
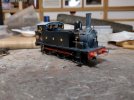
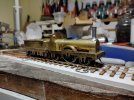
    The current major project at 'the sidings' is GER No 73 class. Which illustrates the type of thing I usually build... Victorian/Edwardian East Anglian stock....
    IMG_20221221_181502307.jpg

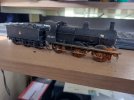
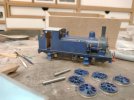
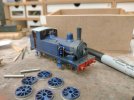
    The locomotive is entirely scratch built and has taken me since may to get to what I think is about 70% complete.... You can do the maths yourselves....

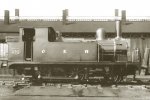
    As the class is an often ignored footnote in GER locomotive history allow me to give you a brief history of the real thing.

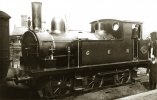
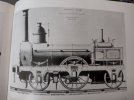
    In the 1840s the East Anglian Railway and Eastern Union Railway both purchased a number of similar 5'6" drived 2-2-2 locos from Sharp bros of Manchester... These 'sharpies' (not to be confused with the later GER no 1 class) were for the 1840s about as close as you could get to an off the shelf catalogue item for that time. And many railways including the Manchester and Sheffield and London and Birmingham had them to a total I have been told of approx 600 of these being built. The GER in 1862 absorbing 21of these... As built illustration....
    IMG_20221226_121047356_HDR.jpg

    By the late 1860s this fleet, which was a large class for the time (there were more of these on the GER than J65s!), Was getting long in the tooth and Robert Sinclair instigated a rebuilding program which was continued by Sam Johnson when he took over at Stratford. This rebuilding covered new boilers and cab weatherboards but didn't alter much more. However the last 8 locos were treated rather differently.

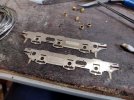
    The next 6 that were withdrawn were combined into 3 2-4-0 outside frame locos using the cylinders, motion sets and tender from one loco and the driving wheels from both. This became the no 109 class and more on these anon.... I've cut the main frames for a 109 but nothing else as yet

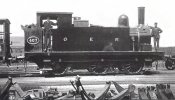
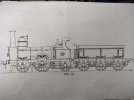
    The last two, which based on withdrawal dates were two of no's 110, 114, 115.. (we aren't sure which two but I can share more thoughts and research on this another time) were kept at 2-2-2s but we're rebuilt with brand new cabs and new boilers and even given new numbers and listed as new builds.... But we know that they were just a new boiler on an old chassis. No's 73 & 74 were outshopped in 1870.
    IMG_20221226_121142652.jpg

    Sadly for unknown reasons they didn't last long 73 going in 1877 and 74 going a couple of years later. I find this rather sad and an uncharacteristic of the GER whom in early days were veritable horders where old locos were concerned.

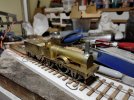
    To rectify this my model of 73 will bend the space time continuum and carry similar features and fittings to other GER locos rebuilt at the end of the 1870s. Stovepipe chimney. Unflared smoke box, a more modest done and sv arrangement, Westinghouse and possible it might even get the early ultramarine blue livery.... Who knows....
    IMG_20221221_181510857.jpg

    Sorry that's a lot of intro for a small engine .... I will promise to put some more photos up of how it went together... And some of the mistakes made....

    Herbie
     
    Last edited:
    2023.02 - Experiments with paint
  • Herb Garden

    Western Thunderer
    Adventures with a split chassis.....
    Well work has once again taken over.... The first week back lulls you into a false sense of security after the shutdown but then week 2.... It didn't help modelling progress this week particularly having to drive to Sheffield and back in a day for a customer meeting..... Long day......

    However some progress has been made at the sidings.....

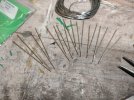
    Firstly springs.... I've started the uneviable job of making the leaf springs for the class 73 (12 in total )

    IMG_20230107_182146306.jpg

    Starting with lots of fine stripwork cut to ever decreasing lengths (all tinned first)

    IMG_20230107_183128196.jpg
    The longest leaf is then solderd into position on two wires in a very 'hightech' jig

    IMG_20230107_183528576_HDR.jpg

    Then the leafs sweated together..... one spring done 11 to go
    But then I got distracted......

    During the pandemic I turned 30 so as we couldn't all meet up my family clubbed together and bought me a locomotive kit....of a GER E22 class (J65 to those of you who only speak LNER).... Which I built later that year

    IMG_20230108_101249065.jpg

    It was a bit of a step up for me as it was the first time I had build a loco chassis that ran smoothly and the first time I had built anything with compensation..... I think the two are linked..... Anyways it ran for most of 2021 on my Skeetsmere mk2 layout until it was disassembled for painting..... And learning how to use an airbrush

    Then I decided to move to EM gauge and the E22 was shelved pending conversion.....

    So on Sunday I thought to escape from springs why not convert it to EM?

    The easy thing to would be of course just put longer axles in and some spacer washers in and be done with but no.....

    IMG_20230108_101217577.jpg

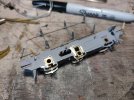
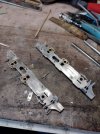
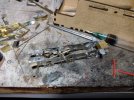
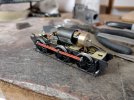
    What I decided would be a great idea would be to literally spilt the chassis into 2 pieces then solder in some new frame spacers..... I must have been mad....IMG_20230108_130321271.jpg

    Surprisingly when I put the pieces back it the jig it went together rather well... With a new front compensation beam

    IMG_20230108_212837144.jpg

    And now it is rolling perfectly and I've got the body to fit back on..... Chassis now needs the brake gear adjusted and painted before it rejoins the body.... And then somehow I need to tone down the garish blue.... It's the right shade but just too intense for a 4mm scale model....

    IMG_20230113_074440935.jpg

    So until next time.... Happy modelling!
     
    2023.03 - GER Y14 class #510
  • Herb Garden

    Western Thunderer
    Springs that go ping!

    Yep I've got distracted again and the poor 73 class is looking at me sorrowfully as if to say: "why are you bothering with that modern traction why am I not getting finished?"

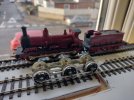
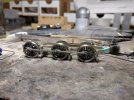
    Well there be a reason for that... Since starting up in EM I've always wanted to have a go with one of the brassmasters easichas kits for the Y14(J15). But never got round to it until recently when I acquired one being sold off to raise funds for one of our preserved railways.

    So when it arrived I had to drop everything and have a go.

    IMG_20230126_214852225.jpg

    IMG_20230126_213820375_HDR.jpg

    IMG_20230127_185626884.jpg

    IMG_20230128_110329339.jpgIMG_20230128_120924808_HDR.jpg
    IMG_20230131_071034734.jpg
    So that's with progress with the Y14 easichas so far. Brakes are in and it's rolling nice. I did at one point drop five out of the six springs on the dark green carpet. Much colourful language was created and they could probably hear me in Gateshead but with much crawling around with a magnet produced the required results and all the springs are back in place..... Not how to spend a weekend.....

    So on to the tender and getting it fitted to the Y14 body you have allready seen in previous posts...

    Happy modelling!
     
    2023.04 - GER 73 class #74 - Bodywork and Detailing
  • Herb Garden

    Western Thunderer
    Finding a happy place

    A change of tack was in order..... You may ask what has happened to the Y14 and I will share that in due course but suffice to say I've hit some major snags with it's running that require major surgery to put right. It also gave me a dam good kick in the confidence department....

    Recovering from a setback isn't always easy so after a few days I've gone back to the modelling activity that finds me at my most relaxed.... Making things out of brass

    IMG_20230316_065003265.jpg

    Yep #73 is back! Since I started the detour playing with paint and modern traction (if you call a 1899 Y14 and 1889 E22 modern traction) the old lady of canary sidings the rebuilt 1846 Sharpie has sat in a box but it's now back out and I'm really happy to have it back on the workbench.... I've missed it if you can believe that

    IMG_20230316_065008944.jpg

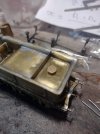
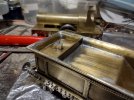
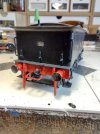
    Detailing work continues on the tender.... One of the things I've realised is that there is no way to put water in the tender so I've made a water filler cap.

    IMG_20230316_070834708.jpg
    Its a 1/8th" axel bearing with some scrap soldered on top.

    IMG_20230316_211947739_HDR.jpg
    And satisfactorily here it is all finished with a dinky little handle for the fireman to lift off. A very pleasant evening spent making that....

    More detailing adventures to follow

    Until next time

    Happy Modelling!

    Herbie
     
    2023.05 - M&GN rebuilt D class #71
  • Herb Garden

    Western Thunderer
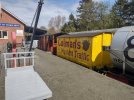
    The longer I leave it the harder it is to get back modelling I find.... Anyways after weeks of diy and chasing steam trains in God's County (Norfolk).....

    IMG_20230425_131054026_HDR.jpg

    So yes it's time to get back to the work bench.... Here follows a cautionary tale about certain auction sites.....

    I'm one of those people who goes bargain hunting and I thought I had a great one which needed a little bit of rust removed.... What a fool I was

    IMG_20230502_174509249_HDR.jpg

    IMG_20230502_180437502.jpg

    Yeah oh yeah that's bad!

    IMG_20230502_203217926_HDR.jpg

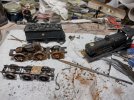
    The great thing is after much effort I was able to strip it down and save all the component pieces apart from motor gearbox and driving wheels. So with wheels on order etc it will get rebuilt and painted brown with some modifications...

    IMG_20230504_220814609.jpg
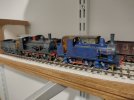
    Just like the M&GN D class on the right

    But learn from my stupidity.... Be careful on auction sites
     
    2023.06 - GER 73 class #74 - Further Detailing
  • Herb Garden

    Western Thunderer
    So now that rustbucket is safe from further corrosion I can finally return to #73

    This project has almost been a constant for the last year but I feel it's about time it got finished....

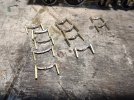
    So we come back to springs. I've allready shown previously that I've made all the leaf springs but when I came to trial fit them I found the ones for the driving wheel should be narrower than the rest so I've had to modify 2. I've also added the collar around the leafs so. They are ready to go on the loco

    IMG_20230508_181413953.jpg

    From left to right.... Tender springs... Loco fore and aft springs and finally the driving wheel springs.

    Next job has to be trial fitting. The loco springs should have hangers that go either side of the frames... In trying this I found that the spring clashed with the splasher and that needed reducing
    IMG_20230508_184711919.jpg
    So that's been further setback the spring now fits but the hangers need shortening and I need to make the missing bit of footplate before everything can be soldered in place

    IMG_20230508_184826937.jpg
     
    2023.07 - GER 73 class #74 - Painting
  • Herb Garden

    Western Thunderer
    I'm provarocating now...

    What I should be doing is getting on with cleaning the loco of grease and grime ready for glueing the boiler fittings on and painting.... But seemingly I don't want the soldering to end...

    Thinking about lighting has made me consider headcodes. With conventional modern locos one could consider these at the very end but not early locos.

    Unlike modern engines that had 3 lamp irons along the footplate and one on the smokebox. The GER in the 1870s used lamp hangers. With one at the tope of the smokebox and two either side of the smokebox

    IMG_20230823_071248707_HDR.jpg

    IMG_20230823_071258959_HDR.jpg

    Them I re read some articles about the lamp hanging equipment and realised the buffer beam hanger only came into use in 1880 and until then the lamp had been hung off the coupling hook.

    Also I had equipped 74 with the left hand lamp hanger on the smokebox which didn't come into use until 1875.... So it was out with the soldering iron again!

    IMG_20230824_070854973.jpg

    Problem solved but the lesson of the day is: do your research first!

    But now it really is time to put this loco in a cleaning bath!
     
    2023.08 - Skeetsmere
  • Herb Garden

    Western Thunderer
    So back at workshop wise 2 weeks ago I did a layout design demo.... I suppose I have designed loads of layouts over the years.... Just not built many....

    Anyhow to do this demo I refreshed a concept that has haunted me since my modelling returned to east Anglia best part of a decade ago. That of the fictional terminus of Skeetsmere & Rushall on the Mid Suffolk Light Railway. I've built 2 layouts that never got finished (they worked though) to this concept allready and designed a few more in between.... So this is probs Mk6?

    IMG_20231026_210515261_HDR~2.jpg
    So this is what I came up with on the day.... The same concept but based around a different alcove in my new office.

    Then in the pub after the event someone suggested I should build the layout by next year's show..... And because I was in the pub by that stage I thought it was a good idea....

    So in between practices with the lining pen I've been getting on with it

    IMG_20231105_144922017.jpg
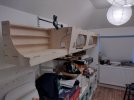
    From a paper plan a 3d mock up has been made to a quarter of the final scale. It's in 2 scenes to split to fit nicely in the car.

    IMG_20231105_144941218.jpg

    IMG_20231105_144944948.jpg
    The first scene being a river crossing with water mill and the rear of the loco shed

    IMG_20231105_144928155.jpg
    IMG_20231105_144948917.jpg
    The second being a station with a village at the end.

    I think the mockup has sold the design to me so I'm cracking ahead....

    IMG_20231105_144757460.jpg
    The track plan is now templotted.... Is that an irregular verb?

    I templot
    You scream at computer
    He/she/they go back to peco 00 code 75
     

    Attachments

    • IMG_20231105_144941218.jpg
      IMG_20231105_144941218.jpg
      119.5 KB · Views: 3
    2023.09 - GER 73 class #74 - Lining
  • Herb Garden

    Western Thunderer
    So back on the work bench lining practice carries on with a bit of a step forward

    IMG_20231109_214252218.jpg
    I dug this G5 out of the rescue collection to play around with and although it's a bit messy in places and I never will be able to hit museum standard unlike some of the professionals out there I'm getting to feel confident in the use of the pen....
     
    2023.11 - GER B26 class #407
  • Herb Garden

    Western Thunderer
    Seasons greetings everyone!
    (Just in case anyone is still reading this)

    So there has been some progress on Skeetsmere been made but much of is planning positioning of servo motor and wiring routing so not very exciting stuff. More to follow in due course.

    Instead let me tell you about the other project I've restarted over the festive season.

    CRW_2678_RJ.JPG
    Back in 2011 when I was still a student I purchased my first GER loco; This little buckjumper built from a wills finecast kit. (This was before Hornby brought out it's J15).

    Well it ended up running around on a rather terrible layout a few of us students had built where it was highly inappropriate but hey I loved it even if it did run like a bag of spanners

    Moving into more finescale modelling I looked about comming up with a use for it. And hit upon this.


    r24_407_1890.jpg
    This little beauty is B26 a sub-class of the GER R24 breed (J67/2 for those of you who speak LNER) basically a shunting version of the more famous passenger fitted buckjumper. The key differences being the flat tank profile, 15 spoke unbalanced wheels and lever reverse.

    IMG_20231227_192952681.jpg
    After years in store. I built a new chassis for her soon after I joined local EM area group and thanks to the advice of my friends there it runs like a dream. But something was clashing with the body shell and the pair weren't running together so instead of being sensible and solving the issue the loco went back in the box and I got distracted with other things.... Very typical me I'm afraid....

    IMG_20231227_193006932.jpg
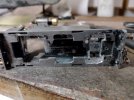
    However, after a year or so in the box I have dug her out again and started work. The problem was that the footplate was clashing in some places with the wheel flanges causing a short.

    Now for years I've shied away from using my Dremel but this holiday I've mastered it and been able to use here to gently mill away some material to clear the wheel flanges.

    IMG_20231227_192922576.jpg
    And hey presto it fits!

    So in-between work on skeetsmere #407 might get finished.... Well we can hope.... But it will be a useful loco to work the goods services on skeetsmere until I can get round to building a MSLR tank loco or two.
     
    2024.01 - Hunslet 35T 252bhp DH BSC#38 'Barton'
  • Herb Garden

    Western Thunderer
    And now for something completely different a quick project whilst #407 goes through the paint shop.

    In 2010 at the Newcastle show I made two significant decisions.... Never to model you n 009 again (a story for another day) and with encouragement from Mike Edge to have a go at etch kit building.

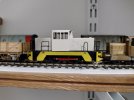
    The result was this little Hunslet diesel.

    IMG_20240131_074702350.jpg

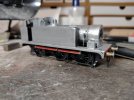
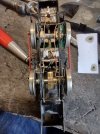
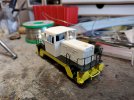
    Since it was built in 2010 it's had its ups and downs.... The shortened version is that it's had 2 major rebuilds, blown up a decoder and finally ended up as a practice model for airbrushing and this is how it looked at the beginning of the week just a sorry body shell.

    IMG_20240203_130129060.jpg
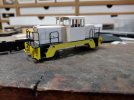
    I had thought that one day I might build a new chassis for it but I woke up at 3am this week thinking I could just reuse all the old components and with a bit of bodging I've been able to get a working chassis again. I've also converted it to EM in the process

    IMG_20240203_130017626_HDR.jpg
    It's not my neatest work by any means and includes many features that I wouldn't incorporate in a new build but it runs

    IMG_20240131_164049458.jpg

    One to join 407 in getting painting finished

    IMG_20240203_130201734.jpg

    With the prototype #74 being rebuilt from an 1847 loco and this diesel type being built from 1974 that gives me a fleet with a date range of 127 years.... Yeah .... Bit mad but this is now a very useful locomotive and I'm keeping it for sentimental reasons
     
    2024.02 - GER Y14 class #510 - repairing the damage
  • Herb Garden

    Western Thunderer
    Long term followers of this thread will remember that last year I attempted to convert one of my backdated Hornby Y14(J15) to EM gauge using the brass masters easichas.

    Some may also remember that I ruined the loco chassis in the process and the whole thing got dumped back in its box in rage and frustration. Please note there is nothing wrong with the chassis kit design.... Just my handiwork

    IMG_20240204_184227007_HDR.jpg
    But today it's back in business.

    A couple of mods have allowed me to turn the sprung easichas wreck into a compensated flexichas and now it's running again. The tender still has the CSB chassis as per the kit.

    IMG_20240204_184136137_HDR.jpg
    It still needs the brakes refitted a repair to the brake stantion and a new front toplamp bracket and it will joint the other two locos for a bit of touching up of the paintwork

    IMG_20240204_184118523_HDR.jpg
    IMG_20240204_115922747.jpg
    For those who are wondering the model was originally a RTR Hornby J15 that I backdated to 1899 condition. I probably have another one or two hanging around so I can demonstrate how to do this at some point

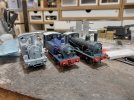
    We are now at 3 working locomotives ready for painting and finishing. Break out the brushes!
     
    2024.03 - GER E22 class #151 - it's back in business
  • Herb Garden

    Western Thunderer
    There had been a bit of a theme in my modeling recently about getting things moving and working, mostly returning to old projects and getting a batch of locos ready for painting.

    Although I am well aware that I do have a layout to build and a deadline to meet my modelling motivation is currently fired up in this direction and i am just going to go with the flow.

    So to the next project that should have been finished ages ago.

    Although you've seen it before it's never had a proper introduction so:

    The E22 class, later LNER J65 was the smallest of the modern GER 0-6-0T locos. Known as Babybucks here at canary sidings.

    e22_151_1889-1895.jpg
    Here is the subject of this project the real #151 just after she was built.

    e22_151_1895-1901 (1).jpg
    And here she is prior to her first reboilering just before the turn of the century. This is the condition I'm modelling her in with the extra coal rails and the experimental steam ejectors fitted half way down the boiler. This was a one off and they were moved inside the cab on the R24s amongst others.

    IMG_20240205_195004791.jpg
    The model is built from the ex Riceworks etched kit which I was given for my 30th birthday a couple of years ago and was built to 00 gauge before being re-gauged last year to EM and then suffering a series of paint experiments until it finished up in the cabinet awaiting putting back into service.

    IMG_20240205_194956705.jpg

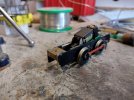
    It's now been put back together as a rolling chassis and I'm in the process of adding pickups.

    IMG_20240206_180336280_HDR.jpg
    It was always built in 2-4-0T configuration and I've kept that for the EM version. This was a trick by the ever frugal GER that when a buckjumper locomotive was on lighter duties the front rods were removed to make it freer running and save on fuel.... It just had to be modelled

    IMG_20240206_180347362_HDR.jpg
    The plan is that 151 along with 407 will provide the necessary motive power for skeetsmere until some red locos can be built. The pair should hopefully be joined by an accurascale machine as a spare loco later in the year ready for October.

    IMG_20240207_070123480_HDR.jpg
    For the first time I'm starting to achieve that family look the GER had at the turn of the last century
     
    Last edited:
    2024.04 - GER Y14 class #510 - Painting
  • Herb Garden

    Western Thunderer
    So it's been a while....

    I thought I would be able to share in detail my painting method but truth be told I'm still working it out and each of the locomotives I'm working on have been painted in a different way... A few steps forward and some back...

    Anyhow first to leave the paint shop is 510. In theory this didn't need much work but @Liver & Fry was kind enough to point out that the loco was looking a bit too grey.... So I've darkened the shade to a deeper black and here she is:
    IMG_20240225_101200168_HDR.jpg
    So this is 510 with the painting complete and yet to be weathered although I'm not sure where to draw that line as a lot of pre weathering has gone into the loco so far.

    IMG_20240225_100821253_HDR.jpg
    The texture of the paint still has a pattina and isn't museum standard smooth but that is intentional as it aids in weathering.

    IMG_20240225_100804064_HDR.jpg
    Transfers are from fox and etched plates are to my own artwork because other options don't get the GER font right.

    IMG_20240225_102404145_HDR.jpg

    Also the commercial options don't include the tender plate in thier offering ... But I do on mine and oh what a difference it makes

    IMG_20240225_100743336_HDR.jpg

    So there you have it.... Just weathering and details like coal and crew to go. Oh and the refitting of it's DCC chip...
     
    2024.05 - GER B26 class #407 - Painting
  • Herb Garden

    Western Thunderer
    So hot on the heels of 510 comes 407. Not one to be out done by her larger cousin the goods yard pilot is now painted.

    IMG_20240305_172419061.jpg
    Well that's what I assume her duties will be...

    IMG_20240305_172439938.jpg
    Same drill as before. Citadel paints applied with a brush, fox transfers and my own artwork for etched plates.

    IMG_20240305_172430129.jpg
    Just needs a dose of weathering now. Although my aim is to give her a slightly lighter dose that 510 as the expectation is that she will pick up less muck in a yard than on an open road and maybe she will get a better rub down than her cousin as the crew might have more time between duties or on the other hand they might just spend all that time drinking tea?

    CRW_2678_RJ.JPG

    I've allready featured the next two images but I make no apologies for reminding us all of what the model was like when it arrived in 2011

    IMG_20231227_192927025.jpg
    And more importantly the condition it was in when I dug it out of the storage box at Christmas.

    IMG_20240305_172457631.jpg
    And what a transformation. Something that is important to me is breathing new life into old models not just building new all the time. It's a different set of skills and judgements to make along the way. Perfection may sometimes have to be compromised a little but it saves something that someone else'l put time and effort into making from ending up in the bin.

    Bring on the muck!
     
    2024.06 - Skeetsmere - baseboards and track bed
  • Herb Garden

    Western Thunderer
    Well week one of the new job has been amazing and everyone has been lovely.

    A shorter commute has really helped with an increase in both modeling and DIY time so another win.

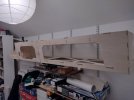
    With a couple of loco's finished the attention has turned to skeetsmere again and the first thing to happen is the baseboard modules have been glued together and the fixings and alignment dowels inserted to allow the full scale of the layout to be appreciated
    IMG_20240320_180335612_HDR.jpg
    I would that a couple of extra fixings were required (hence the clamps) and the larger module is so light weight it can twist but apart from that I think the design concept works well so far.

    IMG_20240320_180556192_HDR.jpg

    It is the intention to have skeetsmere operational as part of a layout building demo at Workshop Wise in October so the clock is ticking
     
    2024.08 - Skeetsmere - tracklaying
  • Herb Garden

    Western Thunderer
    So the York show last weekend was fantastic. It was good to catch up with so many acquaintances.... And look at some fantastic layouts.

    IMG_20240330_124007277_HDR.jpg
    The highlight of the show for me was the chance to see Terice once more Iain Rice's masterpiece that has inspired me so much in my modeling.

    Inspiration has encouraged me to get on with a very boring job on the layout this week
    IMG_20240406_183923180.jpg
    So yes it's a pile of track. I've spent the week checking, adjusting and fettling each turnout and adding the dropper wires. A thankless and boring task but we are finally ready to lay track
     
    2024.09 - GER B32 class #253 New
  • Herb Garden

    Western Thunderer
    Oh no not another buckjumper!

    So this little project has been going on in the background since #151 was competed. With all the goings on on the layout the workbench wasn't being used to I took the opportunity to have a slow project going on in the background.

    Back at Christmas I had assumed wrongly that I would be able to run the layout with one fitted and one unfitted tank loco but finalising the time table had meant that I've realised it is best run with two fitted locomotives. Unfortunately 407 doesn't fit that requirement. But I was always in the grand plan intended for that loco to work the goods station at Norwich Whitefriars when I get round to building that section of the system.

    So we needed another fitted tank loco for October.... Alongside a working layout.... I could wait for the accurascale offering but given the delay to those it's a bit of a risk so I settled on building another buckjumper. Much to my delight!
    IMG_20240421_110759876_HDR.jpg
    The subject wasn't hard to decide upon. The GER B32 class were the second batch of small buckjumpers following a few years later after their earlier E22 siblings (#151 of earlier posts is of this early batch) although the LNER called them all J65 the B32s were heavier due to an increased water capacity 650gallons rather the the earlier 600. But interestingly this was done by lowering the tank height at the same time to give better visibility to the driver. And giving a visual difference between the two batches.

    IMG_20240410_065324813.jpg

    #253 was out shopped from Stratford in April 1893 and for most of her early life was based in and around Ipswich during that time she was placed on loan at least once to the Mid Suffolk Light Railway to cover in one of thier many motive power shortages. The photo shows her on the Eye branch. One of her other haunts. She ended her days at Yarmouth beach and was condemned in 1949 after over 30 years service. Also as you can see from the photo she has mamy unusual details. Tapered buffers, safety valves on the boiler barrel and the vent in the cab front. All things that will distinguish her from sister 151.

    IMG_20240414_105709380.jpg
    The kit is the same as used on 151. The old Riceworks etchings now supplied by London Road Models. Building a kit for the second time is like wandering down a familiar path. You know much better where all the lumps and bumps are and can plan accordingly.

    IMG_20240421_082238773.jpg
    However I'm not quite building 253 the same way. It's 3 years since I built 151 and I've moved on somewhat. Use of more refined techniques and the RSU is now playing a big part in construction, a tool I didn't have a few years ago.

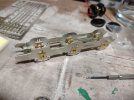
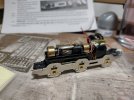
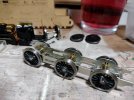
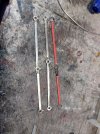
    The other key change is I've decided to experiment with a different form of flexichas compensation. 151, 407 & 510 all featured a fixed rear axel with a rocking beam supporting the front two. On the tender loco running was fine but on the tank locos the fixed rear axel seems to find every bump in the trackwork and with weight in the tanks both wobble a wee bit. So on 253 I'm trying using a pair of split beams to support the two rear axles and a single rocking front axle. Which means that we maintain 3 point suspension but have all axles moving. It might make no difference but it's worth a try

    IMG_20240421_102612878.jpg
    So that's progress to date. Back to track laying
     
    Top