4mm Wharfeside, a lifetime's project

Dave F.

Western Thunderer
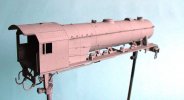
All the talk about a RTR WD 2-10-0 over the last weeks had me digging out the DJH one I had started for myself some time ago, the chassis frames were scratchbuilt to suit compensation using a template I had made for previous builds, (long before CSB suspension was considered, at least by me). I thought I might try to fit CSBs to these frames so Chris at HighLevel supplied the hornblocks and earlier this week the 2-10-0 was up on it's wheels all be it as a 0-10-0 at first, turning over nicely on the rolling road.
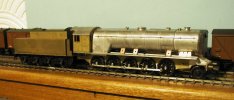
WD 2-10-0 90763.JPG
What a beast of a loco and all 150 were built in Glasgow not 15 miles away from here
I'll put a clip up on YouTube showing it hauling it's first train last Thursday night.

I'd built a few WD 2-10-0s for customers over the years with the same scratchbuilt compensated chassis in all 4mm gauges, P4, EM and OO (just the frame width varied!). I've very few decent photos unfortunately but here are a few. 90766 in P4 with Sharman wheels. Note the sliding cab windows fitted by BR
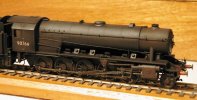
WD 2-10-0 90766.jpg

And in OO with the then new Markits WD wheels and incorrect dome... (doh!)
10-090763(OO).jpg.3228196fe8b944062131f65af3fc5ee2.jpg

And an EM one in primer.
WD 2-10-0 in primer..jpg

These are big locos compared to the 2-8-0 and I'm informed by at least one owner who shows his Scottish layout up and down the country that quite a few people think it's a 2-8-0 or even a Bachman WD....
He's quoted as saying - all that expense and people think it's a Bachmann.

Dave Franks.
 
Last edited:

David Waite

Western Thunderer
Hi Dave
Your Track work looks amazing.
The third photo from the start of this thread shows a point how did you file the shape to the ends of the blades what I mean to say is did you file both sides of the rail head to thin it down, also it doesn’t look like you have filed or joggled the stock rails do the wheel flanges clip the ends of the blades with facing movements, my next job is to build some point work and I’m trying to weigh up what design is best for me to build I am using code 70 FB rail what code of FB rail are you using?
David.
 

Dave F.

Western Thunderer
Hi David, I made the point blades in code 75 bullhead. I file one side which would contact the stock rail from zero to half the web thickness over whatever the distance the blade would be in contact with the stock rail then I file the other side down at a steep angle for a good distance along judging it by eye so that the top edge of the blade starts with a sharp knife edge matching the flanges on the wheels, see the photo you referred to, if it's been done right there is no lurching.
I've been doing it successfully for years on many peoples layouts so it seems to work and it's just like the real thing.

This was a test of rewheeled wagons (Gibson EM) but it shows up the pointwork too, It's become a party piece for visitors to the club now, 60 wagons at 100 mph...

Cheers,
Dave.
 

David Waite

Western Thunderer
Hi David, I made the point blades in code 75 bullhead. I file one side which would contact the stock rail from zero to half the web thickness over whatever the distance the blade would be in contact with the stock rail then I file the other side down at a steep angle for a good distance along judging it by eye so that the top edge of the blade starts with a sharp knife edge matching the flanges on the wheels, see the photo you referred to, if it's been done right there is no lurching.
I've been doing it successfully for years on many peoples layouts so it seems to work and it's just like the real thing.

This was a test of rewheeled wagons (Gibson EM) but it shows up the pointwork too, It's become a party piece for visitors to the club now, 60 wagons at 100 mph...

Cheers,
Dave.
Hi Dave
Thank you that was amazing I will try like you have done with solid stock rails, in the past I have filed the stock rails for the blades to sit into but I don’t really like the look of it, if I can master what you have done it will save a lot of work.
David.
 

David Waite

Western Thunderer
Here is a description of filing rail to produce switch blades (straight cut style). I am amazed to note that I wrote this piece at least ten years back.

rgds, Graham
Thanks Graham
Much appreciated thats great deal of information I will study it all carefully every bit helps.
David.
 

Dave F.

Western Thunderer
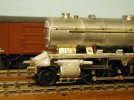
As mentioned on the workshop thread I've fitted the cylinders to the chassis.
Dave Bradwell drain cocks and smokebox saddle modified to raise the boiler to the correct height.
Slidebar bracket made to support the very flimsy slidebar, not enough room to fit a full thickness three part slidebar though but it is a 'layout loco' so it shouldn't be noticed, cough....
WD cylinders.JPG

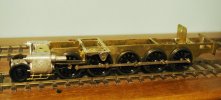
Someone asked about the chassis with CSB suspension, I'd actually stripped down the chassis for final fitting out and painting, I'd dropped the wheels back in to check the cylinder clearances so here a couple of photos showing the chassis at that point. The plate sticking up at the rear is for the circuit board where all the wires from the eight plunger pickups terminate and the vertical mounted Mashima sits just in front driving the fourth axle through a HighLevel gearbox.
WD chassis.JPG

You may be able to see the CSB wire going through the mounts and the HL tags on top of the hornblocks.
WD chassis 2.JPG

Cheers,
Dave F.
 

Dave F.

Western Thunderer
Been a while but work goes on on Wharfeside both layout and locos.
IMG_20240207_213718.jpgIMG_20240207_213740.jpg

I first saw teddy bear fur grass used on Retford, I was shewn how it was done, thanks to John McCrea and with the subsequent article in the MRJ mag we bought a bale of 'Wolf' teddy bear fur - and there it sat for a few years. My other half has been eager to have a go with it on Wharfeside so for the last two weeks Fiona has been shaving and cutting the fur then colouring with the recommended acrylics and me glueing it down with 'No More Nails' glue. This has become more of a priority now due to being railroaded, persuaded into showing the layout at Modelrail Scotland in Glasgow in 2025. It won't be finished but the exhibition manager is quite happy that it runs. A couple of the guys in the group have offered to help with Chas Dougan doing the station building to let me get on with the locos, the two Caprotti Fives are getting there, various 4Fs getting details added and at the moment a DJH 8F is in the paintshops having had extra details added.
I've tried to upload a video of the big WD hauling its first train but it must be too big so if I can remember how to upload to the tube I might be able to set up a link.

Dave.
 
Last edited:

Dave F.

Western Thunderer
Thanks very much for all the likes and comments, will pass them on to Fiona, just noticed the loose hairs and debris on the track, vacuumed up before running trains. Still some tidying up of the edges, colouring, scatter material and bushes to add but it seems to be getting admired.

Dave.
 
Not much to write home about really. Spent some time altering wiring to sort odd little problems plus trying to find out why some of the fiddleyard panel 12v LEDs were popping, one right in my face.... Turns out the supply round to the fiddleyard which was supposed to be 16vac then rectified to 12vdc for the tortoise point motors and panel LEDs was actually nearly 15vdc so the LEDs were being over driven, pop....pop, one going every club night.
Took advice and told to fit a ''Buck Converter'' adjustable step down module to reduce the voltage, these worked and we now have 11volt powering the point motors and LEDs, no more blowouts.
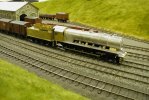
On the loco front is a Hornby Royal Scot converted to EM gauge last week but when reassembling the chassis I found the dreaded Mazak rot in the motor mount and the idler gear retainer, they were starting to crumble, I glued some of the crumbs back together last Wednesday just to get the loco running and ordered new parts which came today. One is original Hornby the other is a 3D print. The Scot ran very well last week taking the 10 coach Thames/Clyde Express round Wharfeside at break neck speed, slowed down a wee bit when I hung another 10 coaches behind. It's on the bench now getting a Mashima motor fitted to give better, smoother and quieter performance.

Also been working on the latest Bufferstop, it's an LSWR bufferstop and it can be found on the Lanarkshire Models website.

Dave


I have two of these Scots in Semi dismantled state for over a decade!
I really should get Comet chassis for them but since my move I haven't really had a suitable area for building.
That's hopefully going to change from this week.
Very nice models above the waterline though.
Really would love to get down to visit the layout again when life permits!

Davy.
 

40057

Western Thunderer
Not much to write home about really. Spent some time altering wiring to sort odd little problems plus trying to find out why some of the fiddleyard panel 12v LEDs were popping, one right in my face.... Turns out the supply round to the fiddleyard which was supposed to be 16vac then rectified to 12vdc for the tortoise point motors and panel LEDs was actually nearly 15vdc so the LEDs were being over driven, pop....pop, one going every club night.
Took advice and told to fit a ''Buck Converter'' adjustable step down module to reduce the voltage, these worked and we now have 11volt powering the point motors and LEDs, no more blowouts.
On the loco front is a Hornby Royal Scot converted to EM gauge last week but when reassembling the chassis I found the dreaded Mazak rot in the motor mount and the idler gear retainer, they were starting to crumble, I glued some of the crumbs back together last Wednesday just to get the loco running and ordered new parts which came today. One is original Hornby the other is a 3D print. The Scot ran very well last week taking the 10 coach Thames/Clyde Express round Wharfeside at break neck speed, slowed down a wee bit when I hung another 10 coaches behind. It's on the bench now getting a Mashima motor fitted to give better, smoother and quieter performance.

Also been working on the latest Bufferstop, it's an LSWR bufferstop and it can be found on the Lanarkshire Models website.

Dave
I’ve been reading back over your thread. Your railway does look really excellent.

Astonished to read of the Royal Scot in the above post being affected by the ‘dreaded Mazak rot’. I am amazed this is still occurring in recently produced models. In the late 1920s and through the 1930s, Mazak was seen as godsend by model manufacturers as it could be used to produce strong, cheap, accurate castings. The Leeds Model Company even used it for their motor frames. All the volume maunfacturers of 0 gauge used it for wheels. However, within a very few years many of the castings were expanding and cracking — and this remains a problem for collectors and operators of vintage models. Hornby (ie. Meccano Ltd) actually discovered the reason for the problem during the war: contamination of the alloy mix by minute amounts of lead. I have never seen or heard of a post-WW2 (ie. 1950s/60s) Hornby model with disintegrating Mazak. So how come it’s still happening? I suppose ‘Hornby’ now is the same company in name only. But I would still have thought there would be awareness of how to prevent the problem, and generally amongst those manufacturing in Mazak.

Fiona’s grass looks very convincing.
 

Dave F.

Western Thunderer
Hi 40057, yes the Mazak problem is still around, a whole list of models mainly from Hornby made in China ones, the worst I've come across is the Class 31 diesel which some people have found the mazak chassis has expanded and bust the cab ends off the model. It seems to be certain batches that are affected so it may be down to contamination of the metal as you say.
My business is white metal casting and I learned very early on that you must keep removing the crude and spelter from the melting pot to produce good castings.

Thanks for the comment on the grass I'll pass it on, nearly half the layout is done now as of yesterday afternoon, but some ground works are holding up progress.

Dave. :)
 

Philc

Member
As someone involved with the layout, I can promise that the look of the grass is better in real life than in the pictures.

Earlier today, I discovered the thread of Elmham Market, and one of the things that many people have commented on is the feeling of space. Wharfside also has a great feeling of space, but that's not it's only attribute. The quality of the trackwork means the layout runs really well and Dave builds superb locos that just purr, so although he feels that his arm has been twisted, I'm sure he'll be really proud of the layout after Model Rail Scotland 2025. And compliment him as much as you like - he doesn't handle compliments well!
 

Dave F.

Western Thunderer
Just an update on Wharfeside, the grassing continues and locos are progressing plus the Churchward Models brass MR signal box is in the paintshop which is being painted in NE Region off white and light blue.
Wharfeside 8F.JPG

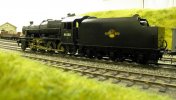
DJH based 8F fresh out the paintshop still to have the boiler backhead and windows fitted, the scratchbuilt CSB chassis is painted and reassembled just the valvegear to paint and weather down and the brakes clipped on.

Wharfeside WD 2-10-0.JPG

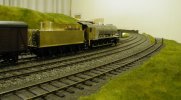
DJH based WD 2-10-0 back on it's wheels with the scratchbuilt CSB chassis painted and reassembled and being test run last night on Wharfeside, 44 vans behind the tender.

Wharfeside grass.JPG

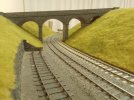
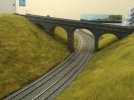
Fiona's grass is looking good and will be even better with some scatter material and bushes added, quite a few tree skeletons have been made using heavy duty aluminium welding cable and are awaiting the Artex/PVA mix to be applied, loads are needed for the gorge around the viaduct.
Panic button firmly pressed due to the layout being invited to Modelrail Scotland next February....

Must get on.
Dave F.
 
Top